Welcome to the world of cookie decorating! If you’re passionate about baking and want to elevate your cookie art, using a projector can be a game-changer. With this guide, we’ll explore everything you need to know about using projectors for cookie decorating, including tips, tricks, recommended products, and more. Let’s dive in!
Why Use a Projector for Cookie Decorating?
Using a projector can transform your cookie decorating experience. Here are some reasons why:
- Precision: Projectors allow for intricate designs that can be scaled to fit your cookies perfectly.
- Consistency: You can reproduce the same design across multiple cookies, ensuring a cohesive look.
- Creativity: With a projector, you can explore more complex designs that might be hard to freehand.
Understanding Different Types of Projectors
Before investing in a projector, it’s essential to understand the different types available and how they can be applied to cookie decorating.
1. Digital Projectors
Digital projectors are versatile and can display images from a computer or device. These are great for detailed designs.

2. Mini Projectors
Compact and portable, mini projectors are an excellent option for smaller decorating spaces.
3. Overhead Projectors
These projectors are more traditional and often used in classrooms. They’re ideal for larger designs but can be bulkier to handle.

Comparison Table of Projector Types
| Type | Portability | Image Quality | Best For |
|---|---|---|---|
| Digital Projector | Moderate | High | Detailed Designs |
| Mini Projector | High | Medium | Small Spaces |
| Overhead Projector | Low | High | Large Designs |
Personal Experience: My Journey with Projectors in Cookie Decorating
When I first started cookie decorating, I struggled with getting my designs just right. I came across the idea of using a projector and thought, why not give it a try? The first time I used a digital projector, it was like a light bulb went off! Suddenly, I could project intricate designs onto my cookies and trace them with icing.
Over time, I’ve experimented with different types of projectors, and I can confidently say that the investment has dramatically improved my decorating skills.
Choosing the Right Projector for Cookie Decorating
Here are essential factors to consider when selecting a projector for cookie decorating:
1. Brightness
The brightness of a projector is measured in lumens. For cookie decorating, a brighter projector will help you see the design clearly against the white surface of the cookie.
2. Resolution
Higher resolution means crisper images. Depending on the complexity of your designs, look for projectors that support at least 720p resolution.
3. Size and Portability
Consider where you’ll be using your projector. If you have a small kitchen, a mini projector might be the best choice.
4. Connectivity Options
Ensure that the projector can connect to your devices easily, whether via HDMI, USB, or Bluetooth.
Best Projectors for Cookie Decorating
After extensive research and testing, I’ve compiled a list of the best projectors suitable for cookie decorating:
1. Epson Home Cinema 2150
Pros: High resolution, bright output, great color accuracy.
Cons: Slightly bulky, more expensive than other options.
2. Anker Nebula Capsule
Pros: Portable, compact design, good battery life.
Cons: Lower brightness compared to larger projectors.
3. Canon LV-X320
Pros: Great for large images, high lumen output.
Cons: Heavier and harder to move.
Comparison Table of Recommended Projectors
| Projector | Brightness (Lumens) | Resolution | Size | Price |
|---|---|---|---|---|
| Epson Home Cinema 2150 | 2500 | 1080p | Medium | $799 |
| Anker Nebula Capsule | 100 | 480p | Portable | $349 |
| Canon LV-X320 | 3200 | XGA | Heavy | $599 |
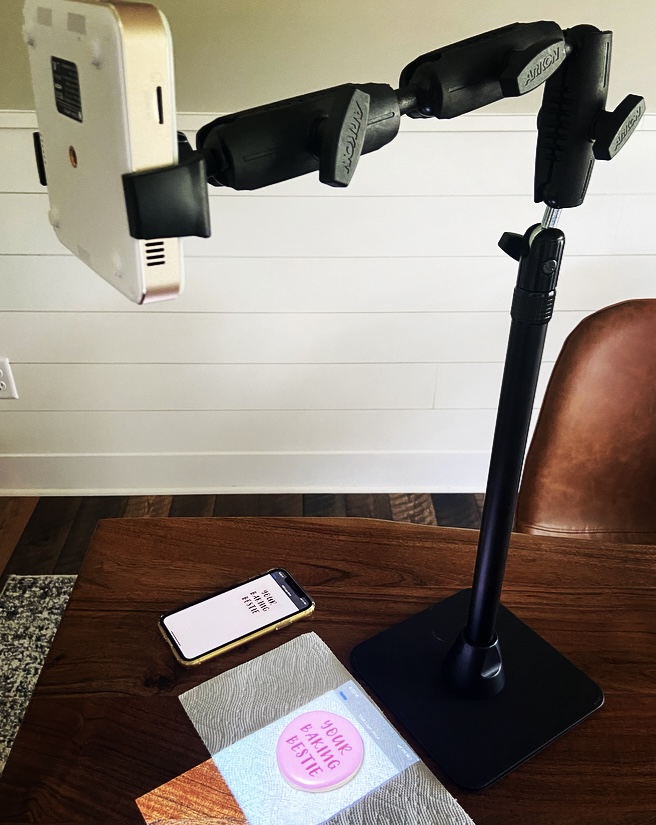
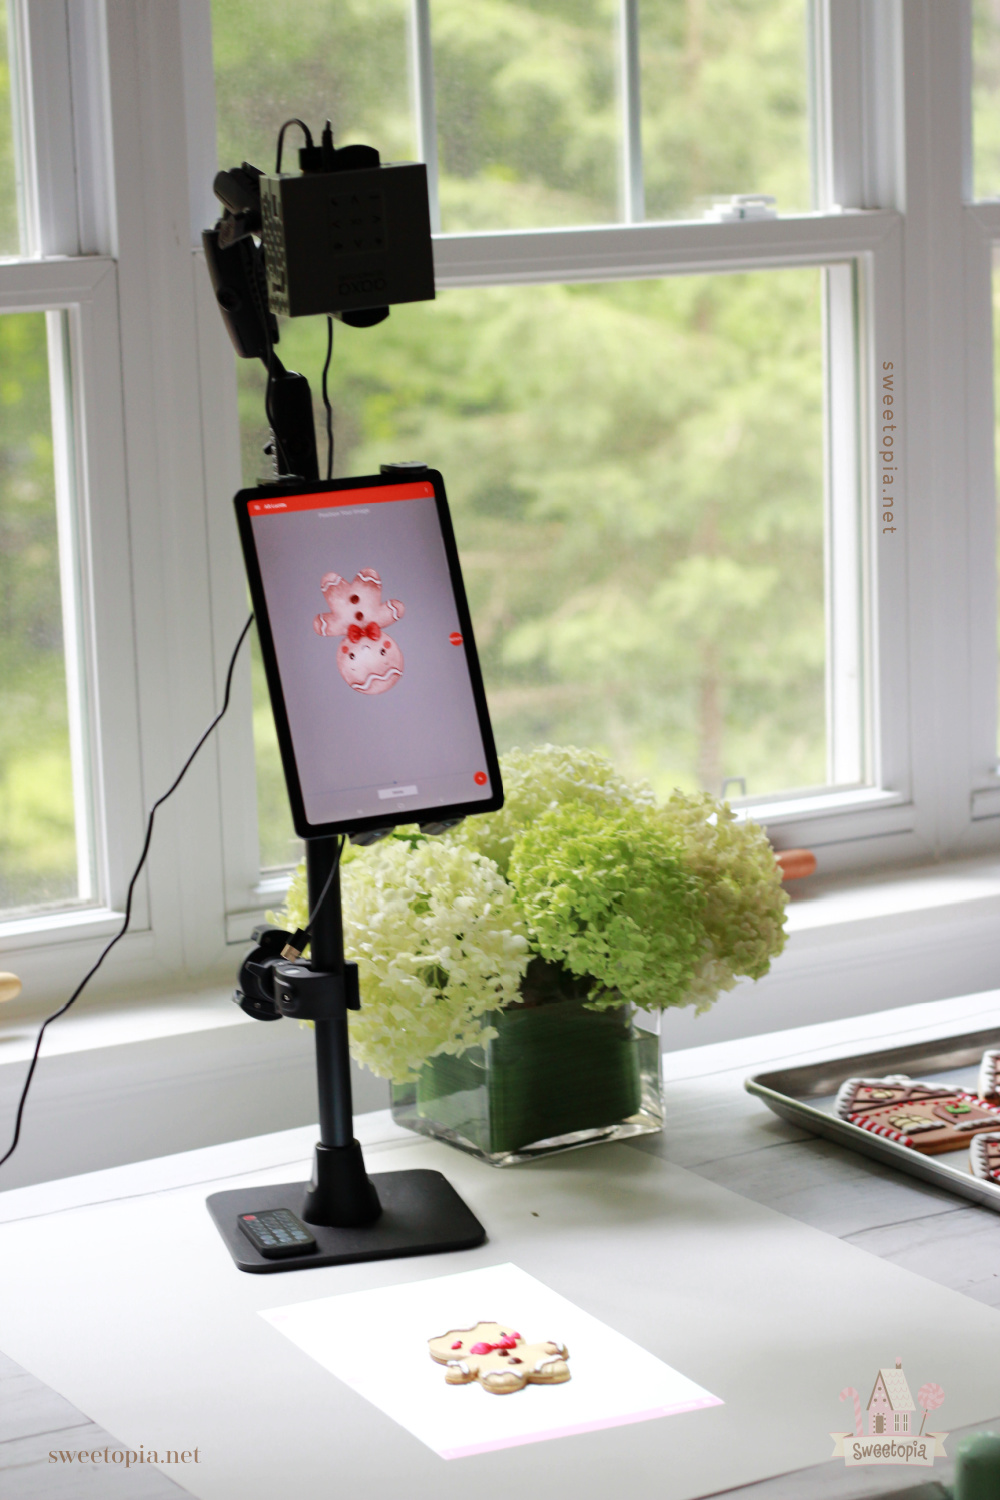
How to Set Up Your Projector for Cookie Decorating
Setting up your projector correctly is crucial for achieving the best results. Here’s a step-by-step process to help you get started:
1. Choose the Right Spot
Find a flat surface where you can set up your projector at an appropriate distance from your cookies. The distance will depend on the size of the cookies and the projector’s throw ratio.
2. Connect Your Device
Connect your computer or tablet to the projector, ensuring you have the right cables ready. Test the connection before projecting your design.
3. Adjust Brightness and Focus
Before projecting your design, adjust the brightness to make sure the projection is clear and easy to see. Focus the image until it looks sharp.
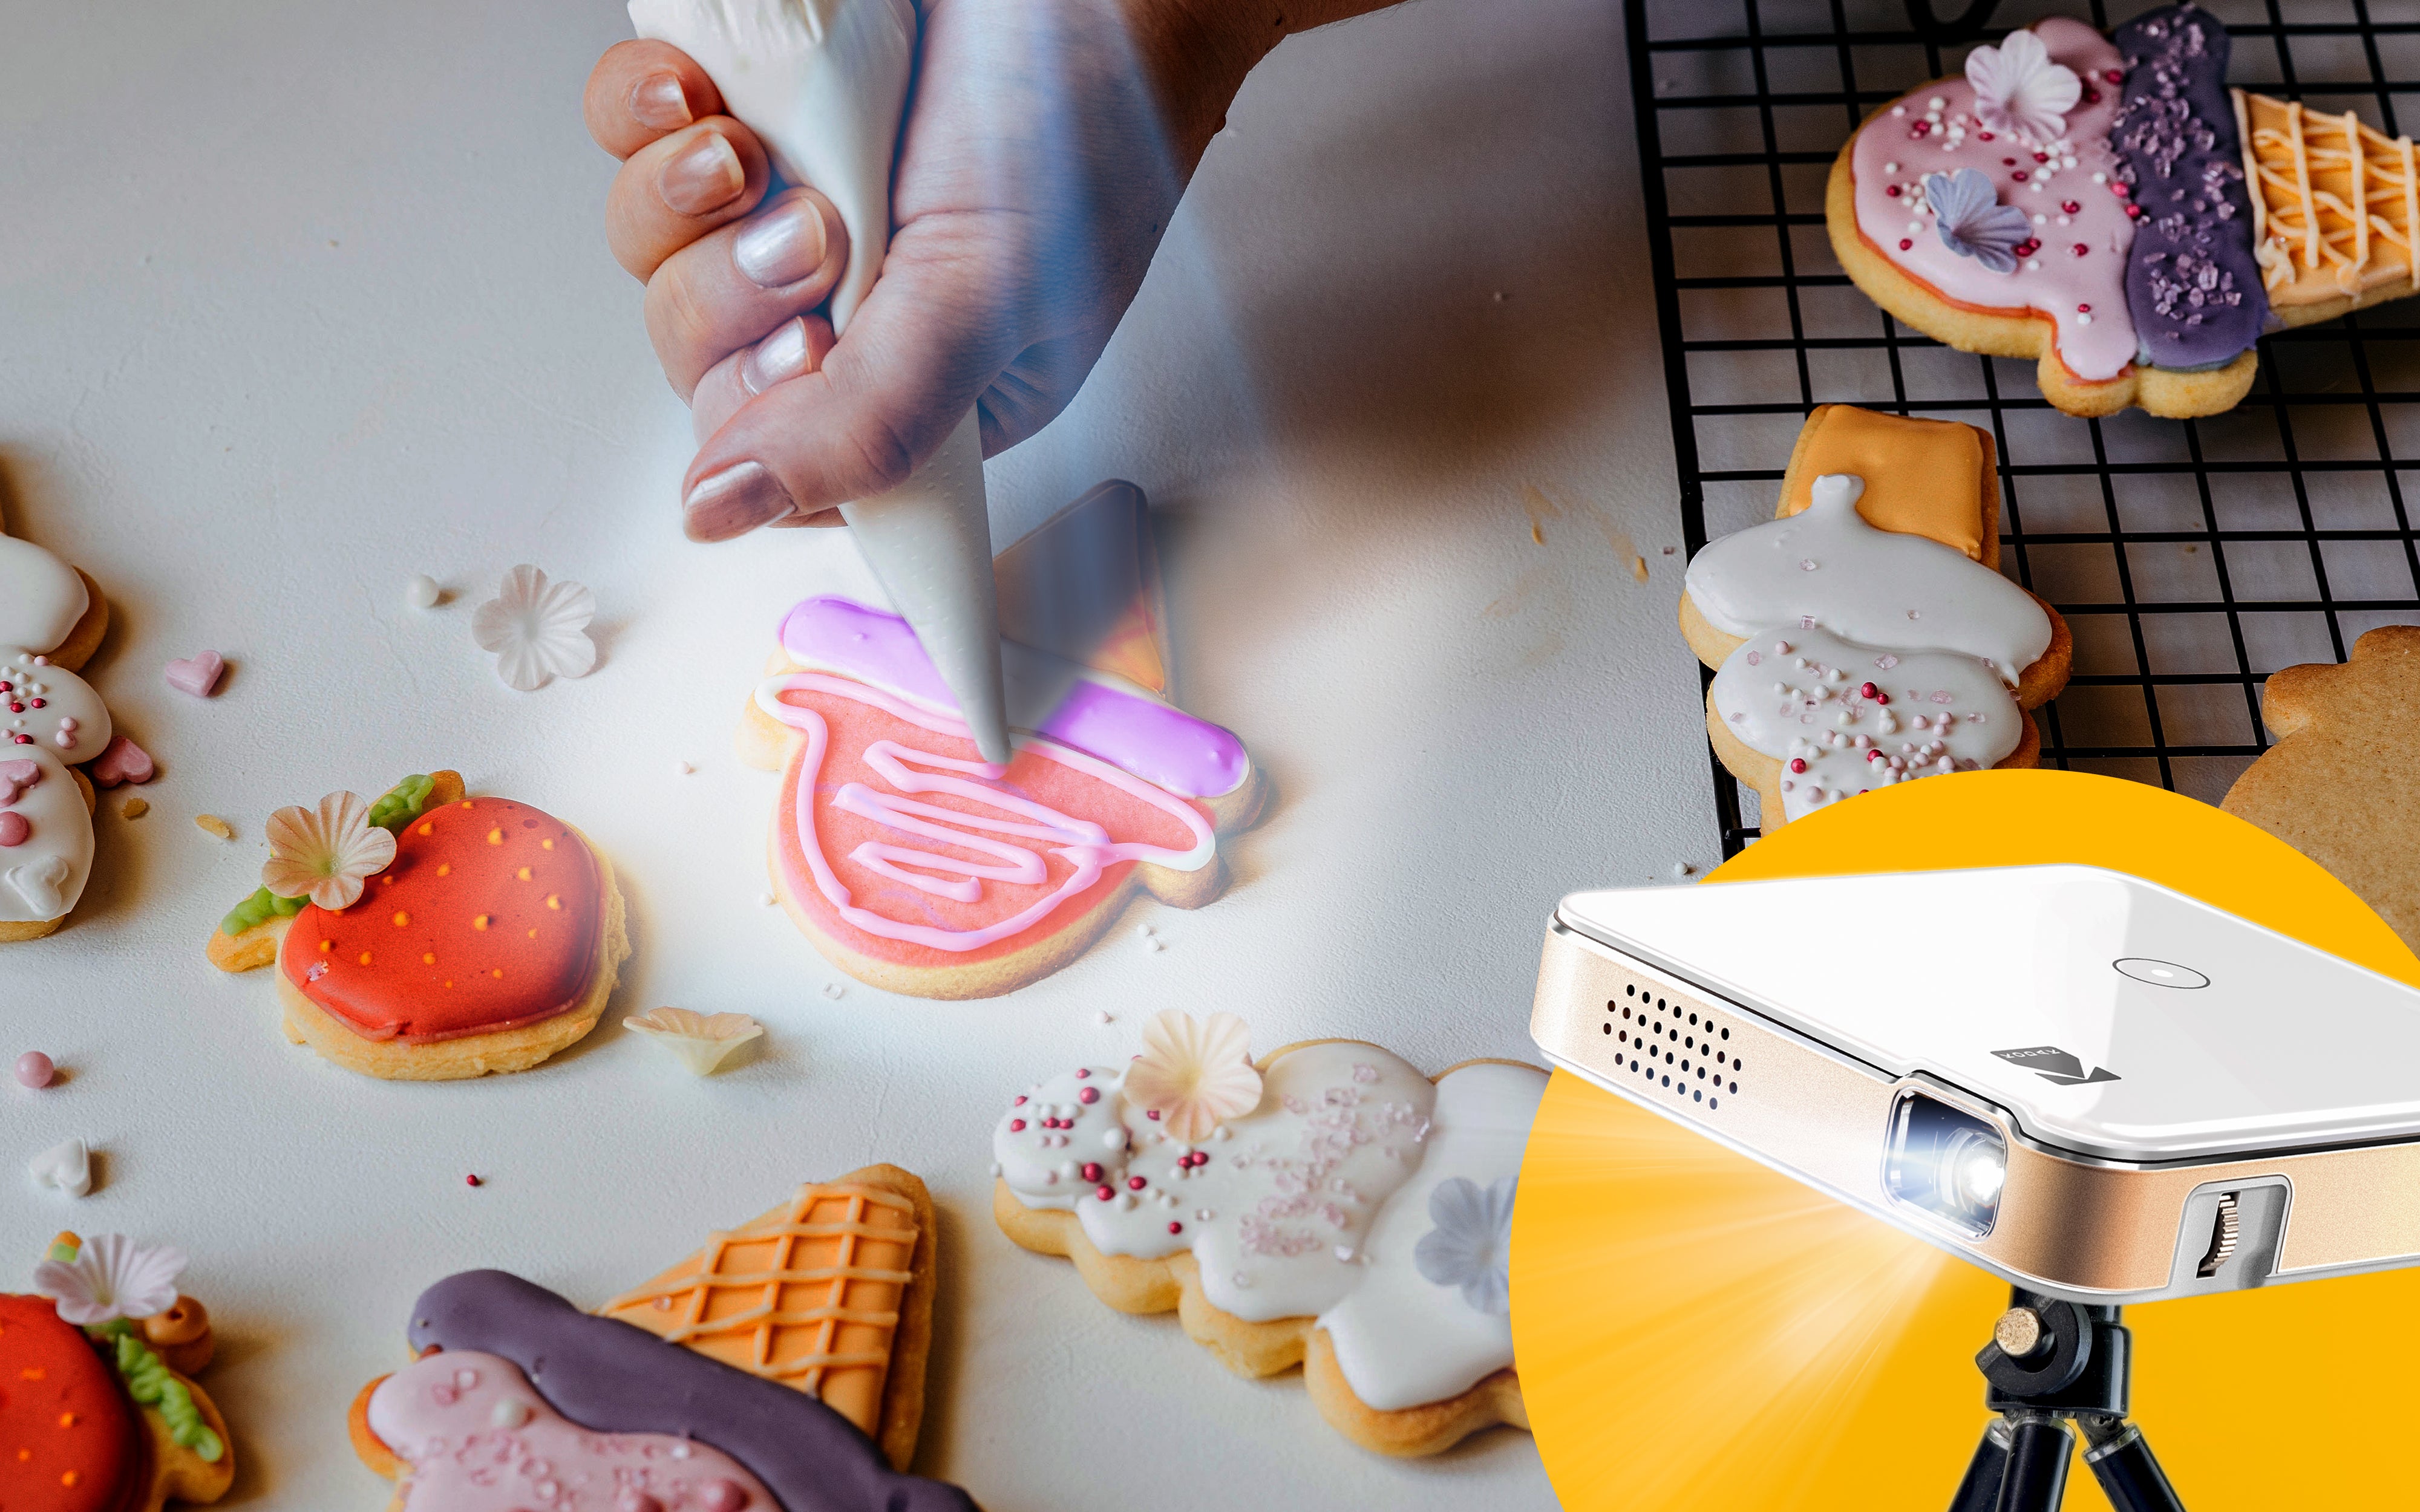
4. Trace and Decorate
Once your design is projected onto the cookie, use royal icing or edible markers to trace the lines. Let your creativity flow!
Tips for Successful Cookie Decorating with a Projector
Here are some tips to enhance your cookie decorating experience:
- Practice makes perfect. Don’t be discouraged if your first few attempts aren’t perfect. Keep trying!
- Experiment with different designs and colors.
- Use good-quality icing for cleaner lines.
- Consider projecting onto a piece of parchment paper first to find the right dimensions before working on your cookies.
Common FAQs About Using Projectors for Cookie Decorating
1. Can I use my regular home projector for cookie decorating?
Yes, most home projectors can be used for cookie decorating. Just ensure that the brightness and resolution are suitable for your needs.
2. Is it difficult to set up a projector?
Not at all! Setting up a projector is usually straightforward. Just follow the steps outlined above, and you’ll be ready to go.
3. What types of designs work best for projector decorating?
Simple outlines and designs work best, especially if you’re just starting. As you become more comfortable, try more intricate patterns.
4. Can I project on other surfaces besides cookies?
Absolutely! You can project on cakes, fondant, and even macarons if you wish to decorate them with designs.
Final Thoughts
Using a projector for cookie decorating can significantly enhance your creativity and precision. It’s an investment that pays off in beautifully decorated cookies that wow your friends and family. Whether you choose a digital, mini, or overhead projector, the key is to practice and have fun! Happy decorating!