If you’ve ever marveled at a beautifully decorated cake, chances are you’ve envied the artistry of its frosting. Decorating with frosting is not just an art; it’s a blend of creativity, technique, and a bit of science. As a passionate home baker with years of experience in the kitchen, I’ve learned some invaluable tips and tricks that can make your frosting game much more enjoyable and impressive. This ultimate guide will walk you through everything you need to know about frosting decoration—from essential tools to advanced techniques.
The Basics of Frosting: Types and Their Uses
Before diving into the decorating techniques, let’s cover the different types of frosting. Each has its unique properties, making it suitable for specific decorating styles and cake types.
1. Buttercream Frosting
Buttercream is perhaps the most popular type of frosting. It’s creamy, easy to work with, and can hold its shape well.

Pros
- Easy to make and can be flavored in many ways.
- Great for piping decorations.
- Holds its shape well.
Cons
- Melts in warm temperatures.
- Can be too sweet for some tastes.
2. Cream Cheese Frosting
This frosting has a tangy flavor that pairs wonderfully with carrot cake and red velvet. It’s smooth and luscious but requires refrigeration.
Pros
- Rich flavor complements many cakes.
- Easy to spread.
Cons
- Requires refrigeration.
- Can be tricky to pipe due to its softness.

3. Fondant
Fondant is a sugar paste that can be rolled out and draped over cakes, offering a smooth finish. It’s often used for professional-looking cakes.

Pros
- Provides a smooth, elegant finish.
- Can be molded into shapes.
Cons
- Can be difficult to work with for beginners.
- Not everyone likes the taste.
Essential Tools for Frosting Decoration
Having the right tools can make all the difference in your frosting decorations. Here’s a list of must-have tools to get started:
| Tool | Description | Purpose |
|---|---|---|
| Offset Spatula | A flat spatula with a slight angle. | Perfect for spreading frosting evenly. |
| Piping Bags | Reusable or disposable bags for piping. | Essential for detailed decoration work. |
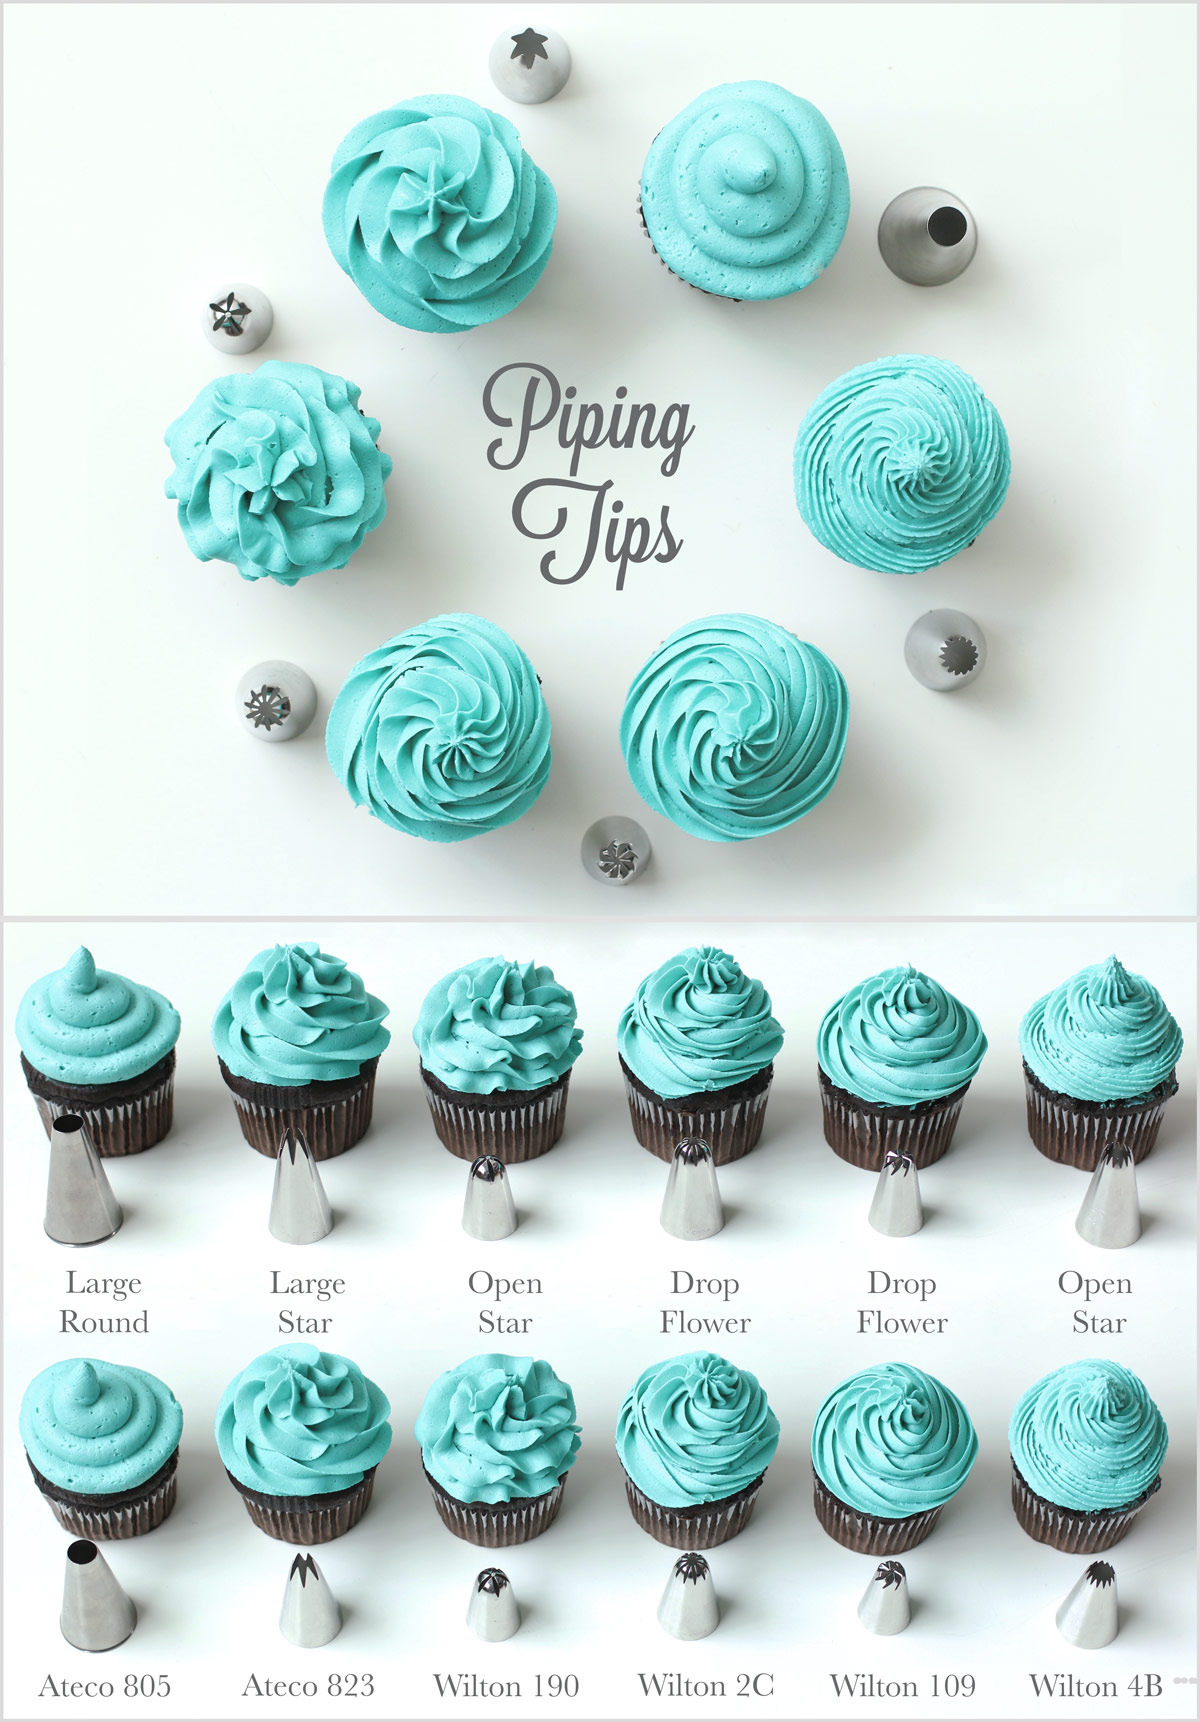
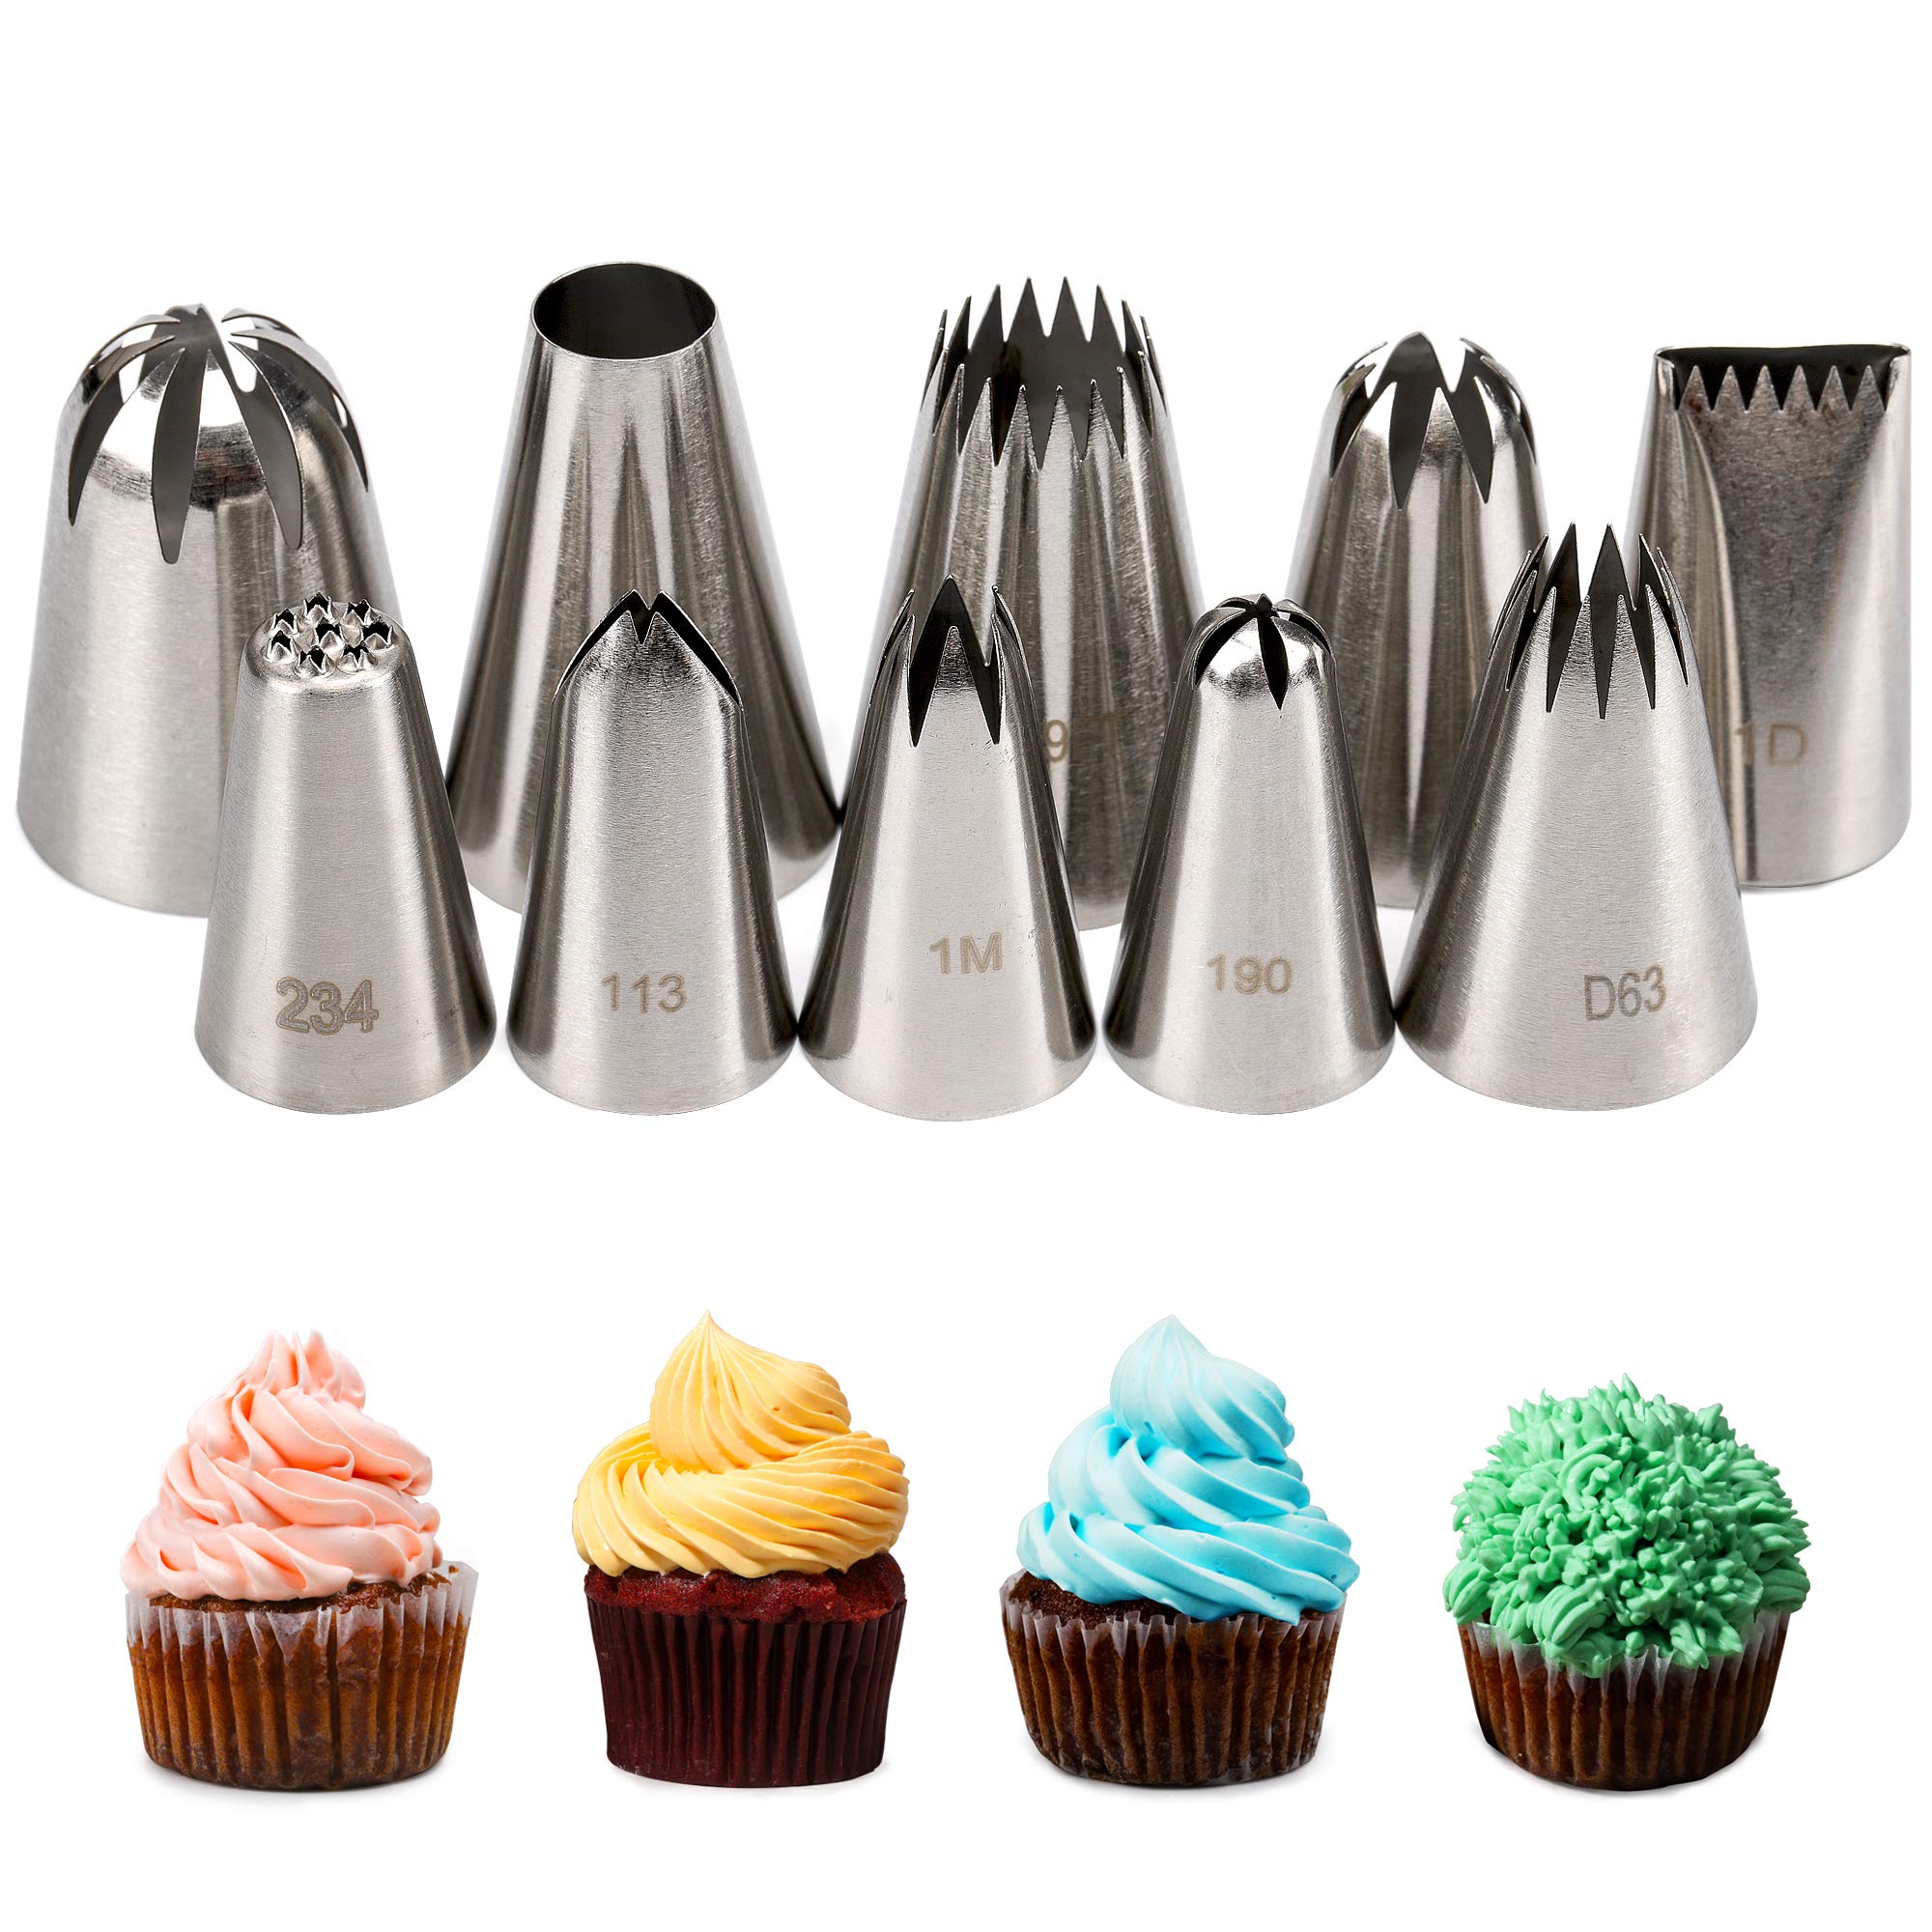
| Piping Tips | Various shaped nozzles for different designs. | Used with piping bags for intricate designs. |
| Turntable | A rotating base for your cakes. | Makes frosting and decorating easier. |
| Bench Scraper | A flat tool used for smoothing surfaces. | Good for achieving clean edges on cakes. |
Basic Frosting Techniques
Now that you have a grasp of the types of frosting and essential tools, let’s move on to some basic frosting techniques that will serve as a foundation for your decorating skills.
1. Spreading Frosting
Using an offset spatula, scoop a generous amount of frosting and apply it to the top of your cake. Spread it evenly, allowing some to drip over the sides. Continue to spread around until you achieve a uniform layer. Use a bench scraper to smooth out the edges.
2. Piping Borders
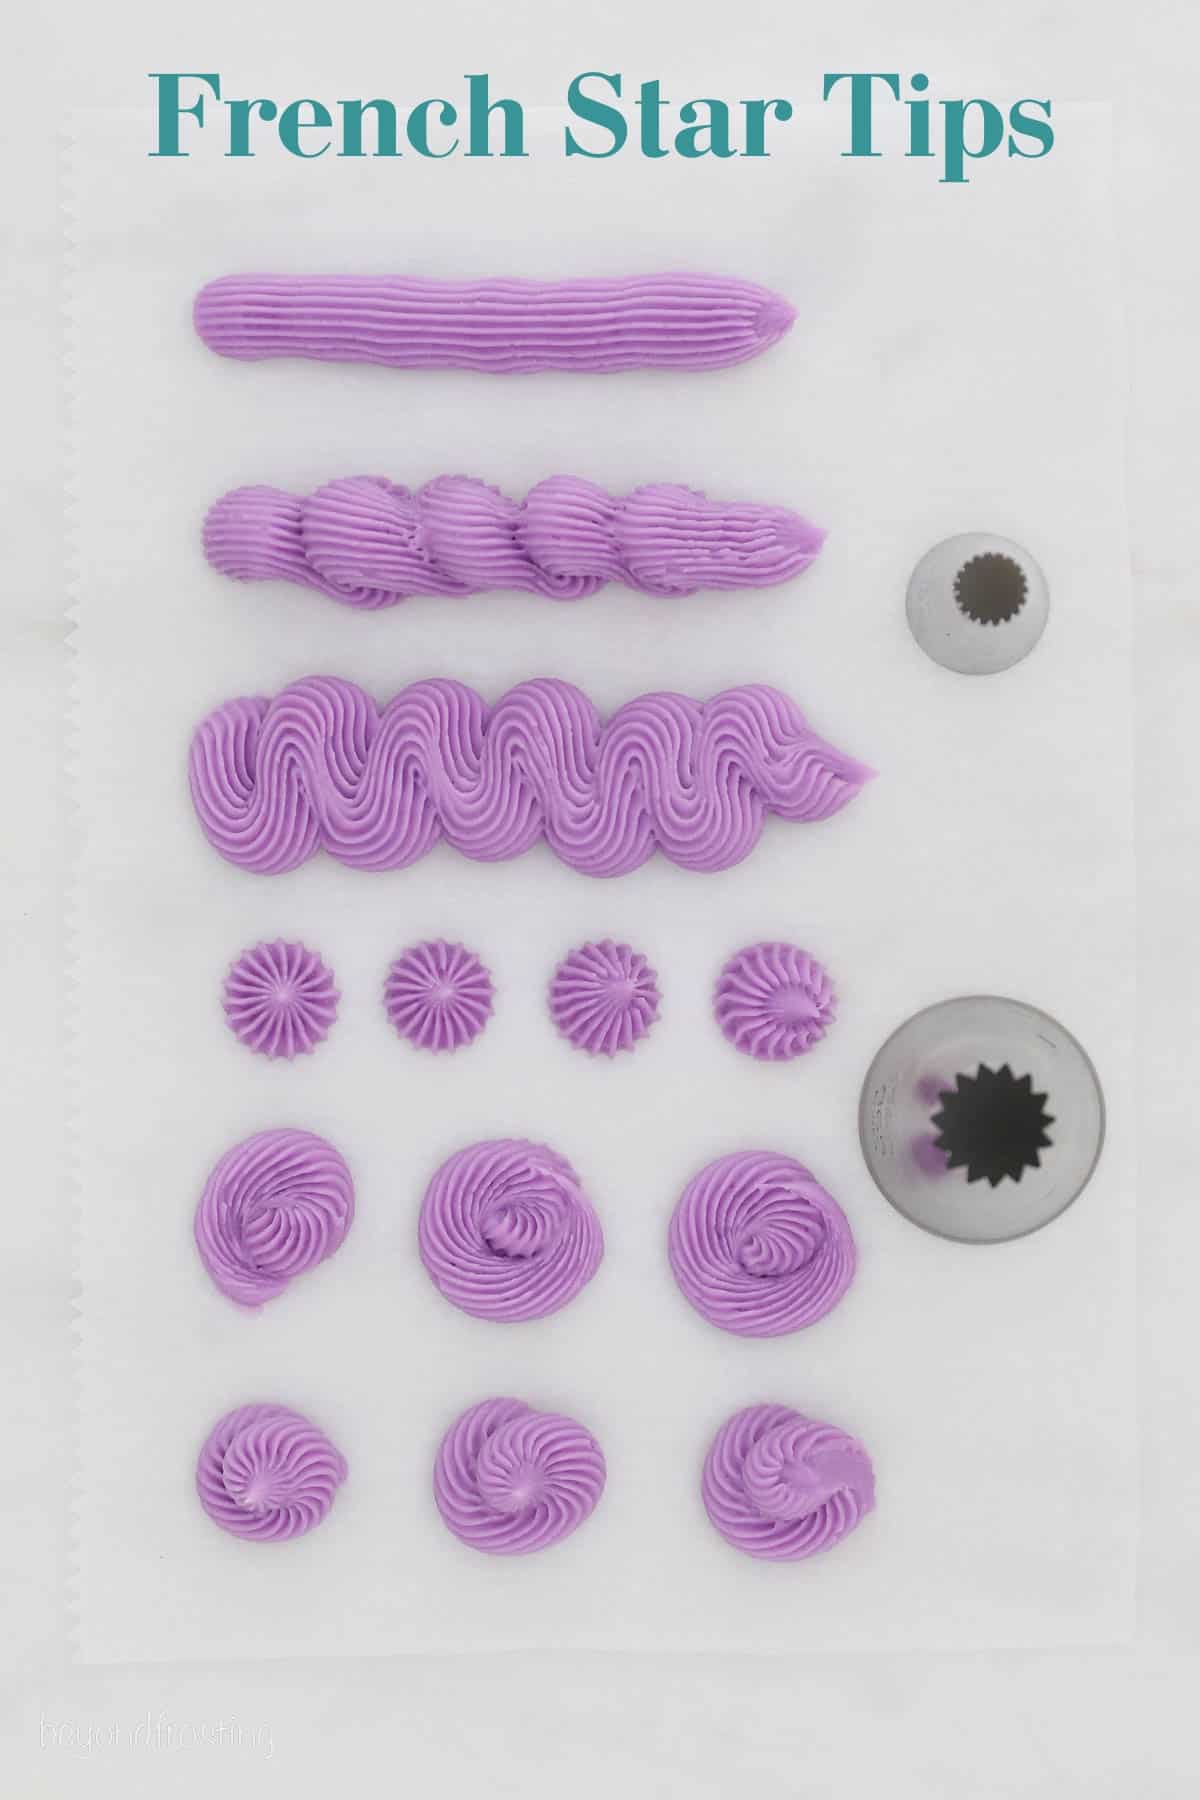
Piping borders is an easy way to add a polished look to your cake. Fill a piping bag fitted with a star tip and apply pressure while moving around the edge of the cake to create a decorative border.
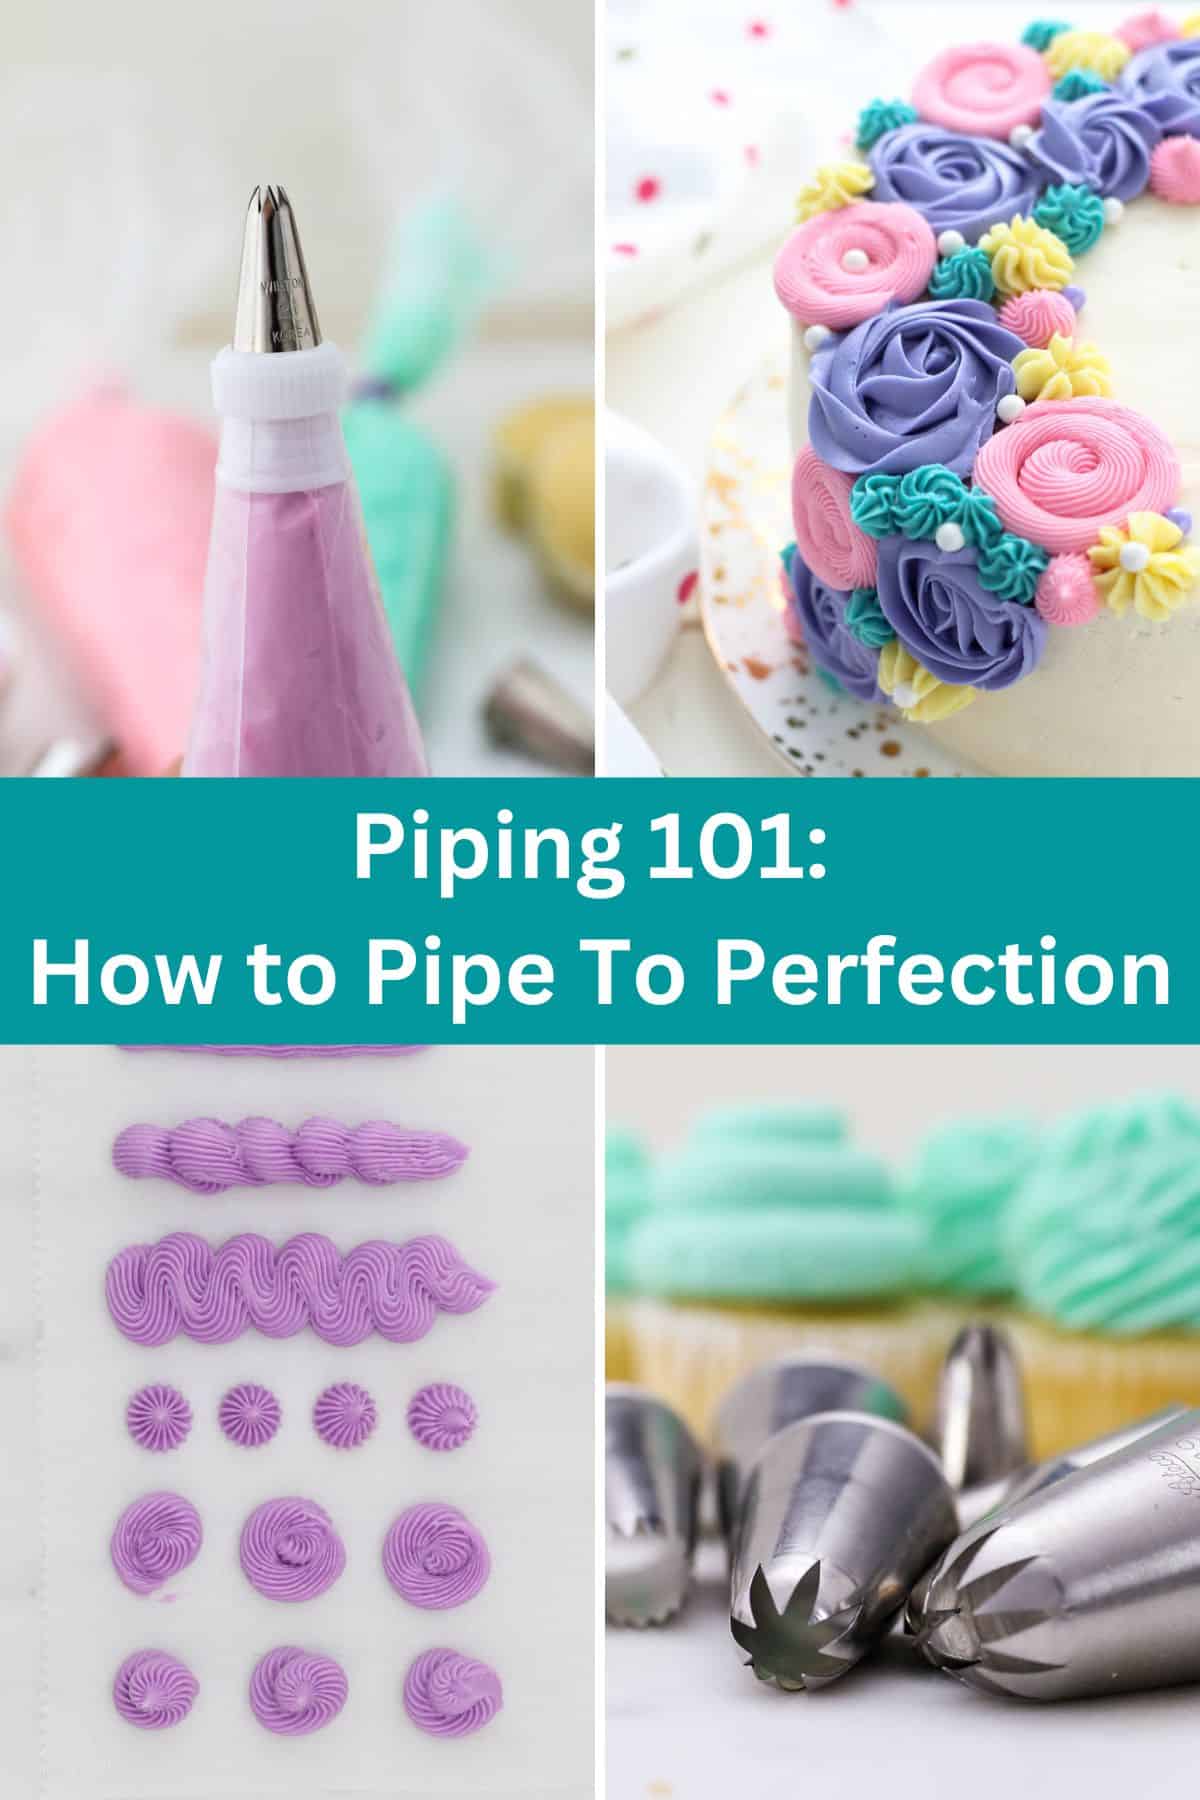
3. Rosettes and Flowers
Using a piping bag and a petal tip, you can easily create beautiful rosettes. Start by piping a spiral from the center outwards, and practice different sizes for variation.
Tip
Practice on parchment paper before working on your cake to get the feel for the technique!
Advanced Frosting Techniques
Once you’re comfortable with the basics, you can explore these advanced techniques to enhance your decorating skills.
1. Ombre Effect
The ombre effect involves creating a gradient of color from light to dark. To achieve this, mix your frosting in varying shades and layer it on your cake, starting with the lightest at the top and transitioning to the darkest at the bottom.
2. Drip Cake
This popular trend involves letting a thin layer of ganache or glaze drip down the edges of the cake. To create this, make a ganache with equal parts chocolate and cream, let it cool slightly, and pour it over the top, allowing it to drip naturally.
3. Texture Techniques
Experiment with different textures by using various tools. A fork can create lines, while the back of a spoon can create swirls. This adds a unique flair to your cake.
Common Mistakes to Avoid
Even experienced bakers sometimes make mistakes when decorating with frosting. Here are some common pitfalls and how to avoid them:
- Too Warm or Cold Frosting: Frosting that’s too warm can melt and become unmanageable, while cold frosting can be difficult to spread. Aim for room temperature for best results.
- Using the Wrong Tip: Selecting the appropriate piping tip for your design is crucial. Experiment with different shapes to get the perfect look.
- Overmixing Colors: When coloring your frosting, be careful not to overmix, as this can dull the colors. Add food coloring slowly until you achieve the desired shade.
Personal Experiences and Tips
As a longtime baking enthusiast, I’ve had my share of frosting fiascos. One time, I attempted a three-tiered cake for a friend’s wedding. I spent the entire day decorating and, just before it was time to leave, my frosting began to melt in the summer heat. I quickly learned the importance of temperature control and using a sturdy frosting. Always use high-quality ingredients—especially butter when making buttercream—because it can truly make a difference in flavor and texture.
FAQs About Frosting Decoration
1. What is the best frosting for beginners?
Buttercream is the easiest frosting for beginners due to its versatility and forgiving nature.
2. How do I store leftover frosting?
Store leftover frosting in an airtight container in the refrigerator for up to two weeks. Just remember to re-whip it before using it again.
3. Can I freeze decorated cakes?
Yes, you can freeze cakes with frosting. Wrap them tightly in plastic wrap and aluminum foil. To enjoy later, let them thaw in the refrigerator.
4. What can I do to prevent my frosting from melting?
To avoid melting, keep your cake in a cool, dry place. Avoid direct sunlight and consider using a sturdier frosting, like Swiss meringue buttercream.
Conclusion: Embrace Your Creativity!
Decorating with frosting is a skill that can be developed over time with practice and patience. As you experiment with various techniques and styles, remember to have fun and embrace your creativity. Whether you’re preparing a simple cupcake for a friend or an elaborate wedding cake, the joy of decorating is in the journey and the love you put into your creations.