Transform your landscape while effectively managing water runoff with decorative rock drainage ditches. In this guide, we’ll explore everything from design choices to installation tips, making your outdoor space work for you.
What is a Decorative Rock Drainage Ditch?
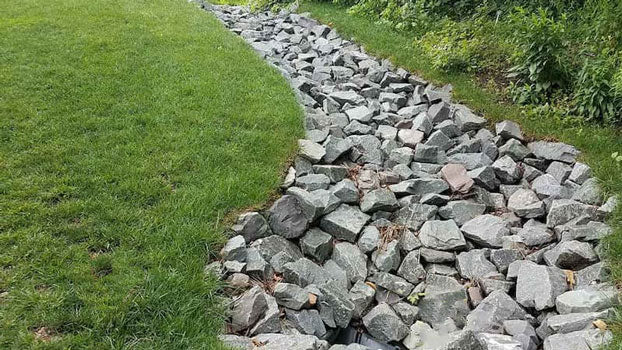
A decorative rock drainage ditch is an aesthetically pleasing landscaping feature that channels excess water away from areas where it can cause damage, like near foundations or garden beds. Unlike traditional ditches, these landscaped alternatives blend function and beauty seamlessly, using decorative rocks, gravel, and plants to create an inviting look.
Why Choose Decorative Rock Drainage Ditches?
Whether you’re looking to enhance your property’s curb appeal or address water drainage issues, decorative rock ditches offer several advantages:
- Effective Water Management: Redirect and manage water flow efficiently.
- Enhances Aesthetic Appeal: Adds beauty to your landscape with natural materials.
- Low Maintenance: Once established, they require minimal upkeep.
- Environmental Benefits: Promote groundwater recharge and reduce erosion.
How to Design Your Decorative Rock Drainage Ditch
Creating an attractive and functional drainage ditch involves careful planning. Here are some key considerations:
1. Assess Your Property
Understanding your property’s drainage patterns is critical. Look for areas where water tends to pool after rain. Note the slopes of your yard, as these will influence where your ditch should go.
2. Choose the Right Location
Position your ditch where it won’t interfere with foot traffic, while still effectively redirecting water away from structures. Aim for a slope that allows water to flow naturally.
3. Select Decorative Rocks
Your choice of rocks is crucial. Options range from larger boulders to smaller gravel. Consider colors and textures that complement your existing landscape.
4. Incorporate Plants
Adding native plants not only enhances the visual appeal but also helps with soil stabilization and water absorption.
Planting Suggestions
Consider these native plants for your drainage ditch:
- Blue Wildrye
- Indian Grass
- Switchgrass
- Black-eyed Susans
Installation Process
Once you’ve planned your decorative rock drainage ditch, it’s time to get to work! Here’s a step-by-step guide:
Step 1: Mark the Area
Use stakes and string to outline the shape and curvature of your ditch. This will give you a visual guide while digging.
Step 2: Dig the Ditch
Using a shovel or trenching tool, dig the ditch to a depth of about 6-12 inches, depending on your drainage needs. Ensure the bottom slopes slightly downward for effective water flow.
Step 3: Lay Landscape Fabric
Lay down landscape fabric along the bottom and sides of the ditch to prevent weeds and allow for drainage.
Step 4: Add Rocks
Begin layering your decorative rocks, starting with larger stones at the bottom and smaller stones on top. Make sure to create a natural look while ensuring proper drainage.

Step 5: Plant Vegetation
Fill spaces between the rocks with soil and plant your chosen vegetation. Water the plants thoroughly to help them establish.
Maintenance Tips for Your Decorative Rock Drainage Ditch
Once your ditch is installed, maintaining it is relatively simple:
- Regular Weeding: Keep an eye out for unwanted plants that can disrupt drainage.
- Check for Debris: Periodically remove any leaves or debris that might clog the ditch.
- Inspect for Erosion: Check for areas that may need reinforcement or additional landscaping rocks.

Comparative Analysis: Decorative Rock Ditch vs. Traditional Ditch
| Feature | Decorative Rock Ditch | Traditional Ditch |
|---|---|---|
| Aesthetic Appeal | High | Low |
| Water Management | Effective | Effective |
| Maintenance | Low | Moderate |
| Cost | Higher (initially) | Lower (initially) |
Pros and Cons of Decorative Rock Drainage Ditches
Pros
- Enhances Landscape Beauty
- Reduces Erosion
- Improves Water Management
- Low Upkeep
Cons
- Higher Initial Costs
- Requires Planning and Design
- Potential for Weeds if not maintained

FAQs About Decorative Rock Drainage Ditches
1. How deep should a decorative rock drainage ditch be?
The depth can vary, but a range of 6-12 inches is generally effective for managing water runoff.
2. Can I use any type of rock for my drainage ditch?
While you can use various types of rocks, it’s best to choose angular rocks that allow for proper drainage and stability.
3. Will a decorative rock drainage ditch help with flooding?
Yes! A well-designed drainage ditch can significantly reduce flooding by redirecting water flow.
4. How do I prevent weeds in my decorative rock drainage ditch?
Using landscape fabric beneath the rocks will help reduce weed growth, along with regular maintenance and weeding.
