When it comes to cookie decorating, few themes are as vibrant and appealing as fish. Whether it’s for a child’s birthday party, a summer celebration, or simply a creative weekend project, fish decorated cookies bring a splash of color and creativity to any occasion. In this extensive guide, I’ll share my personal journey with fish cookies, along with tips, techniques, and recipes that will help you create your own underwater masterpiece.
Table of Contents
- The Joy of Cookie Decorating
- What You Need to Get Started
- Baking the Perfect Cookie
- Decorating Techniques for Fish Cookies
- Popular Fish Cookie Designs
- Pros and Cons of Fish Decorated Cookies
- Frequently Asked Questions
The Joy of Cookie Decorating
Cookie decorating is not just a culinary skill; it’s a form of art that allows you to express your creativity. My journey began on a rainy Sunday afternoon when I decided to try my hand at decorating cookies for my niece’s birthday party. Since then, I have been hooked! There’s something immensely satisfying about transforming simple dough into colorful and charming fish shapes that can brighten anyone’s day.
What You Need to Get Started
Before you dive into the world of fish decorated cookies, here’s a list of essential tools and ingredients you’ll need:
Essential Ingredients
- All-purpose flour
- Granulated sugar
- Butter (unsalted)
- Eggs
- Baking powder
- Vanilla extract
- Food coloring
- Royal icing (for decorating)
Tools and Equipment
- Mixing bowls
- Whisk and spatula
- Cookie cutters (fish shapes)
- Piping bags and tips
- Cooling racks
- Food-safe paints (optional)
- Offset spatula
- Parchement paper
Baking the Perfect Cookie
Baking cookies is all about precision and patience. Here’s a simple recipe and method to ensure your fish cookies come out perfectly every time.

Classic Sugar Cookie Recipe
Ingredients
- 2 ¾ cups all-purpose flour
- 1 teaspoon baking powder
- ½ teaspoon salt
- 1 cup butter (softened at room temperature)
- 1 ½ cups granulated sugar
- 1 egg
- 1 teaspoon vanilla extract
Instructions
- Preheat your oven to 350°F (175°C).
- In a bowl, combine flour, baking powder, and salt. Set aside.
- In another bowl, beat the softened butter and sugar until light and fluffy.
- Add the egg and vanilla extract, mixing until well combined.
- Gradually add the flour mixture to the wet ingredients, stirring until a dough forms.
- Wrap the dough in plastic wrap and chill in the refrigerator for at least 1 hour.
- Roll out the dough on a floured surface to about ¼ inch thickness and cut out fish shapes using cookie cutters.
- Place the cookies on a parchment-lined baking sheet and bake for 8-10 minutes, or until the edges are lightly golden.
- Allow the cookies to cool completely before decorating.

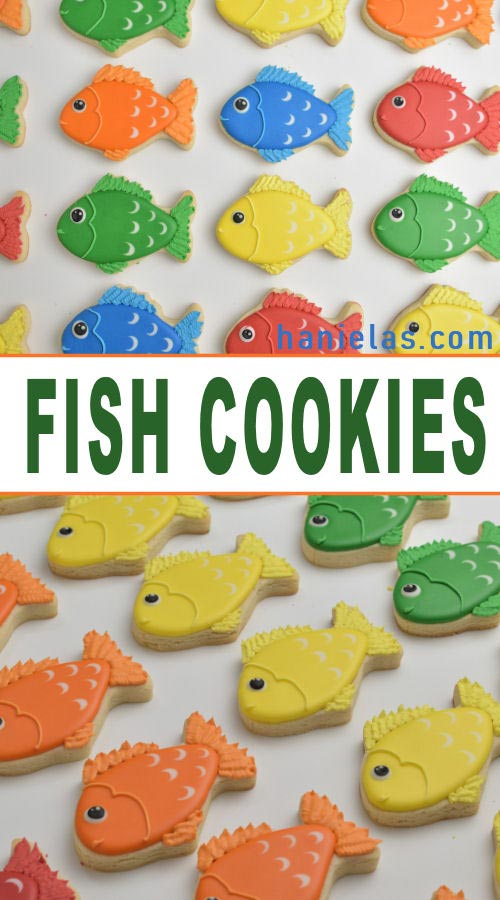
Decorating Techniques for Fish Cookies
Once your cookies are baked and cooled, it’s time to unleash your creativity with decoration! Here are some popular techniques that can help enhance your fish cookies:
Royal Icing Basics
Royal icing is the go-to medium for decorating cookies. It dries hard, making it perfect for intricate designs. Here’s how to make it:

Royal Icing Recipe
- 4 cups powdered sugar
- 3 tablespoons meringue powder
- 6 tablespoons water (adjust for consistency)
Instructions
- In a mixing bowl, combine the powdered sugar and meringue powder.
- Add water gradually, mixing until you reach the desired consistency (thick for outlines, thinner for flooding).
- Color your icing with food coloring as desired.

Piping Techniques
Piping is an essential technique in cookie decorating. Use piping bags with different tips for various designs:
Outline and Flood Method
- Use a thick royal icing to outline the shape of the fish.
- Allow the outline to dry for about 10 minutes.
- Fill in the outline with a thinner icing, smoothing it with a toothpick or offset spatula.
- Let the icing dry completely before adding additional decorations.
Popular Fish Cookie Designs
Here are some popular designs that can inspire your fish cookie creations:
Goldfish Cookies
Use a goldfish-shaped cutter and sprinkle edible gold dust for an appealing touch!
Rainbow Fish Cookies
Color each scale with different shades, and use metallic food coloring for a shimmer effect.
Cartoon Fish Cookies
Emphasize expressions with edible markers and colorful icing for a fun, cartoonish look.
Pros and Cons of Fish Decorated Cookies
Pros
- Visually appealing and fun to decorate.
- Perfect for a variety of events, from birthdays to summer parties.
- Allows for creative expression with designs and colors.

Cons
- Can be time-consuming, especially for intricate designs.
- Requires practice to master piping and flooding techniques.
- Messy with icing and food coloring.
Frequently Asked Questions
Can I use other types of icing for fish cookies?
Yes! While royal icing is the most popular choice, you can also use buttercream icing for a softer texture, although it won’t dry as hard.

How can I store decorated fish cookies?
Store your decorated cookies in an airtight container at room temperature. They can last up to two weeks.
What is the best way to transport decorated cookies?
Place each cookie in a small cellophane bag and seal it. This will help prevent damage during transport.
Can I freeze fish cookies?
Yes! You can freeze undecorated cookies for up to three months. Just ensure they are well-wrapped to prevent freezer burn.
Conclusion
Creating fish decorated cookies can be a joyous experience that brings out your creativity and adds color to any occasion. With the right tools, ingredients, and techniques, you can craft delightful cookies that will enchant both children and adults alike. So, gather your supplies, put on your apron, and dive into the world of cookie decorating!