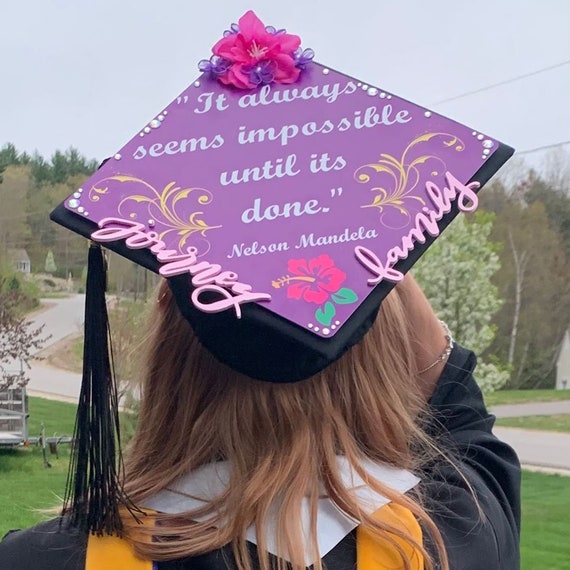
Graduation is a momentous occasion, symbolizing the culmination of years of hard work and dedication. One of the most memorable traditions is to customize your graduation cap, also known as “gorros de graduación decorados.” Not only does this allow you to express your individuality, but it also adds a personal touch to a significant milestone. In this comprehensive guide, we will explore a plethora of ideas, tips, and tricks to create a stunning decorated graduation cap.
Why Decorate Your Graduation Cap?
Decorating your graduation cap is a way to showcase your personality and achievements. Here are some reasons why you might want to consider customizing your cap:
- **Personal Expression**: It’s a chance to express your interests, passions, and imagination.
- **Memorable Keepsake**: A decorated cap can serve as a beautiful reminder of your accomplishments.
- **Celebration of Achievements**: You can highlight your journey, including your major accomplishments, quotes, and inspirations.
Getting Started: Supplies You’ll Need

Before diving into the decoration process, gather some essential supplies. Here’s a list of things you might need:
- Graduation cap (gorro de graduación)
- Adhesive (hot glue gun, craft glue)
- Decorative items (ribbons, glitter, stickers, fabric)
- Markers, paint, or vinyl letters
- Scissors and craft knife
- Optional: Templates for design ideas

Popular Themes for Graduation Cap Decorations
Choosing a theme can make the design process easier. Here are some popular themes to consider:

Inspirational Quotes
Quotes can provide motivation and encapsulate your educational journey. Examples include:

- “The future belongs to those who believe in the beauty of their dreams.” – Eleanor Roosevelt
- “Education is the most powerful weapon which you can use to change the world.” – Nelson Mandela
Pop Culture References

Showcase your favorite movies, books, or songs. Whether it’s a Marvel superhero or a beloved book character, these references can add a fun element to your cap.
Examples of Popular Culture Inspirations

| Source | Design Ideas |
|---|---|
| Harry Potter | “I solemnly swear I am up to no good” with wand designs |
| Disney | “Dreams do come true” with characters |
| Marvel | Superhero logos and quotes |
Personal Achievements
Show off your accomplishments! You can include your major, GPA, or special honors. This not only makes your cap personal but also celebrates your hard work.
Step-by-Step Guide to Decorating Your Graduation Cap
Ready to start decorating? Here’s a step-by-step guide to help you along the way:
Step 1: Plan Your Design
Before you start gluing and sticking, sketch out your design on paper. This will help you visualize how it will look.
Step 2: Choose Your Colors
Select a color scheme that matches your personality or school colors. This will provide a cohesive look.
Step 3: Gather Your Materials
Once you have your design and color scheme, gather all the materials needed for the project.
Step 4: Start Decorating
Using the adhesive, attach your decorative items according to your design. Be patient and allow each layer to dry before adding more.
Step 5: Add Final Touches
Once everything is glued down, go back and add any finishing touches, such as glitter or additional stickers.
Pros and Cons of Decorating Your Graduation Cap
While decorating your cap is a fun activity, it’s essential to consider the following:
| Pros | Cons |
|---|---|
| Personal expression and creativity | Time-consuming process |
| Memorable keepsake | May not fit into school regulations |
| Fun and engaging activity | Potential for damage during the ceremony |
Comparing Different Decoration Techniques
There are various ways to decorate your graduation cap. Here’s a quick comparison of some popular techniques:
| Technique | Materials | Time Required | Difficulty Level |
|---|---|---|---|
| Painting | Acrylic paints, brushes | 2-3 hours | Medium |
| Adhesive Vinyl | Vinyl sheets, craft cutter | 1-2 hours | Easy |
| Sewing/Fabric | Fabric, thread, needle | 3-4 hours | High |
Personal Experiences: My Graduation Cap Journey
As I reflect on my graduation day, one of the highlights was the excitement of showcasing my decorated cap. I chose to go with a theme centered around my favorite book series, complete with a quote from the protagonist that resonated with my journey. Gathering materials and planning the design was a delightful process, filled with creativity and joy. My friends joined in the fun, each adding their personal touch, creating an atmosphere of camaraderie and celebration.
Frequently Asked Questions (FAQs)
What can I use to decorate my graduation cap?
You can use various materials such as glitter, fabric, paint, stickers, and adhesive vinyl. Just ensure everything is securely attached.
Is there a dress code for decorated graduation caps?
Yes, some schools have guidelines regarding decorations. Make sure to check your school’s policies to avoid any issues during the ceremony.
How do I keep my decorations from being damaged during the ceremony?
Consider using lightweight materials and securing everything well. You might also want to carry a small bag for touch-ups after the ceremony.
Can I remove decorations after graduation?
Yes! If you’d like to keep your cap as it was originally, carefully remove the decorations after graduation. However, some people choose to preserve their decorated cap as a keepsake.
Conclusion
Decorating your graduation cap is a fulfilling way to celebrate a significant milestone in your life. By expressing your personality, showcasing your interests, and sharing your journey, you create a memorable keepsake that you’ll cherish for years. Embrace your creativity, gather your supplies, and start crafting a design that truly represents you. Happy decorating, and congratulations on your upcoming graduation!