There’s something undeniably magical about the holiday season, and a retro decorated Christmas tree evokes a warm sense of nostalgia that can transform any home into a winter wonderland. In this article, I will guide you through the process of creating a stunning retro Christmas tree, sharing personal anecdotes, insights, and a plethora of ideas to inspire your festive decor. So, grab a cup of hot cocoa, and let’s get started on this delightful journey of holiday cheer!
Understanding Retro Christmas Decor
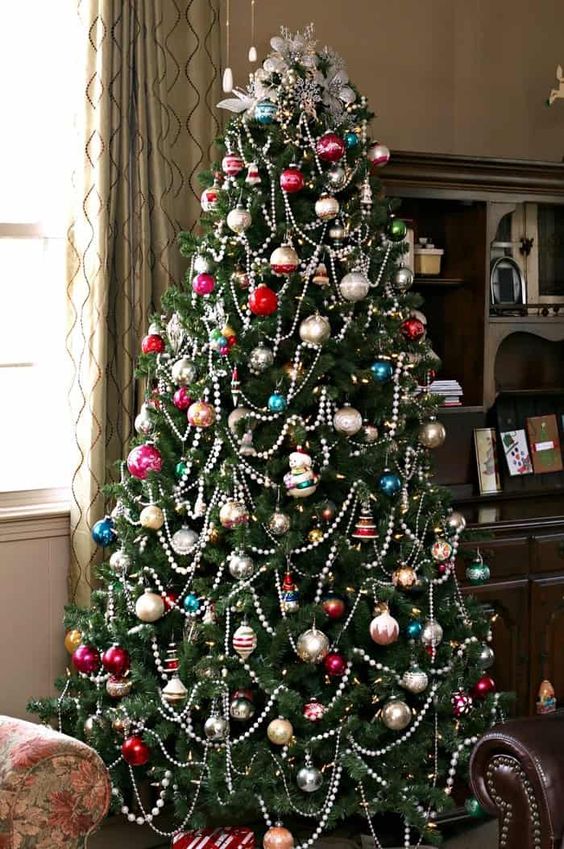
Before diving into the decoration process, it’s essential to understand what defines retro Christmas decor. Generally, retro styles refer to design elements from the 1940s through the 1970s, characterized by vivid colors, shiny materials, and playful patterns. Think of vibrant ornaments, whimsical designs, and classic motifs that harken back to simpler times.
What Makes a Christmas Tree “Retro”?
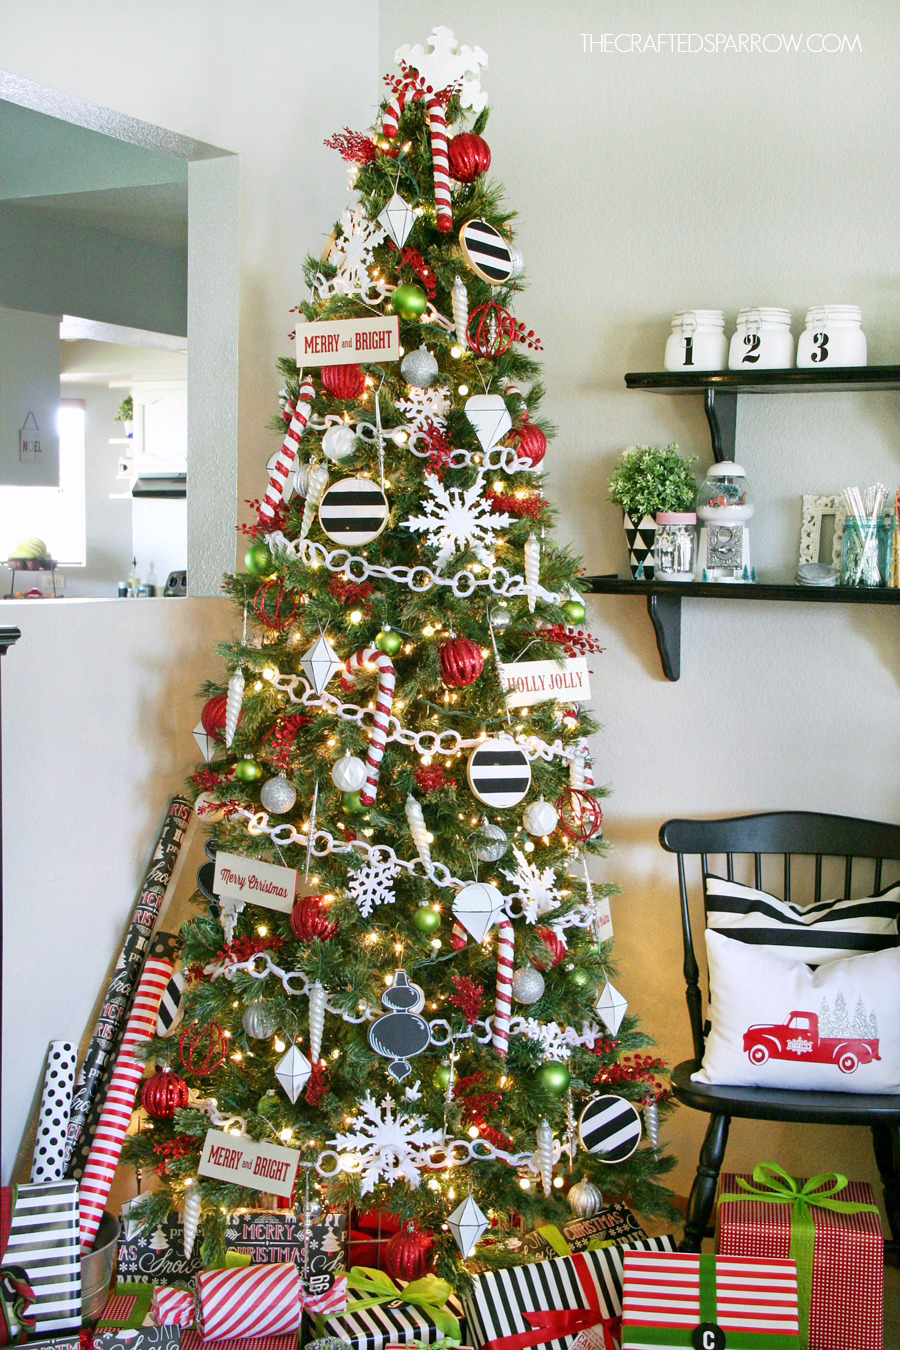
- Color Palette: Bright reds, greens, yellows, and blues dominate retro themes.
- Materials: Shiny tinsel, vintage glass ornaments, and old-fashioned garlands.
- Ornaments: Collectibles from the past, such as handmade decorations and kitschy items.
- Tree Skirts: Classic plaid or embroidered tree skirts that scream nostalgia.
How to Choose the Perfect Tree
The foundation of any breathtaking Christmas display is, of course, the Christmas tree itself. Here are some options you can consider:

| Type of Tree | Description | Pros | Cons |
|---|---|---|---|
| Natural Tree | A fresh pine, fir, or spruce tree that brings the scent of Christmas. | Authentic scent, unique shape, and eco-friendly. | Messy, needs watering, and can be expensive. |
| Artificial Tree | A pre-made tree that can last for many years. | Reusable, no cleanup, and easy to store. | Less authentic smell, can look plastic, and less responsive to changes in temperature. |
| Vintage Tree | Old-fashioned aluminum or ceramic trees that were popular in the 1950s. | Unique aesthetic, great conversation starters, and a cool retro vibe. | Often expensive to find, less traditional. |
Gathering Your Retro Decorations
Once you’ve selected the perfect tree, it’s time to gather your retro decorations. Here’s what you’ll need:
Essential Retro Ornaments
Here is a list of classic ornaments that evoke the charm of retro decor:
- Glass Baubles: Vintage glass ornaments in various shapes, sizes, and colors.
- Tinsel: Shimmering tinsel that gives the tree a sparkling effect.
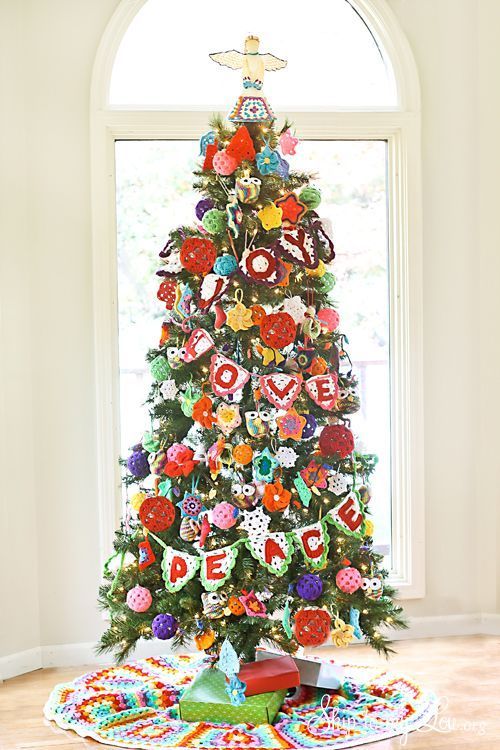
- Handmade Ornaments: Items like popcorn garlands or paper chains for a personal touch.
- Figurines: Classic Christmas characters like Santa, reindeer, and angels that add a whimsical flair.
Theming Your Tree
Consider creating a theme for your tree. Here are some fun ideas:

- Traditional Christmas: Use classic red, green, and gold colors with traditional ornaments.
- Whimsical Retro: Incorporate quirky shapes and vibrant colors.
- Vintage Toyland: Include toy figurines, vintage train sets, and childlike innocence.
Step-by-Step Guide to Decorating Your Retro Christmas Tree

Step 1: Set Up Your Tree
Whether you choose a natural or artificial tree, make sure it is sturdy and placed in a well-lit area. If using an artificial tree, fluff out the branches to create fullness.
Step 2: Add Lights
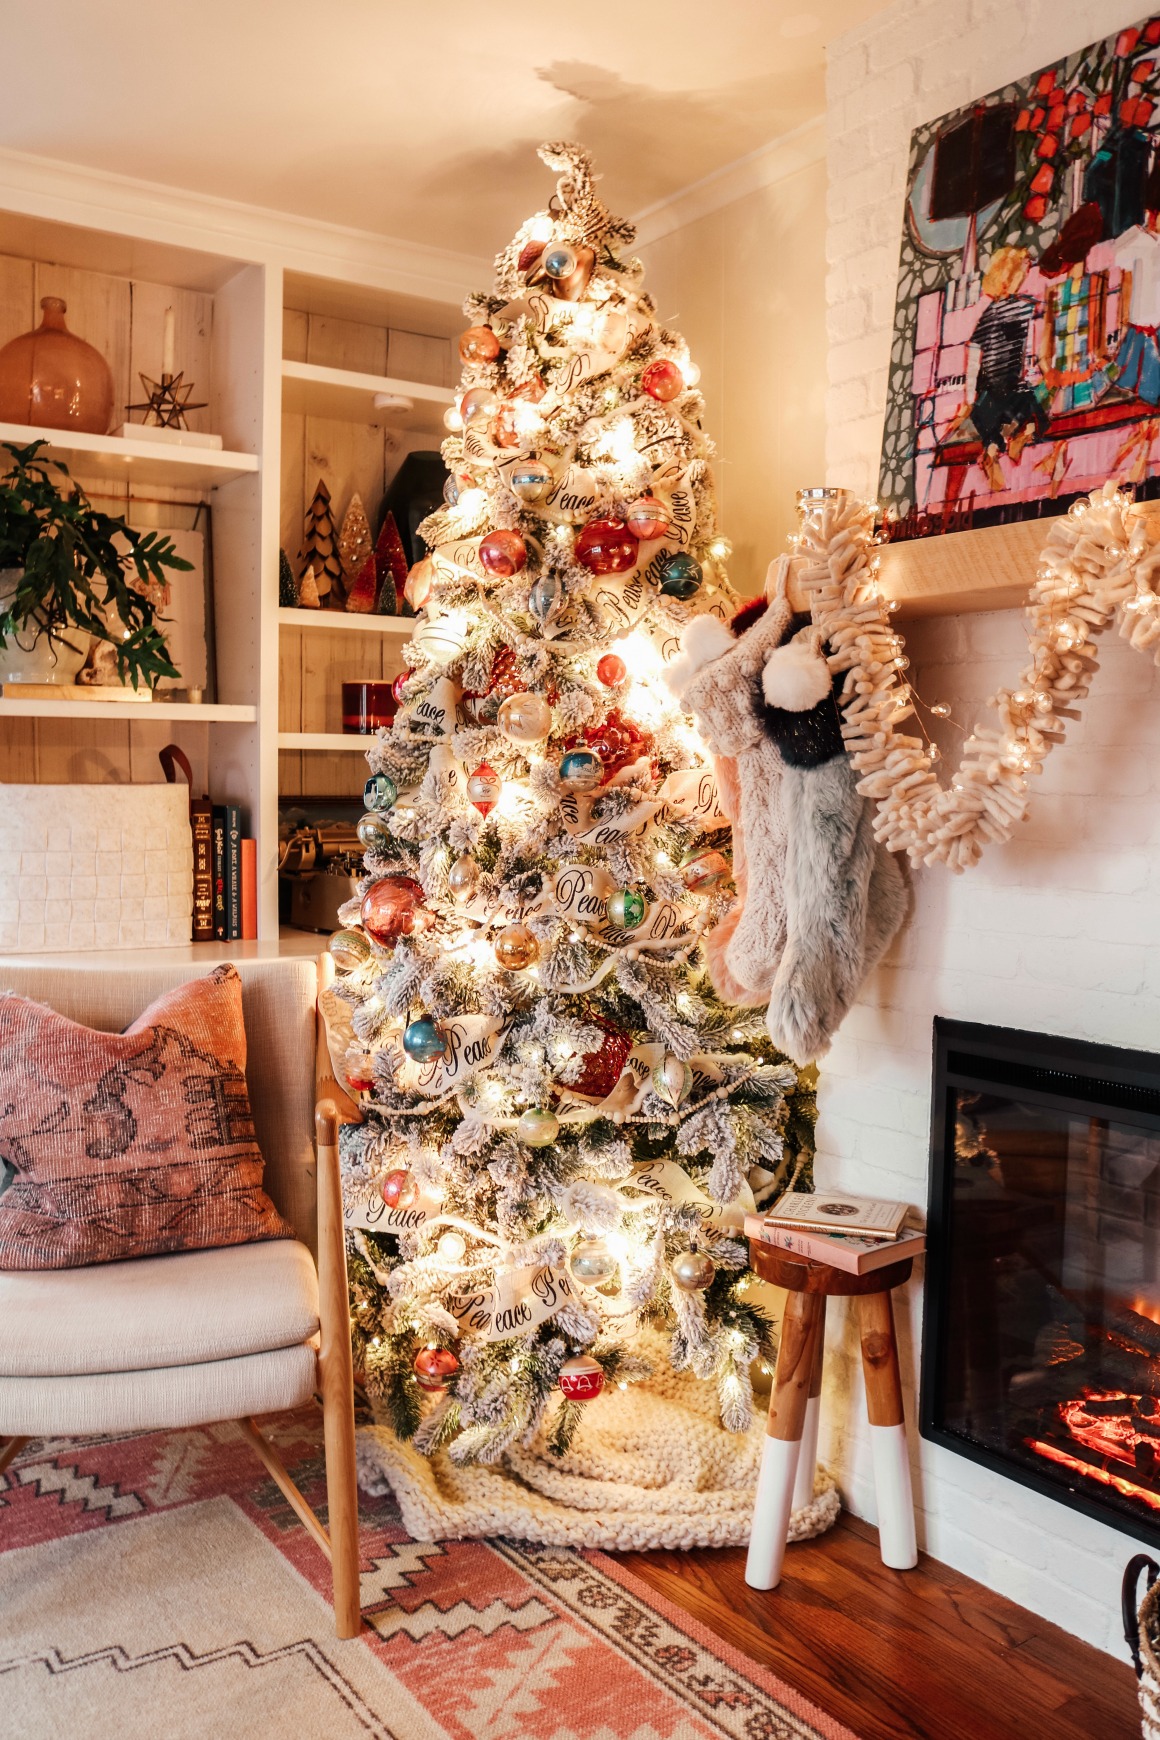
Choose warm white or multi-colored lights to give your tree a cozy glow. String the lights around the tree, starting from the bottom and working your way up. Don’t skimp on lights; the more, the merrier!
Step 3: Hang Garlands and Tinsel
Using garlands like popcorn, beads, or tinsel, wrap them around your tree. Ensure these decorations are evenly spaced, as they create a beautiful backdrop for your ornaments.
Step 4: Place Ornaments Strategically
Start with the larger ornaments and hang them at varying heights. Follow up with smaller ornaments, clustering them together for a more visually appealing look. Feel free to mix classic and quirky ornaments to achieve that retro vibe.
Pro Tip:
Use a combination of shiny and matte finishes to create depth and texture.
Step 5: Top It Off
No tree is complete without a fabulous tree topper! Popular options include stars, angels, or even a vintage toy. Choose one that complements your theme for a cohesive look.
Step 6: Add the Final Touches
Complete your tree with a beautiful tree skirt. A plaid or vintage-style skirt can bring everything together and hide the tree stand.
Personal Experience: My Favorite Retro Christmas Tree Moments
Growing up, my family had a tradition of decorating the tree together on the first Saturday of December. My grandmother had a collection of vintage glass ornaments she had accumulated over the years, each with its own story. I remember the excitement as she pulled out each ornament, sharing tales of where they came from and why they were special. That intimate connection to our decorations is something I cherish and strive to recreate every holiday season.
Common Mistakes to Avoid When Creating a Retro Decorated Christmas Tree
1. Overloading on Ornamentation
While it might be tempting to hang every ornament you own, it can overwhelm the tree. Choose a select few that really stand out.
2. Neglecting the Lights
Don’t overlook lighting! Poor or uneven lighting can detract from the beauty of your decorations.
3. Ignoring Balance
Ensure your tree has visual balance. Arrange ornaments to distribute weight evenly across branches.
4. Skipping the Tree Skirt
A tree skirt adds a finished look to your tree. It also hides unsightly bases, making the display more appealing.
FAQs About Retro Decorated Christmas Trees
What should I look for when buying vintage ornaments?
Look for signs of wear, but also character. Check for chips or cracks, and consider their historical significance. Thrift stores or antique shops are great places to find unique pieces.
How can I make homemade retro decorations?
Get crafty by making popcorn garlands, paper snowflakes, or even painting old glass ornaments in retro colors.
What colors are best for a retro-themed tree?
Opt for bright, bold colors like red, turquoise, yellow, and classic metallics to achieve the perfect retro aesthetic.
Can I mix modern and retro decorations?
Absolutely! Mixing styles can add a unique flair to your decor. Just keep the color scheme consistent for a harmonious look.
Conclusion: Your Retro Christmas Tree Awaits!
Creating a retro decorated Christmas tree is not just about the end result; it’s about the journey and memories you create while decorating. Reflect on your own experiences and let them inspire you to craft a tree that is uniquely yours, filled with warmth, nostalgia, and holiday spirit. So gather those ornaments, start decorating, and create lasting memories with your loved ones!
Happy decorating!