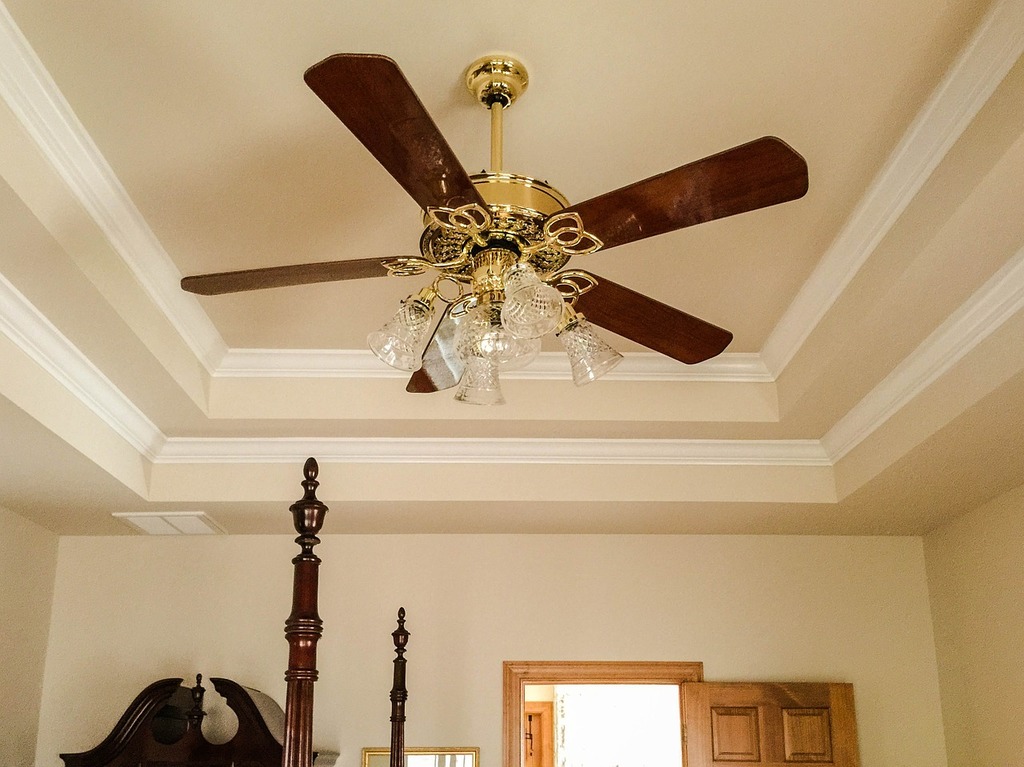
When it comes to home decor, many overlook the potential impact of ceiling fans and their accompanying fixtures. Ceiling fan decorative molding is an often underappreciated element that can significantly enhance the overall aesthetic of a room. In this comprehensive guide, we’ll explore everything you need to know about ceiling fan decorative molding, from its benefits to installation tips, and even personal anecdotes about how it transformed my own living space. Let’s dive in!
What is Ceiling Fan Decorative Molding?
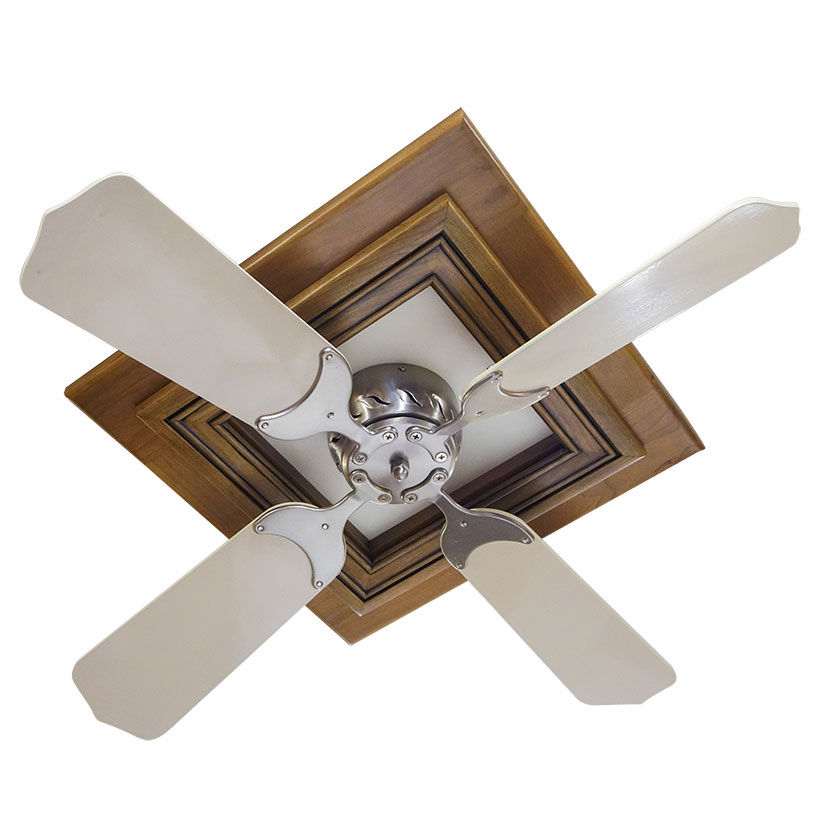
Ceiling fan decorative molding refers to the ornamental trim or borders that surround a ceiling fan. These moldings can be crafted from various materials, including wood, plaster, and polyurethane, and they serve both functional and aesthetic purposes. Not only do they help cover unsightly mounting hardware, but they also add a touch of elegance and sophistication to any room.
Benefits of Using Decorative Molding for Ceiling Fans
- Aesthetic Appeal: Decorative moldings can enhance the look of your ceiling fan and the entire room.
- Concealment: They can cover any gaps or imperfections left after installation, offering a polished finish.
- Increased Home Value: Well-chosen decorative elements can increase the resale value of your home.
- Variety of Styles: Decorative moldings come in a range of styles and materials, allowing for customization based on your decor theme.
Types of Ceiling Fan Decorative Molding
When selecting ceiling fan decorative molding, there are various types to consider. Each type serves a distinct style and purpose, so let’s take a closer look:
Wood Molding
Wood molding adds warmth and richness to a space. It can be stained or painted to match your existing decor. However, it may require more maintenance compared to other materials.
Plaster Molding
Plaster molding is often used in more traditional or classic settings. It can be intricately detailed but might require professional installation due to its weight and fragility.
Polyurethane Molding
Polyurethane moldings are lightweight, durable, and easy to install. They come in various designs and can mimic more expensive materials like wood or plaster.

Styrofoam Molding
Styrofoam moldings are the most cost-effective option. They are lightweight and can be easily painted, but their durability may not be as high as other materials.
Choosing the Right Decorative Molding for Your Ceiling Fan
Selecting the right decorative molding can be daunting, but it doesn’t have to be. Here are some tips that have helped me in choosing the best option for my home:

Consider the Room’s Style
Analyze your room’s overall style. Is it modern, traditional, or eclectic? This will guide you in selecting moldings that complement your existing decor.
Measure Your Space
Always measure the area around your ceiling fan before committing to a specific molding. It’s essential to ensure that the proportions are harmonious.

Material Considerations
Evaluate the maintenance and durability of the materials. While wood might require more upkeep, polyurethane offers ease of installation and longevity.
Color Coordination
Choose colors that either match or contrast with your fan and ceiling. A well-coordinated color scheme can make the fan a focal point.
Installation of Ceiling Fan Decorative Molding
Installing decorative molding may seem intimidating, but it can often be a DIY project. Below, I’ll share my experience and offer a step-by-step guide.
What You’ll Need
- Decorative molding of your choice
- Measuring tape
- Circular saw or miter saw
- Construction adhesive
- Caulk and caulking gun
- Paint (if needed)
- Paintbrush or roller
- Safety goggles and dust mask

Step-By-Step Installation Guide
- Measure and Cut: Measure the lengths needed for the molding and cut them at a 45-degree angle to ensure they fit together seamlessly.
- Dry Fit: Before gluing, dry fit the pieces around the fan to check for proper alignment.
- Apply Adhesive: Apply construction adhesive to the back of the molding and press it against the ceiling.
- Secure and Caulk: Use caulk to fill in any gaps and secure the edges where necessary.
- Paint: If the molding requires painting, do this after installation for a cleaner finish.
Safety Tips for Installation
Safety should always be your top priority when working on home projects. Here are some tips I found helpful:
- Wear safety goggles to protect your eyes from debris.
- Ensure your workspace is clear of any trip hazards.
- Use a sturdy ladder when working on high ceilings.

Maintaining Your Ceiling Fan Decorative Molding
Once installed, maintaining your ceiling fan decorative molding is essential to keep it looking its best. Here are some tips:
Regular Dusting
Use a microfiber cloth to dust your molding every couple of weeks to prevent buildup.
Check for Damage
Periodically check for any signs of peeling or damage, especially if your molding is made from paintable materials. Repaint or repair as necessary.
Cleaning
For stained or dirty moldings, use a mild soap solution and a soft sponge. Avoid harsh chemicals which can damage the finish.
Comparing Popular Ceiling Fan Decorative Moldings
| Material | Pros | Cons | Average Cost |
|---|---|---|---|
| Wood | Elegant, customizable | Expensive, requires maintenance | $3 – $10 per linear foot |
| Plaster | Heavy, ornate details | Requires professional installation, expensive | $6 – $15 per linear foot |
| Polyurethane | Lightweight, easy to install | May not appear as high-end | $2 – $8 per linear foot |
| Styrofoam | Cost-effective, easy to install | Less durable, less elegant | $1 – $4 per linear foot |
Personal Experience: How Decorative Molding Changed My Living Space
When I first moved into my home, the living room felt incomplete. The ceiling fan, while functional, failed to complement the room’s character. After much deliberation, I decided to install polyurethane decorative molding. The installation process was straightforward, and the results were nothing short of transformative.
The moment I stepped back to admire my work, the difference was striking! The molding added a touch of elegance that made the ceiling fan a focal point rather than an afterthought. Guests often comment on the integrity of the design, and I’m proud to offer a cozy yet sophisticated atmosphere. This personal project has affirmed my belief in the power of decorative molding.
Frequently Asked Questions (FAQs)
What is the best material for ceiling fan decorative molding?
The best material depends on your style and budget. Polyurethane is great for an affordable and easy-to-install option, while wood provides elegance but requires more upkeep.
Can I install decorative molding myself?
Yes! With basic tools and our step-by-step guide, many homeowners successfully install decorative molding themselves.
How do I choose the right size molding for my ceiling fan?
Consider the size of your ceiling fan and the height of your ceiling. A larger fan may require wider and more substantial moldings, while smaller fans may benefit from slimmer designs.
Do decorative moldings help with noise reduction?
While decorative moldings primarily serve aesthetic purposes, they can also help absorb some sound, leading to a slightly quieter environment.
How often should I clean my decorative molding?
Regular dusting every few weeks is advisable, while deeper cleaning can be done as needed or at least a couple of times a year.
Conclusion
Incorporating ceiling fan decorative molding can significantly elevate the style and sophistication of any room. From selecting the right type of molding to mastering the installation process, this guide aims to empower you to enhance your space beautifully. I hope my personal experiences and tips will inspire you to take on your own decorative molding project. Happy decorating!