Welcome to the vibrant and delightful world of decorated sunflower cookies! If you’re here, it’s likely that you, too, share a passion for baking and the joy that comes with creating beautiful treats. In this article, I’ll share all the tips and tricks I’ve learned from countless baking adventures, as well as some personal anecdotes that make the journey even sweeter. Whether you’re an expert baker or just getting started, this guide will help you master sunflower cookies that not only look stunning but also taste divine.
What Are Decorated Sunflower Cookies?
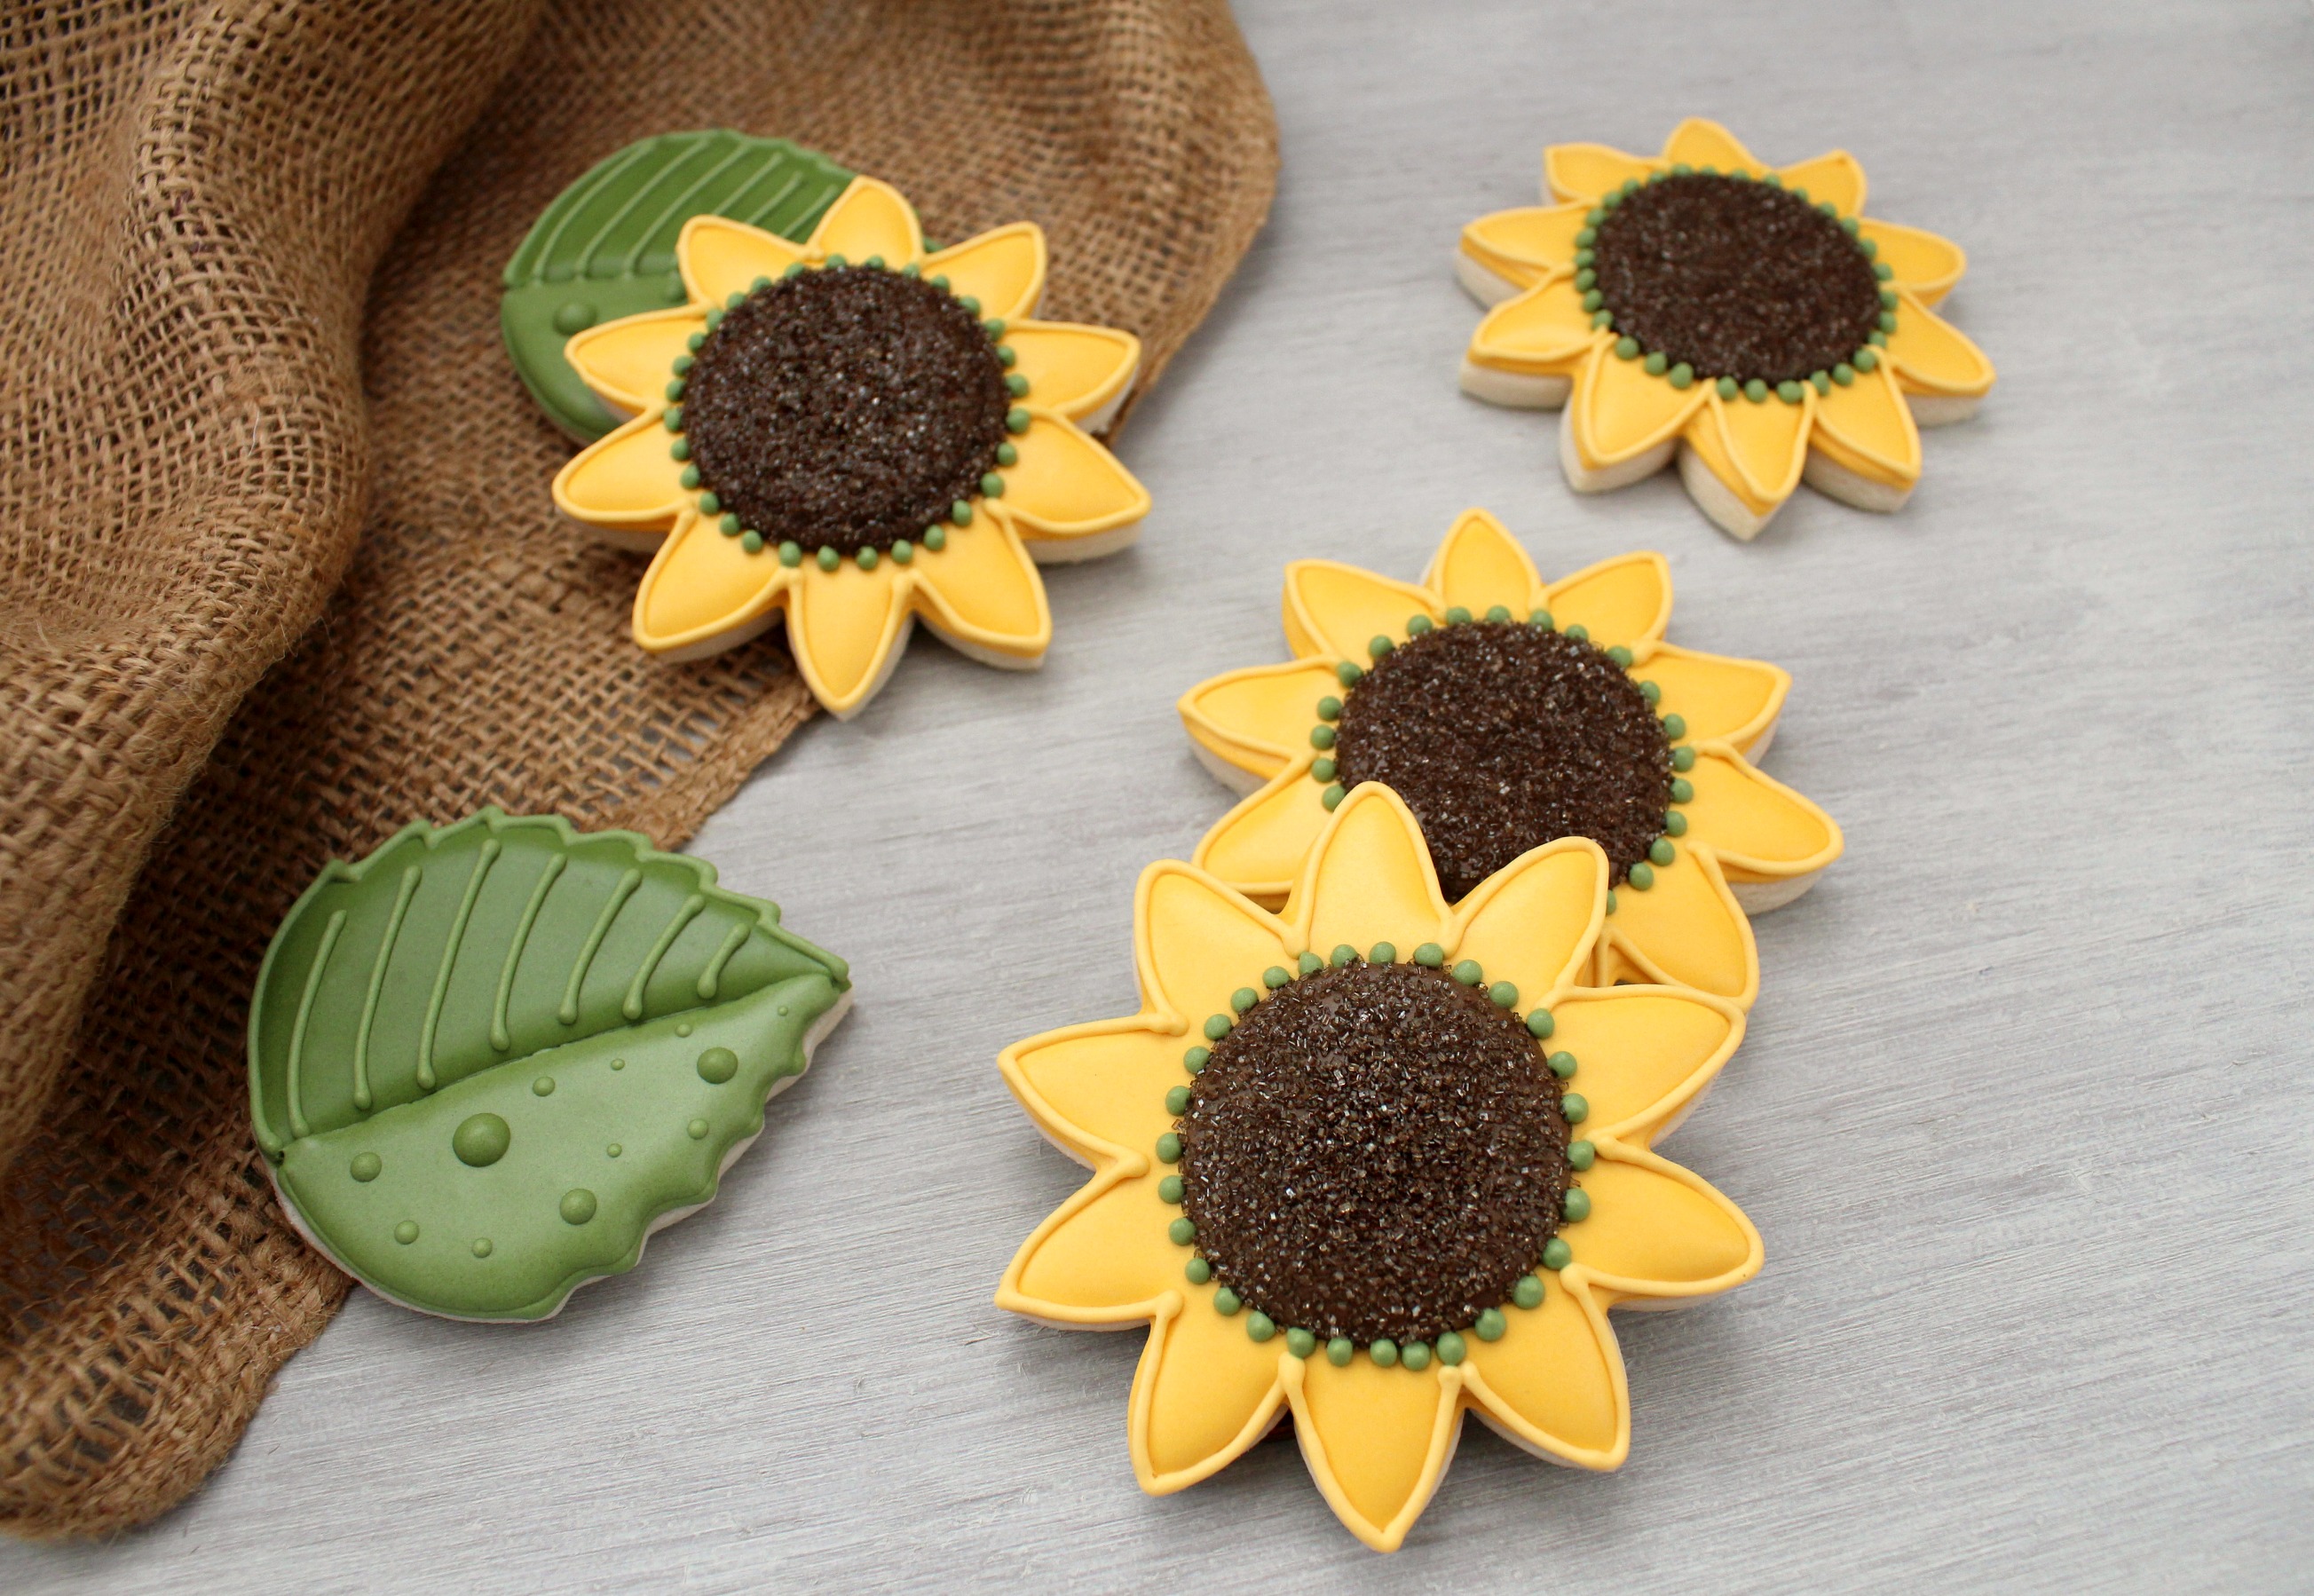
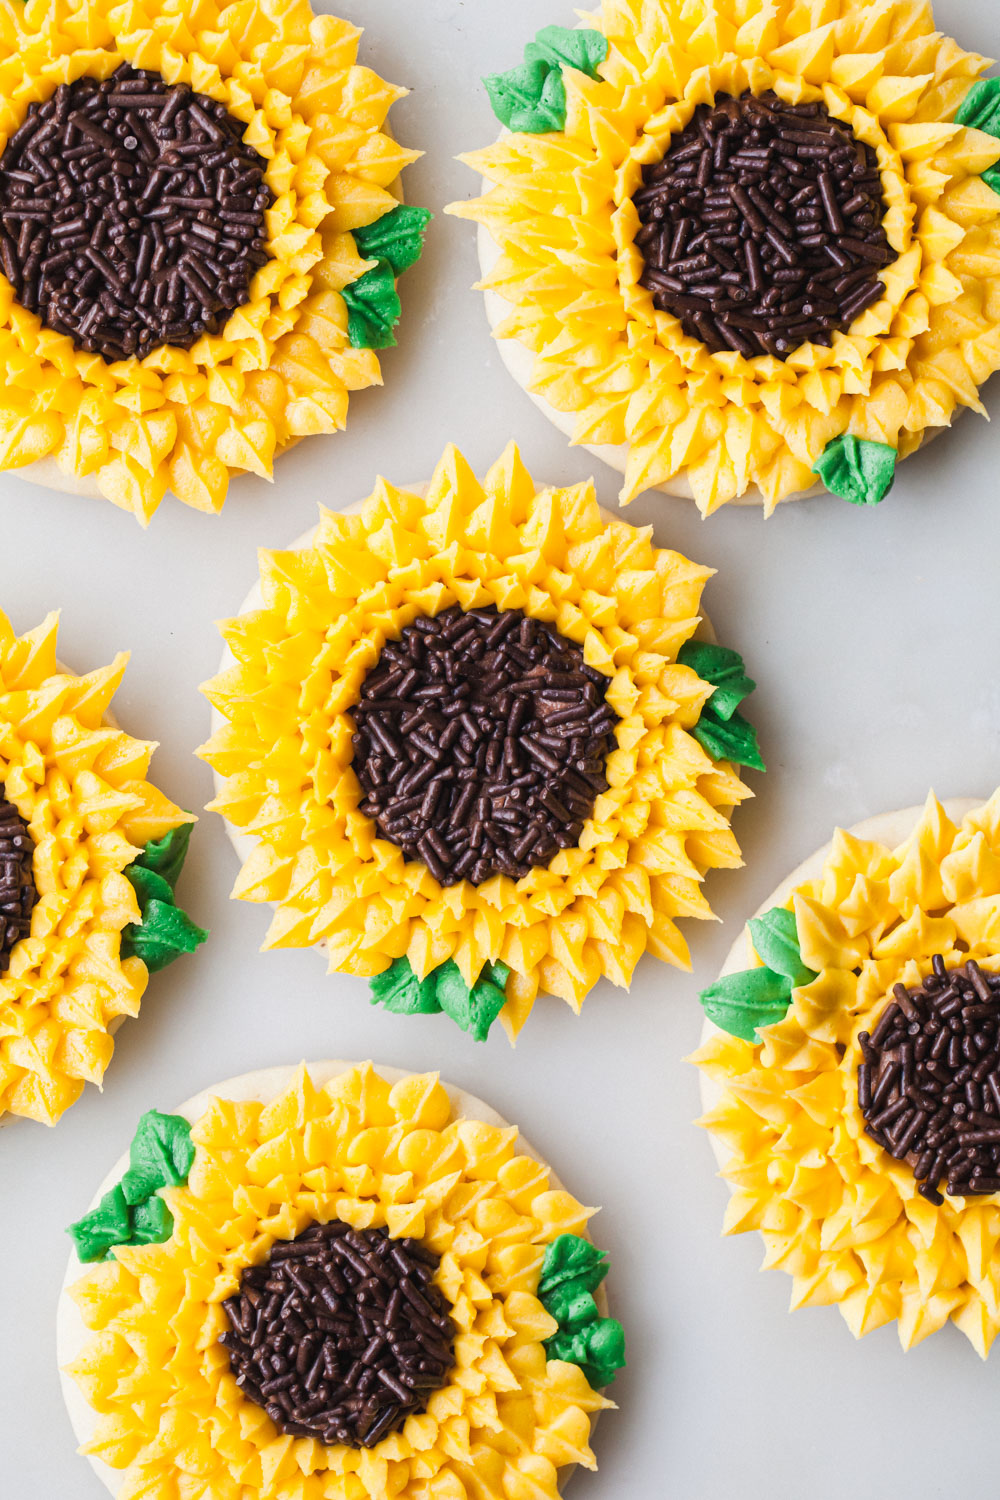
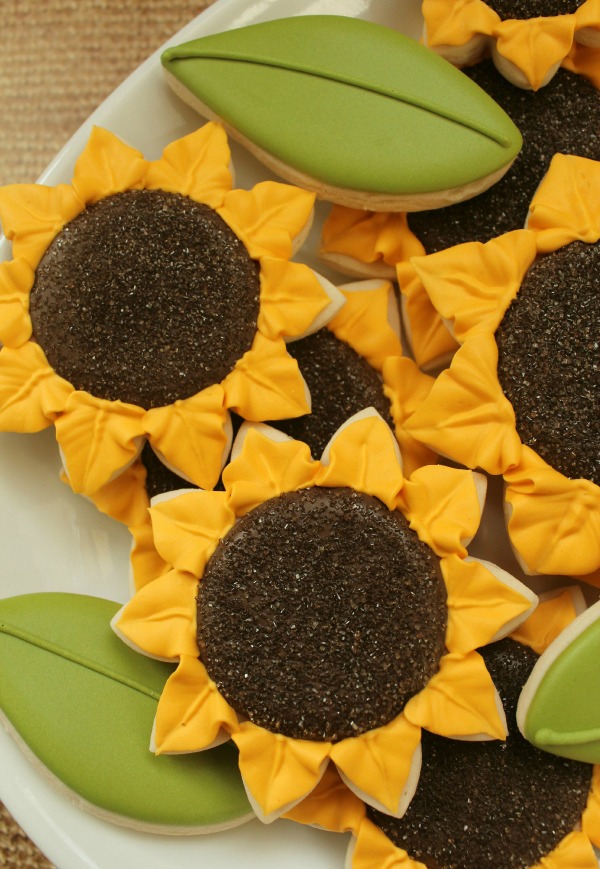
Decorated sunflower cookies are delightful sugar cookies that are shaped and decorated to resemble sunflowers. The vibrant yellow icing, combined with chocolate or brown accents, makes these cookies perfect for any occasion—from summer picnics to birthdays and even weddings. The contrast of colors not only makes these cookies visually appealing but also adds a unique flavor profile.
Why Choose Sunflower Cookies?
Sunflowers symbolize loyalty, adoration, and longevity. Making sunflower cookies can be a lovely gesture for friends and family, making them perfect for gifts or celebrations. They also lend a cheerful and sunny disposition to any event, brightening up tables and hearts.
Personal Experience
I still remember the first time I baked decorated sunflower cookies for a friend’s birthday. The pure joy on her face as she bit into the soft, sugary treat while admiring its beautiful design was priceless. That day, I decided to master this cookie art, and my journey began!
Ingredients for Delicious Sunflower Cookies
Before diving into the baking process, let’s gather all the necessary ingredients. Here’s a comprehensive list:
Basic Cookie Recipe
| Ingredient | Measurement |
|---|---|
| All-purpose flour | 3 cups |
| Granulated sugar | 1 cup |
| Butter (softened) | 1 cup |
| Eggs | 2 large |
| Baking powder | 1 teaspoon |
| Vanilla extract | 2 teaspoons |
| Salt | 1/2 teaspoon |

Decorating Ingredients
| Ingredient | Type |
|---|---|
| Yellow royal icing | For petals |
| Brown royal icing | For the center |
| Green royal icing | For leaves and stems |
| Edible glitter (optional) | For embellishment |
How to Make Decorated Sunflower Cookies
Step-by-Step Instructions
- Prepare the Cookie Dough: In a mixing bowl, cream together softened butter and sugar until light and fluffy. Add eggs and vanilla, mixing thoroughly. In a separate bowl, whisk together flour, baking powder, and salt. Gradually add the dry mixture to the wet mixture until combined. Wrap the dough in plastic wrap and refrigerate for at least one hour.
- Roll Out the Dough: Preheat your oven to 350°F (175°C). On a floured surface, roll out the chilled dough to about 1/4-inch thickness. Use a sunflower-shaped cookie cutter to cut out the cookies.
- Bake the Cookies: Place the cookies on a baking sheet lined with parchment paper and bake for 8-10 minutes or until the edges are lightly golden. Let them cool completely on a wire rack.
- Make Royal Icing: Combine powdered sugar, meringue powder, and water in a mixing bowl. Whip until the icing reaches a stiff peak consistency.
- Decorate the Cookies: Use yellow royal icing to flood the cookie petals. Once dry, pipe brown icing in the center of the cookie. Add green icing for stems and leaves. Finish with edible glitter if desired.
Tips for Perfectly Decorated Cookies
- Ensure your butter is softened to room temperature for easy mixing.
- Don’t skip chilling the dough; it helps the cookies maintain their shape when baked.
- Use piping bags for precise icing application.
- Let each layer of icing dry completely before adding another to prevent colors from bleeding.
Common Mistakes to Avoid
What Can Go Wrong?
| Common Mistake | Description | Solution |
|---|---|---|
| Cookies Spread Too Much | Dough is too warm or not chilled. | Chill the dough for longer before rolling. |
| Icing Runs Off Cookies | Royal icing too thin. | Add more powdered sugar to thicken the icing. |
| Colors Bleed Together | Layers not dried properly. | Allow each layer to dry before adding more icing. |

Healthier Alternatives
While sunflower cookies are indulgently sweet, you can modify the recipe to make it a bit healthier:
Substitutions
- Use whole wheat flour instead of all-purpose flour.
- Substitute coconut oil or unsweetened applesauce for butter.
- Try natural sweeteners like honey or maple syrup instead of granulated sugar.
Storage Tips for Decorated Sunflower Cookies
To keep your decorated cookies fresh, here are some storage tips:
- Store cookies in an airtight container at room temperature for up to one week.
- If you need to keep them for longer, consider freezing the undecorated cookies and icing them when you’re ready to serve.
Frequently Asked Questions
1. Can I use fondant instead of royal icing for decorating sunflower cookies?
Yes, fondant can be used for a smooth finish, but it won’t have the same texture and flavor as royal icing. It also requires different techniques for application.
2. How do I achieve the right consistency for royal icing?
The ideal consistency for royal icing should be similar to that of toothpaste for outlining, and a bit thinner for flooding—think of it as pouring cream.
3. Can I make these cookies vegan?
Absolutely! You can replace eggs with flaxseed meal or commercial egg replacers, and use vegan butter or coconut oil instead of regular butter.
4. What occasions are sunflower cookies suitable for?
Sunflower cookies are perfect for birthdays, weddings, baby showers, or even as a simple treat to brighten someone’s day.
5. How can I make sunflower cookies more colorful?
Feel free to add food coloring to your royal icing for vibrant hues. Gel food colors work best for bold, bright shades!

Conclusion
Creating decorated sunflower cookies can be a rewarding and enjoyable experience that brings happiness to both the baker and the lucky recipients. I hope this guide has inspired you to try your hand at baking these delightful treats. Remember, the secret ingredient is always a pinch of love!
Now, gather your ingredients, put on your apron, and let’s get baking!