Welcome to the enchanting world of Fabergé egg decorating! If you’ve ever admired the intricate designs and luxurious details of a Fabergé egg, you’re in the right place. In this comprehensive guide, we’ll explore the history of Fabergé eggs, the materials and techniques involved in their creation, and how you can bring a touch of this elegance into your own home. So, grab your crafting supplies, and let’s get started!
The History of Fabergé Eggs
The story of Fabergé eggs begins in Russia in the 19th century when Peter Carl Fabergé was commissioned by Tsar Alexander III to create an Easter egg for his wife, Empress Maria Feodorovna. This egg, known as the “Imperial Egg,” was adorned with exquisite craftsmanship and hidden surprises, setting the stage for future creations. Over the years, Fabergé created a total of 50 Imperial eggs, each more lavish than the last.
Significance of Fabergé Eggs
Fabergé eggs are not just beautiful objects; they represent a fusion of art and craftsmanship. Each egg embodies the opulence of the Russian royal court and showcases the meticulous attention to detail that Fabergé was known for. Today, these eggs are treasured as masterpieces and coveted by collectors around the world.

Essential Materials for Decorating Eggs Fabergé Style
Creating your own Fabergé-style eggs requires a variety of materials. Here’s a comprehensive list to get you started:

- Base Egg: Choose from wooden, ceramic, or even real eggs depending on your preference.
- Paint: Use high-quality acrylic paints for vibrant colors that resemble the original Fabergé eggs.
- Gold and Silver Leaf: These metallic sheets add a luxurious touch to your design.
- Beads and Jewels: Incorporate rhinestones, pearls, and other embellishments for added glamour.
- Glue: A strong adhesive is necessary for attaching embellishments.
- Brushes: Use a variety of brush sizes for detailed painting and finishing touches.
- Sealer: Protect your finished egg with a clear acrylic sealer.
Choosing the Right Base Egg

When selecting a base egg, consider the following:
| Type of Egg | Material | Pros | Cons |
|---|---|---|---|
| Wooden Egg | Wood | Durable, easy to paint | May not have the same appeal as real eggs |
| Ceramic Egg | Ceramic | Beautiful finish, heavy | Fragile, heavier to work with |
| Real Egg | Egg shell | Authentic look, lightweight | Fragile, requires careful handling |
Techniques for Decorating Eggs Fabergé Style
Now that you have your materials, let’s dive into the techniques that will help you create a stunning Fabergé-style egg.
1. Painting the Base
The first step in decorating your egg is to paint the base. Choose a vibrant color that you love and apply a base coat with a large brush. Allow it to dry completely before moving on to the next step.

2. Adding Metallic Accents
Once the base coat is dry, carefully apply gold or silver leaf to different areas of your egg. Use a fine brush to dab glue where you want the leaf to adhere. Once the glue is tacky, gently press the leaf onto the surface. This technique will add an elegant touch reminiscent of the original Fabergé designs.

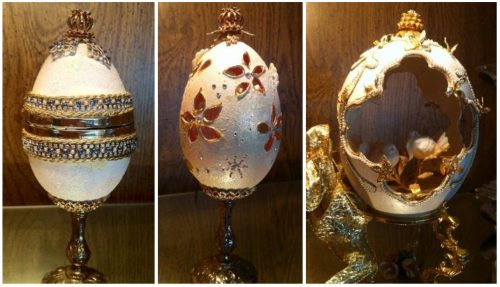
3. Embellishing with Beads and Jewels
Next, it’s time to get creative! Use small amounts of glue to attach beads, rhinestones, and other embellishments around your egg. Think about design elements you want to incorporate, such as floral patterns or geometric shapes, and arrange your jewels accordingly.
Design Inspiration
Look for inspiration from the original Fabergé eggs. Some popular themes include:
- Floral motifs
- Animal designs
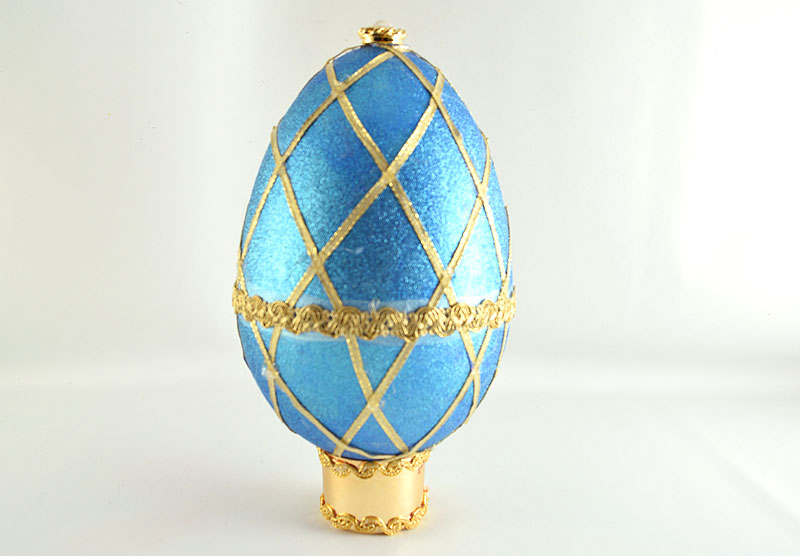
- Geometric patterns
4. Sealing Your Masterpiece
Once you’re satisfied with your design, it’s important to protect your work. Apply a clear acrylic sealer to the entire egg, ensuring even coverage. This will help preserve your creation for years to come.
Common Mistakes to Avoid
As you embark on your egg-decorating journey, here are some common pitfalls to avoid:
- Skipping the Primer: Always use a primer on wooden or ceramic eggs for better paint adhesion.
- Overloading on Glue: Use only a small amount of glue for embellishments to avoid mess.
- Ignoring Drying Times: Be patient and allow each layer of paint and glue to dry completely before moving on.
Pros and Cons of Fabergé-Style Egg Decorating
Before you get started, here’s a quick overview of the pros and cons of this delightful hobby:
| Pros | Cons |
|---|---|
| Encourages creativity and self-expression | Can be time-consuming |
| Creates beautiful home decor | Requires some investment in materials |
| Great for gifting | Fragile creations, especially with real eggs |
Frequently Asked Questions (FAQs)
What materials do I need to start decorating Fabergé-style eggs?
You’ll need a base egg (wooden, ceramic, or real), acrylic paints, gold and silver leaf, embellishments (like beads and jewels), glue, brushes, and a sealer.
Is it difficult to paint a Fabergé-style egg?
While it takes practice, painting a Fabergé-style egg is enjoyable and can be mastered with patience. Start with simple designs and work your way up to more intricate patterns.
Can I use real eggs for my Fabergé-style decorations?
Yes, you can use real eggs! However, be sure to hollow them out carefully and handle them gently, as they are fragile.
How long does it take to create a Fabergé-style egg?
The time varies depending on the complexity of your design, but you should plan for several hours, including drying time between layers of paint and glue.
Conclusion
Decorating eggs Fabergé style is a beautiful, creative endeavor that allows you to express your artistic flair while paying homage to a timeless art form. Whether you’re planning to display your exquisite creations or gift them to loved ones, each egg you decorate will be a unique masterpiece filled with your personal touch. So why wait? Gather your materials, unleash your creativity, and let your imagination take flight!
Happy decorating!