Decorating slips pottery is an ancient art form that combines creativity with technical skill. Having dabbled in pottery for years, I can attest to the joy and satisfaction that comes from transforming a simple clay piece into a personalized masterpiece. This article is your ultimate guide to understanding, applying, and mastering various slip decorating techniques.
What is Slip in Pottery?
Slip is a mixture of clay and water that is used to decorate pottery. It is versatile and can be applied in various forms to achieve different textures and colors. Understanding the foundational elements of slip is essential for any potter looking to elevate their work.
Types of Slip
There are primarily two types of slips used in pottery:
- Colored Slip: Achieved by adding colorants such as oxides or stains to natural clay. This type allows for vibrant designs.
- Engobe: A type of slip that is refined for surface application, often used for covering the entire piece before glazing.
Understanding the Basics of Decorating with Slip
Before diving into advanced techniques, it’s important to understand the basic methods of applying slip to pottery.
Preparation of Slip
Creating the perfect slip involves mixing clay with water and optionally adding colorants. You want a consistency that allows for easy application without being too runny.
Step-by-Step Slip Preparation
- Start with dry clay and gradually add water.
- Mix thoroughly to avoid lumps.
- Test the consistency on a piece of scrap clay.
Application Techniques
Here are some popular methods for applying slip to your pottery:
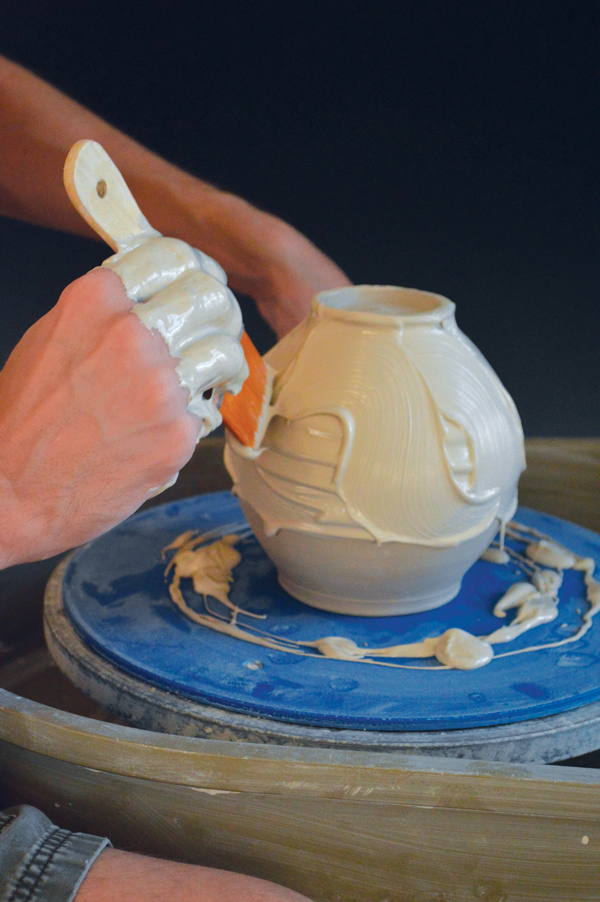
1. Brush Application
This is one of the most straightforward techniques, where you apply slip using a brush for detailed designs.
2. Slip Trailing
Slip trailing involves using a squeeze bottle or a piping bag to create raised designs on your pottery.
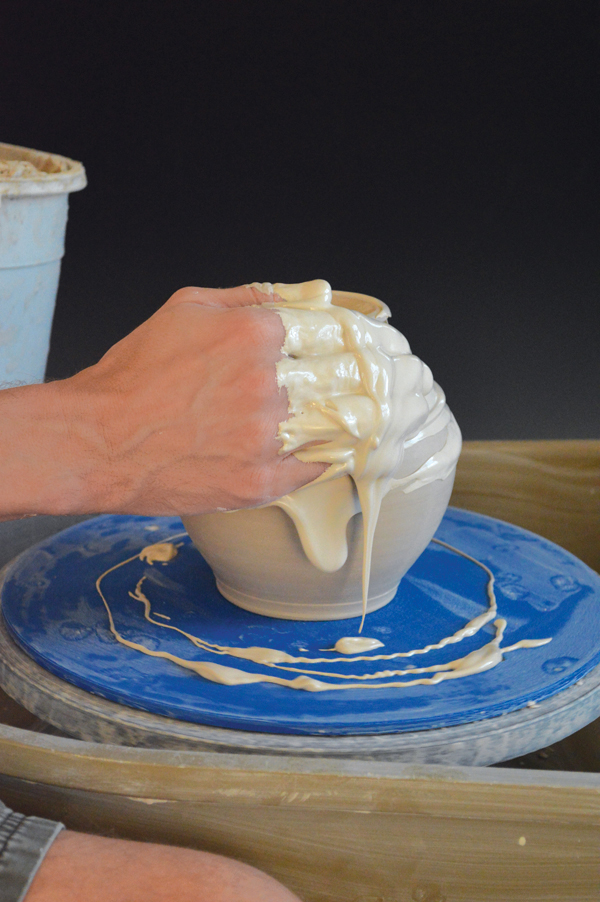
3. Dipping
Dipping involves immersing your piece in slip, allowing for an even coating.
4. Spraying
A more advanced technique, spraying allows for even distribution and interesting textures.
The Benefits of Using Slip in Pottery
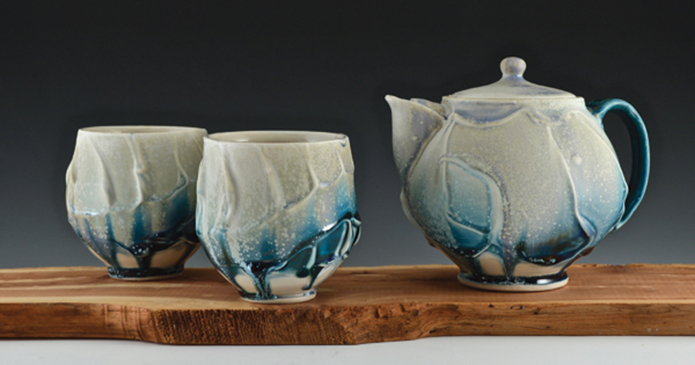
Using slip in your pottery projects not only enhances the aesthetic appeal but also adds functionality. Below are some key benefits:
- Versatility: Slip can be colored and textured in myriad ways, allowing for infinite creativity.
- Adhesion: Slip can help bind various materials together, making it a great choice for mixed media pottery.
- Surface Decoration: It adds depth and visual interest that simple glazing cannot achieve.
Popular Slip Decoration Techniques
Let’s dive into some popular techniques I’ve found particularly effective in my own pottery journey.
1. Sgraffito
This technique involves scratching through a layer of slip to reveal the clay body underneath, creating intricate designs.
How to Achieve Sgraffito
- Apply a layer of colored slip and allow it to dry slightly.
- Using a sharp tool, carefully scratch your design into the slip.
2. Marbling
Marbling creates a beautiful swirling effect by mixing different colored slips together.
Steps for Marbling Slip
- Prepare two or more colors of slip.
- Pour the slips onto the pottery surface and use a stick to swirl them together.
3. Stamping
Using stamps to apply slip can yield stunning results, creating texture and patterns with ease.
How to Stamp with Slip
- Prepare your slip and choose your stamp.
- Apply the slip to your ceramic piece.
- Press the stamp firmly into the slip.

Tips for Successful Slip Decorating
To achieve the best results with your slip decorating, consider these tips:
- Practice on test pieces before committing to your final work.
- Maintain a consistent texture when mixing slips.
- Experiment with different application methods to find what works best for you.
Pros and Cons of Slip Decoration
| Pros | Cons |
|---|---|
| Enhances creative possibilities | Can be time-consuming |
| Variety of techniques | Requires practice for mastery |
| Can add texture and depth | May need additional firing considerations |

Tools and Materials for Slip Decorating
Having the right tools can make a significant difference in your pottery experience. Here’s a list of essentials:
- Brushes of various sizes
- Slip trailing bottles
- Stamps and textures
- Spraying equipment (airbrush or spray bottle)
FAQs about Decorating Slips Pottery
What is the difference between slip and glaze?
Slip is a liquid mixture of clay and water, used primarily for decoration, while glaze is a glassy coating that fuses to pottery during firing.

Can I use colored slip on already fired pottery?
Yes, but it typically requires a second firing to set the slip properly.
Is it necessary to use a specific type of clay for slip decoration?
While it’s not required, using a compatible clay body can improve adhesion and finish.

How do I clean my tools after slip decorating?
Rinse your tools promptly after use to prevent slip from hardening and damaging them.
Can slip be used on all types of pottery?
Slip can be used on most clay bodies, but testing on your specific clay is advisable for optimal results.
Conclusion
Decorating slips pottery is not just a technique; it’s a journey that can lead to incredible personal expression and artistic satisfaction. Whether you’re just starting or looking to refine your skills, I hope this guide serves as a valuable resource. Remember, the key to mastering slip decoration is practice and perseverance. Happy potting!