Decorating stocking cookies is one of my favorite holiday traditions. The joy of creating beautiful, edible decorations while embracing the festive spirit is truly unparalleled. As an avid baker, I’ve experimented with different techniques, ingredients, and designs to perfect my stocking cookie decorations. In this comprehensive guide, I’ll share tips, techniques, and a sprinkle of personal anecdotes to make your cookie decorating experience enjoyable and memorable. Let’s dive in!
Why Stocking Cookies are a Holiday Favorite
Stocking cookies are not just delicious treats; they are also a canvas for creativity. These cookies symbolize the joy of giving and sharing during the holiday season. Here’s why they stand out:
- Versatile Design: You can play with various colors, patterns, and styles.
- Amazing Gifts: Stocking cookies make perfect gifts for friends, family, and neighbors.
- Fun Activity: Decorating cookies can be a joyful family activity that everyone can enjoy.
Essential Tools for Decorating Stocking Cookies
Having the right tools is crucial for a successful decorating session. Here’s a list of essential tools I consider must-haves:
| Tool | Description |
|---|---|
| Piping Bags | Used to apply icing precisely; the disposable ones save on cleanup! |
| Food Color Gel | These colors are much more vibrant and concentrated than liquid food coloring. |
| Turntable | A rotating base that makes icing and decorating smoother and more accessible. |
| Offset Spatula | Great for spreading icing evenly across the cookies. |
| Decorating Tips | Different tips allow for various icing effects (e.g., stars, flowers, or fine lines). |
Choosing the Perfect Cookie Recipe
Classic Sugar Cookie Recipe for Decorating
The base of your decorating adventure is the cookie itself. A classic sugar cookie recipe is ideal because of its sturdy texture, which holds up well during decorating. Here’s a quick recipe to get you started:
Ingredients
- 2 ¾ cups all-purpose flour
- 1 teaspoon baking soda
- ½ teaspoon baking powder
- 1 cup unsalted butter, softened
- 1 ½ cups white sugar
- 1 egg
- 1 teaspoon vanilla extract
- 3-4 tablespoons of milk (for consistency)
Instructions
- Preheat your oven to 375°F (190°C).
- In a bowl, cream together the butter and sugar until smooth. Beat in the egg and vanilla.
- Combine the flour, baking soda, and baking powder; gradually add to the creamed mixture.
- Roll rounded teaspoonfuls of dough into balls, and place onto ungreased cookie sheets.
- Bake 8 to 10 minutes in the preheated oven or until golden. Let cool on wire racks.
Understanding Icing Types for Stocking Cookie Decor
Choosing the right icing is vital for decorating cookies effectively. Below are the common types of icing:
Royal Icing
This is a classic choice due to its hardening properties, perfect for intricate designs.
- Pros:
- Dries hard, allowing for stacking.
- Great for detailed designs.
- Cons:
- Requires a bit of skill to achieve the right consistency.
- Can be a bit tricky to color evenly.
Buttercream Icing
Rich and creamy, buttercream is another popular option, especially for those who prefer a softer cookie.
- Pros:
- Easy to spread and work with.
- Delicious flavor and texture.
- Cons:
- Doesn’t dry hard, making stacking difficult.
- Can melt in warm conditions.
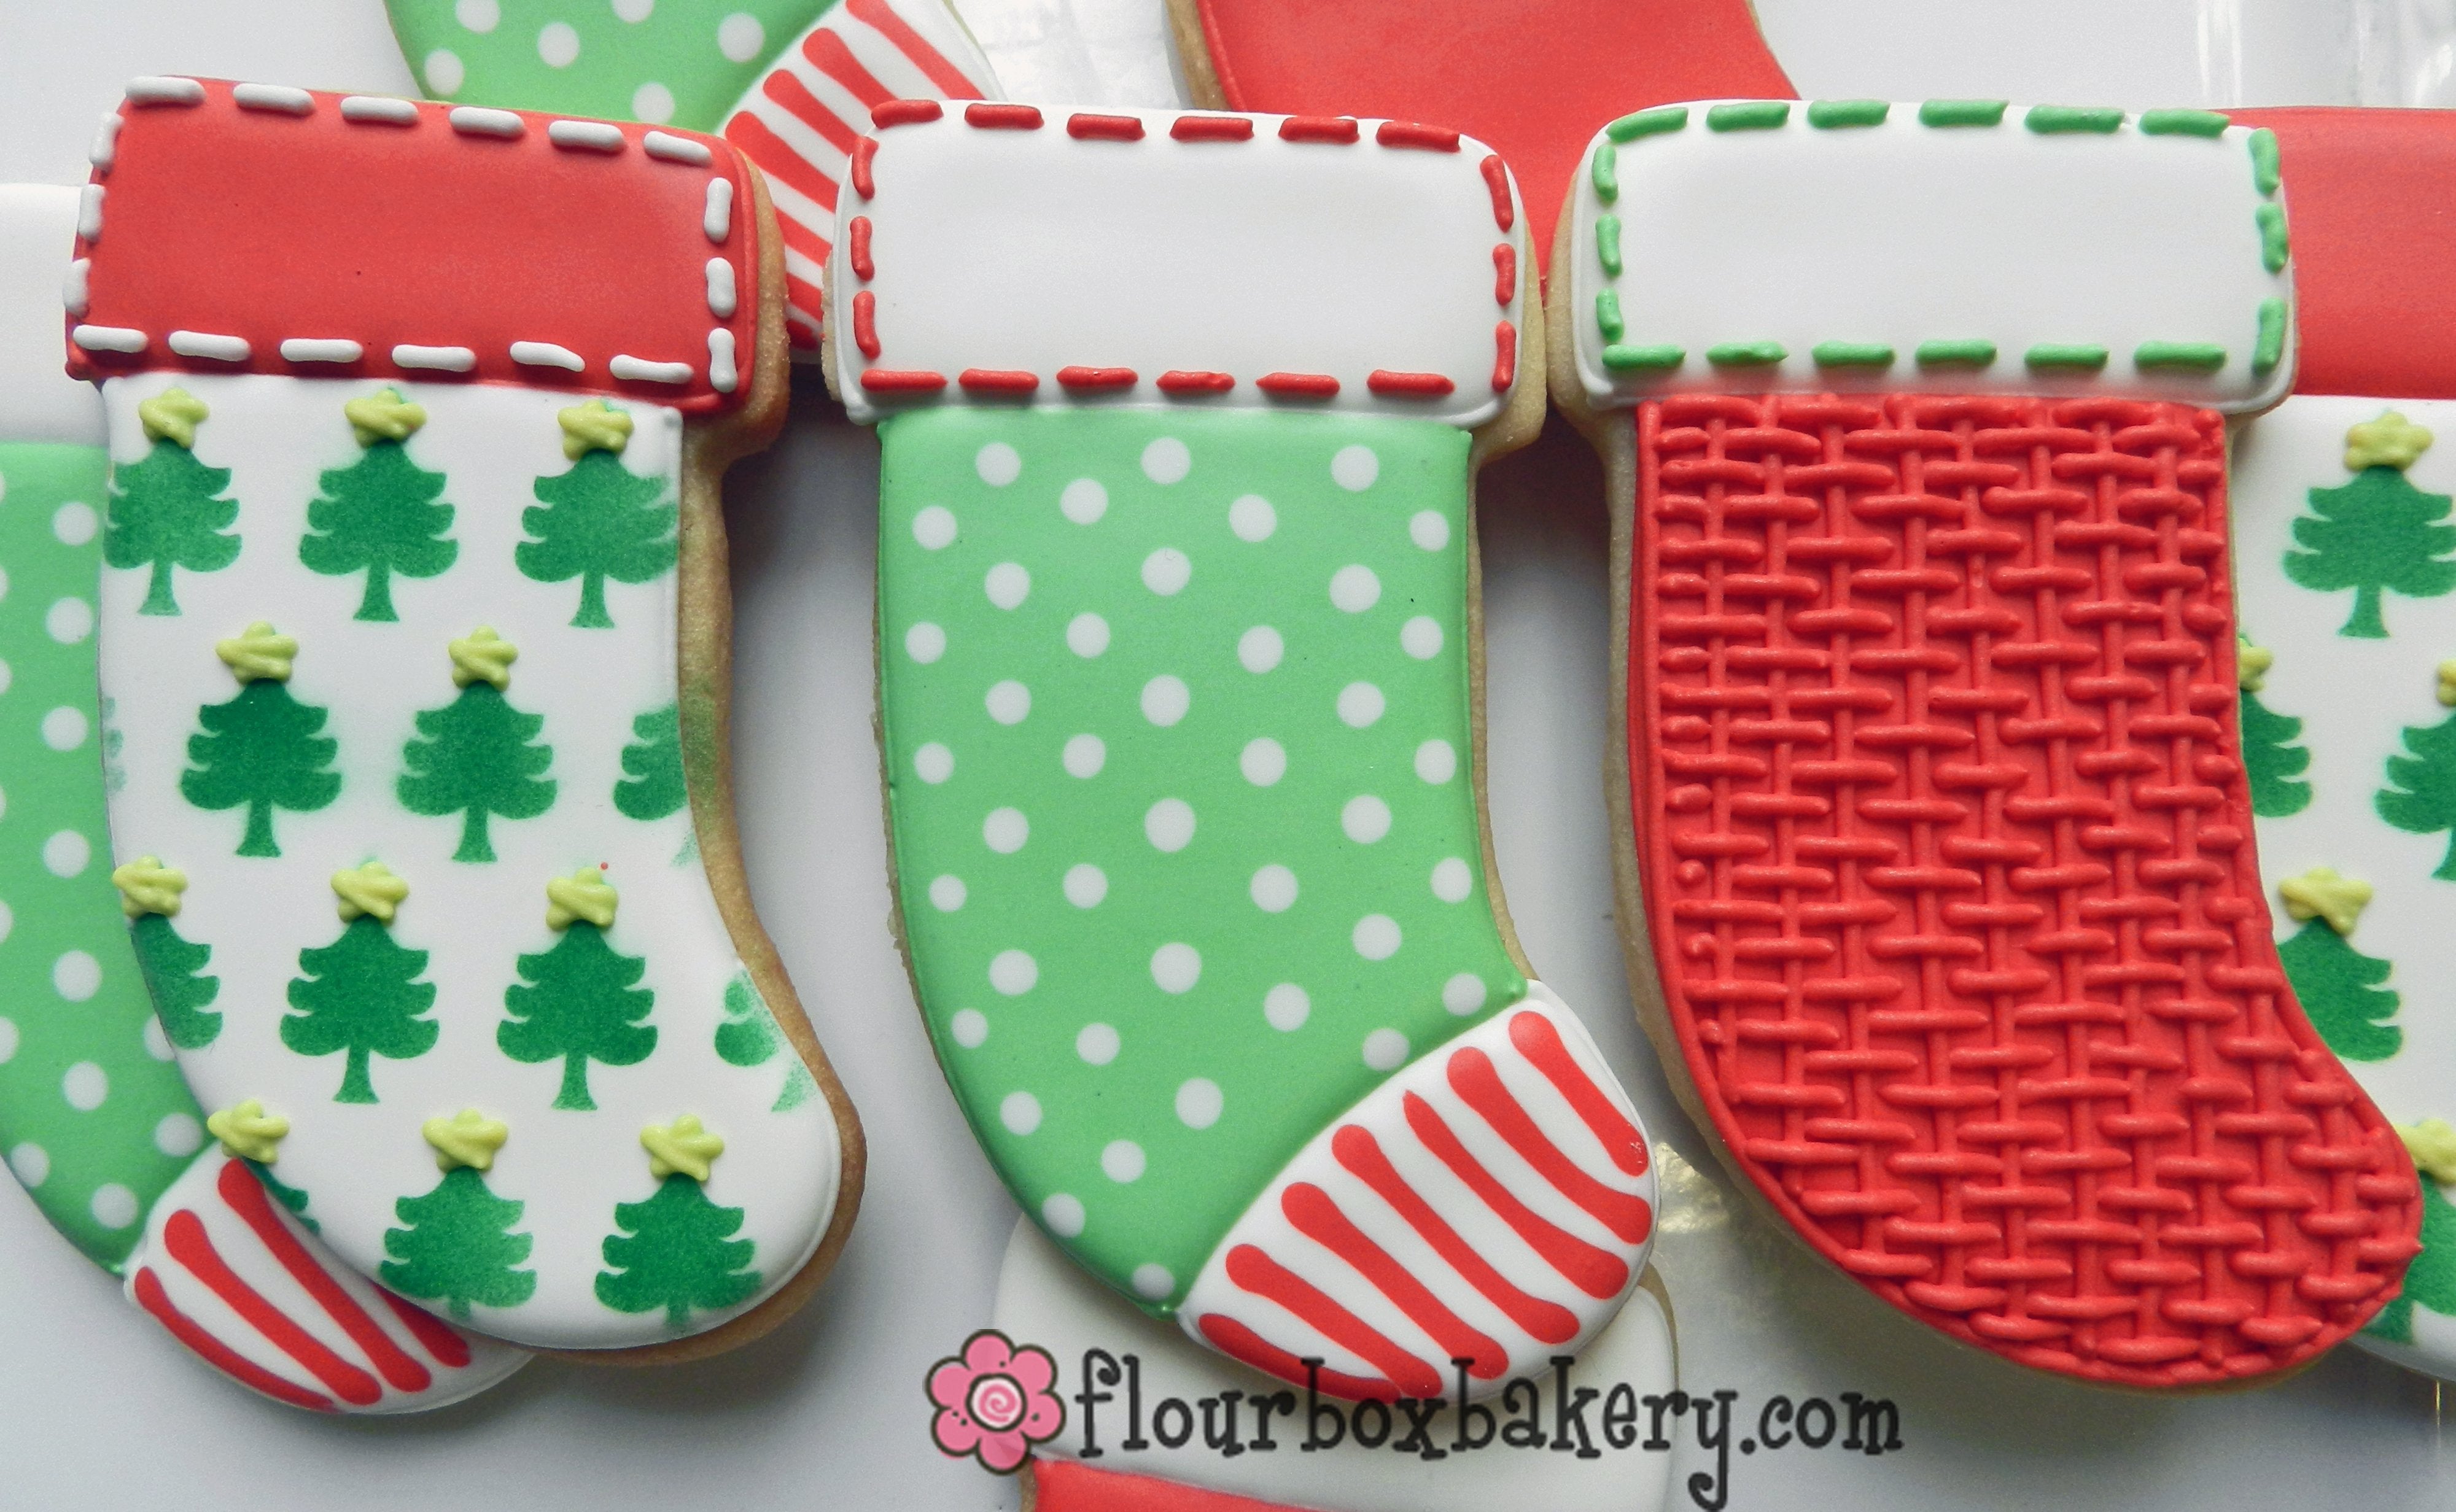
Techniques for Decorating Stocking Cookies
Now it’s time to put your skills to the test! Here are some techniques that I’ve found to be especially effective when decorating stocking cookies.

Basic Outlining Technique
This technique involves piping a line of icing around the edges of your cookie. It creates a barrier to hold in flood icing.
- Fill your piping bag with royal icing and cut a small tip off.
- Pipe along the edges to form an outline.
- Let it dry slightly before flooding the inside.
Flooding Technique
Flooding is where you fill the outlined area with thinned icing.
- Add a bit of water to your royal icing until it reaches a pancake batter consistency.
- Use a squeeze bottle or piping bag to fill the outlined cookie.
- Use a toothpick to spread the icing evenly, ensuring there are no air bubbles.

Marbling Effect
This technique creates beautiful swirls and is perfect for a fun, festive look.
- Flood the cookie with a base color.
- Add dots of different colors on top.
- Use a toothpick to swirl the colors together gently.
Creative Ideas for Stocking Cookie Designs
Let’s unleash your creativity! Here are some exciting design ideas that you can try.

Classic Red and Green
The holiday colors never go out of style. Use red and green royal icing for a timeless look.
Snowman Stocking Cookies
Add a snowman face to your stocking cookie for a whimsical touch!
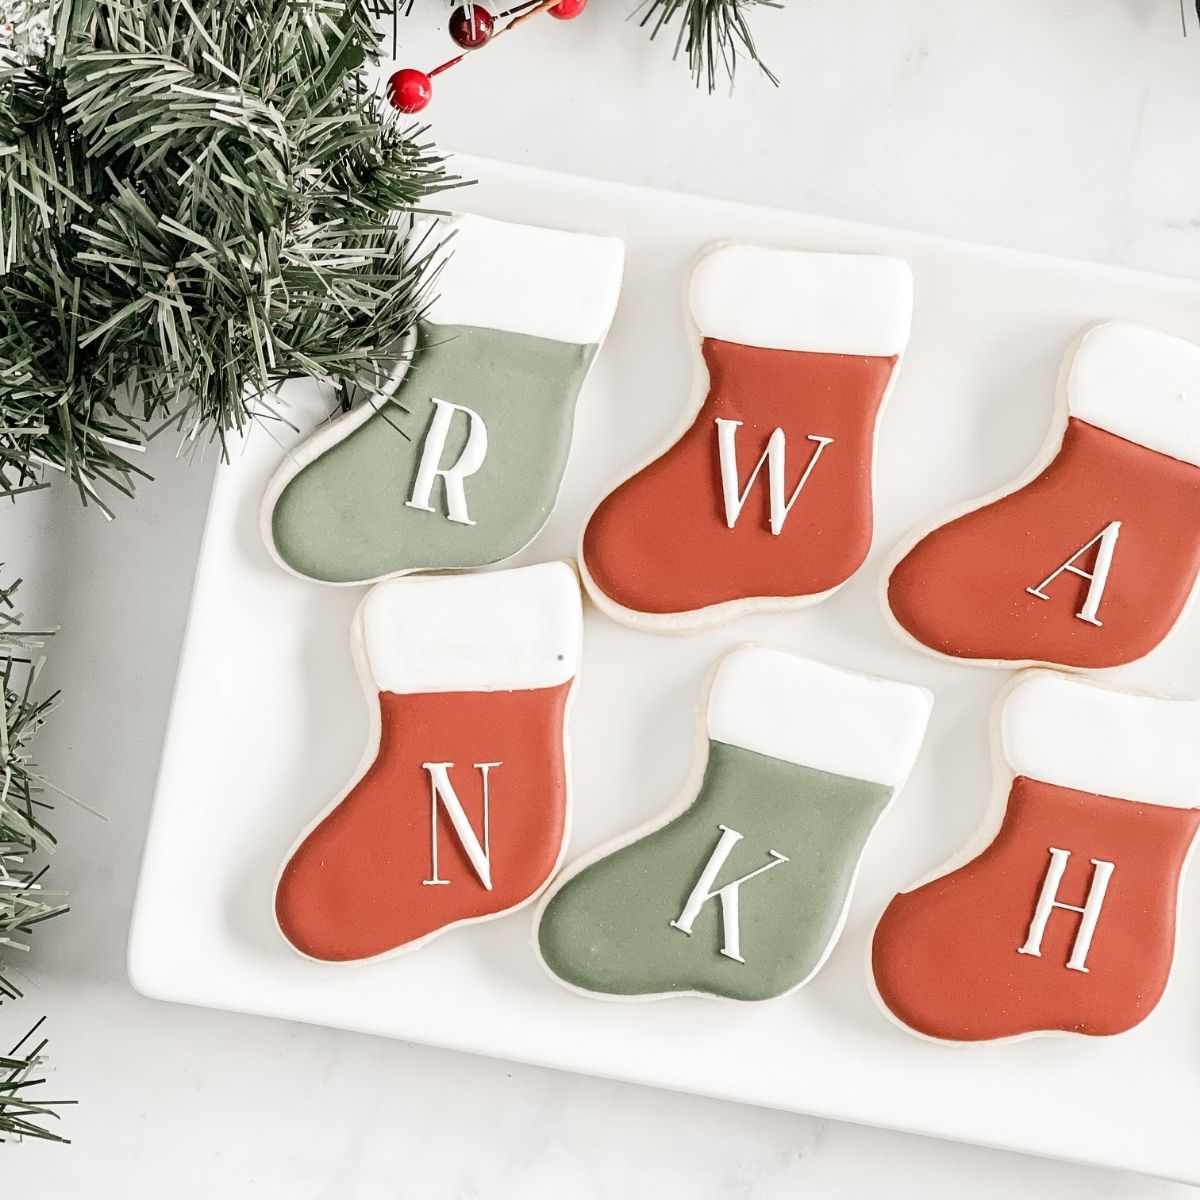
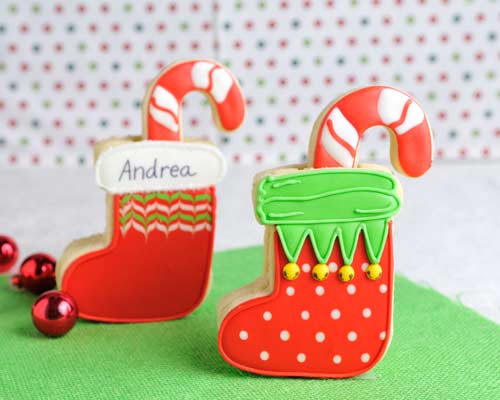
Personalized Touch
Use edible markers to write names on each stocking cookie. It’s a delightful way to customize your treats!
Tips for Successful Cookie Decorating
Throughout my decorating journey, I’ve learned some tips that can help you achieve the best results:
- Always let your cookies cool completely before decorating.
- Practice your piping skills on parchment paper before decorating the cookies.
- Be patient and let icing dry between decorating stages.
- Have all your tools organized and ready before you start.
Storing and Packaging Your Stocking Cookies
Once you’ve decorated your cookies, you’ll want to store them properly to maintain freshness and presentation.
Storing Tips
- Keep cookies in an airtight container at room temperature.
- If the weather is humid, consider adding a piece of bread to the container to absorb moisture.
Packaging for Gift Giving
Here’s how you can beautifully package your cookies:
- Use clear plastic bags tied with festive ribbons.
- Add a personalized tag for a special touch.
Conclusion: Your Stocking Cookies Await!
Decorating stocking cookies is not just about the final product; it’s about the memories created along the way. I hope this guide inspires you to get baking and decorating this holiday season! There is no right or wrong in cookie decorating—it’s all about having fun and expressing your creativity.
FAQs about Decorating Stocking Cookies
What type of icing should I use for decorating stocking cookies?
Both royal icing and buttercream icing can be used, but royal icing is preferred for detailed designs as it dries hard and allows for stacking.
How do I achieve a smooth finish on my cookies?
Using a flood technique with thinned royal icing will help you achieve a smooth finish. Make sure to use a toothpick to eliminate air bubbles.
Can I make stocking cookies in advance?
Yes! You can bake and decorate your stocking cookies days in advance. Just store them in an airtight container to maintain freshness.
What’s the best way to transport decorated cookies?
Package them in individual bags or sturdy boxes to prevent them from breaking during transportation.
How do I clean my piping tools?
Soak your piping bags and tools in warm, soapy water to dissolve any remnants of icing. Rinse and let them air dry.