Introduction
As someone who loves home decor and renovation, I’ve always found that small details can make a big difference. One of the most impactful elements you can introduce to your home is decorative wood molding. It enhances the aesthetic appeal of your walls and adds a touch of elegance and character. In this comprehensive guide, I’ll walk you through everything you need to know about decorative wood molding for walls, from types to installation techniques and design inspirations.
What is Decorative Wood Molding?
Decorative wood molding refers to strips of wood that are used to adorn walls, ceilings, and even furniture. They can be relatively simple or highly detailed, serving both functional and decorative roles. Molding can enhance architectural features and add depth, making rooms feel more complete.
Types of Decorative Wood Molding
Choosing the right type of wood molding for your home depends largely on your personal style and the overall design theme of your space. Here’s a closer look at some popular types:
Crown Molding
Crown molding is placed at the junction of walls and ceilings, creating a smooth transition and adding a sense of height to the room.
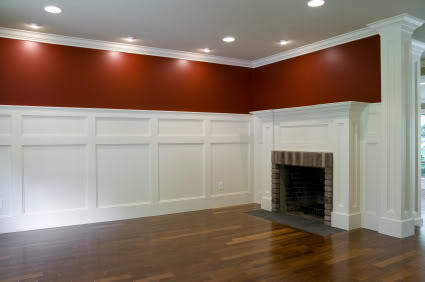
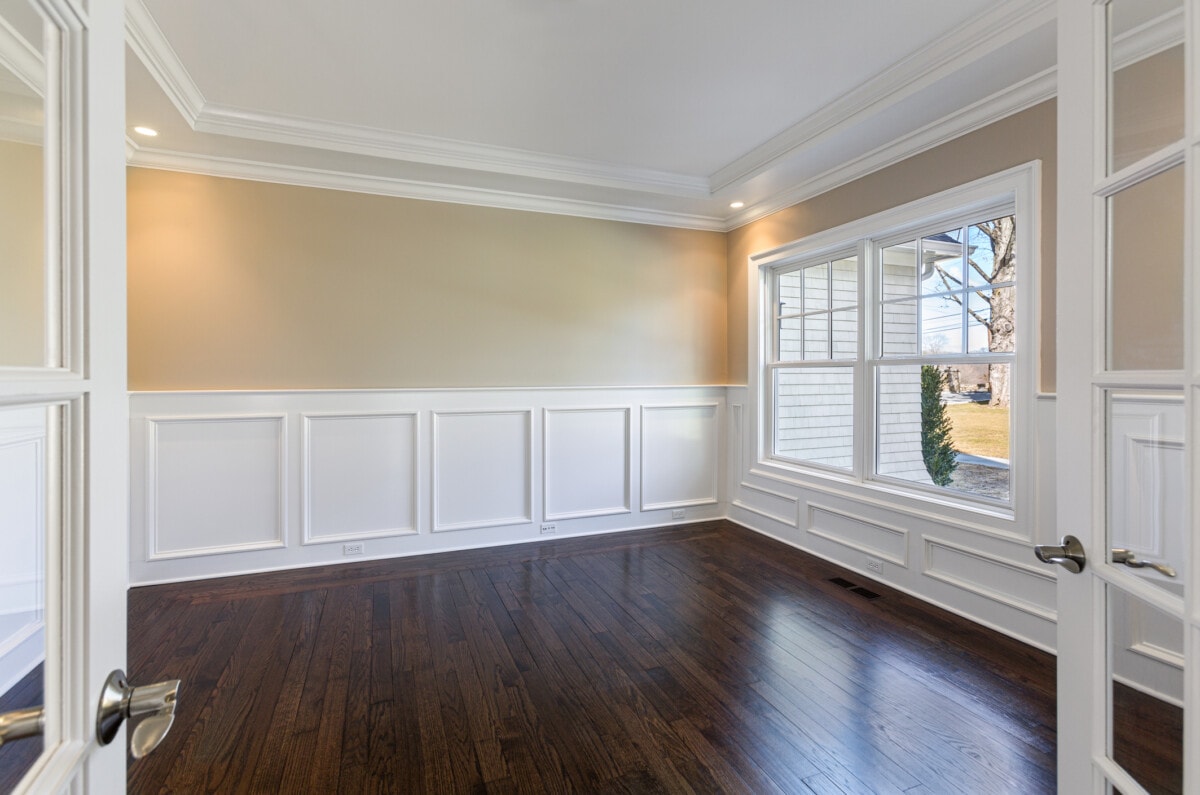
Base Molding
Base molding, or baseboards, runs along the bottom of the walls. It protects your walls and adds a polished finish to the floor.

Chair Rail Molding
This type of molding is installed at a height of about 30-36 inches, protecting walls from damage from chairs. It also provides an opportunity for color or texture contrast.
Picture Rail Molding
Picture rail molding is designed to hang pictures without damaging the walls. It’s typically found near the ceiling and can complement crown molding beautifully.

Casing Molding
Casing is used around doors and windows to create a finished look and provide a transition between different surfaces.
Comparison Table of Molding Types
| Type | Description | Best For |
|---|---|---|
| Crown Molding | Decorative trim at the top of walls. | Adding height and elegance. |
| Base Molding | Trim at the bottom of walls. | Finishing floors and protecting walls. |
| Chair Rail Molding | Horizontal strip at chair height. | Protection and visual interest. |
| Picture Rail Molding | Held near the ceiling for hanging pictures. | Art displays without wall damage. |
| Casing Molding | Surrounds doors and windows. | Creating a polished look. |

Benefits of Using Decorative Wood Molding
Incorporating decorative wood molding into your space offers numerous advantages:
- Aesthetic Appeal: Molding enhances the overall look of your rooms, creating a sense of sophistication.
- Increased Home Value: Well-installed molding can boost the resale value of your home.
- Customization: Available in various styles, colors, and materials, molding can be customized to suit your decor.
- Protection: Molding also protects your walls from wear and tear, especially in high-traffic areas.
- Visual Structure: It creates a sense of structure and design flow within a room.
Installation Process for Decorative Wood Molding
Installing wood molding can seem daunting, but with the right tools and a step-by-step approach, it can be a manageable DIY project. Here’s how I installed molding in my own home:
Tools and Materials Needed
- Measuring tape
- Chop saw or miter saw
- Nail gun or hammer and finishing nails
- Wood glue
- Wood filler
- Sandpaper
- Paint or stain
Step-by-Step Installation Guide
- Measure: Start by measuring the length of the walls where the molding will be installed.
- Cut: Use a miter saw to cut the molding at 45-degree angles for corners.
- Attach: Position the molding on the wall and use a nail gun or hammer to secure it. If using adhesive, apply wood glue to the back of the molding before attaching.
- Fill: Fill any nail holes or gaps with wood filler, allowing it to dry completely.
- Sand: Sand the filled areas until smooth and flush with the molding surface.
- Paint or Stain: Finish the molding with paint or stain, allowing sufficient drying time.
Common Mistakes to Avoid
- Neglecting to measure multiple times before cutting.
- Not accounting for the wall’s unevenness.
- Using the wrong type of adhesive for your molding material.
Decorative Wood Molding Design Ideas
Now that you know the basics of molding, let’s discuss some creative ways to incorporate it into your home design:
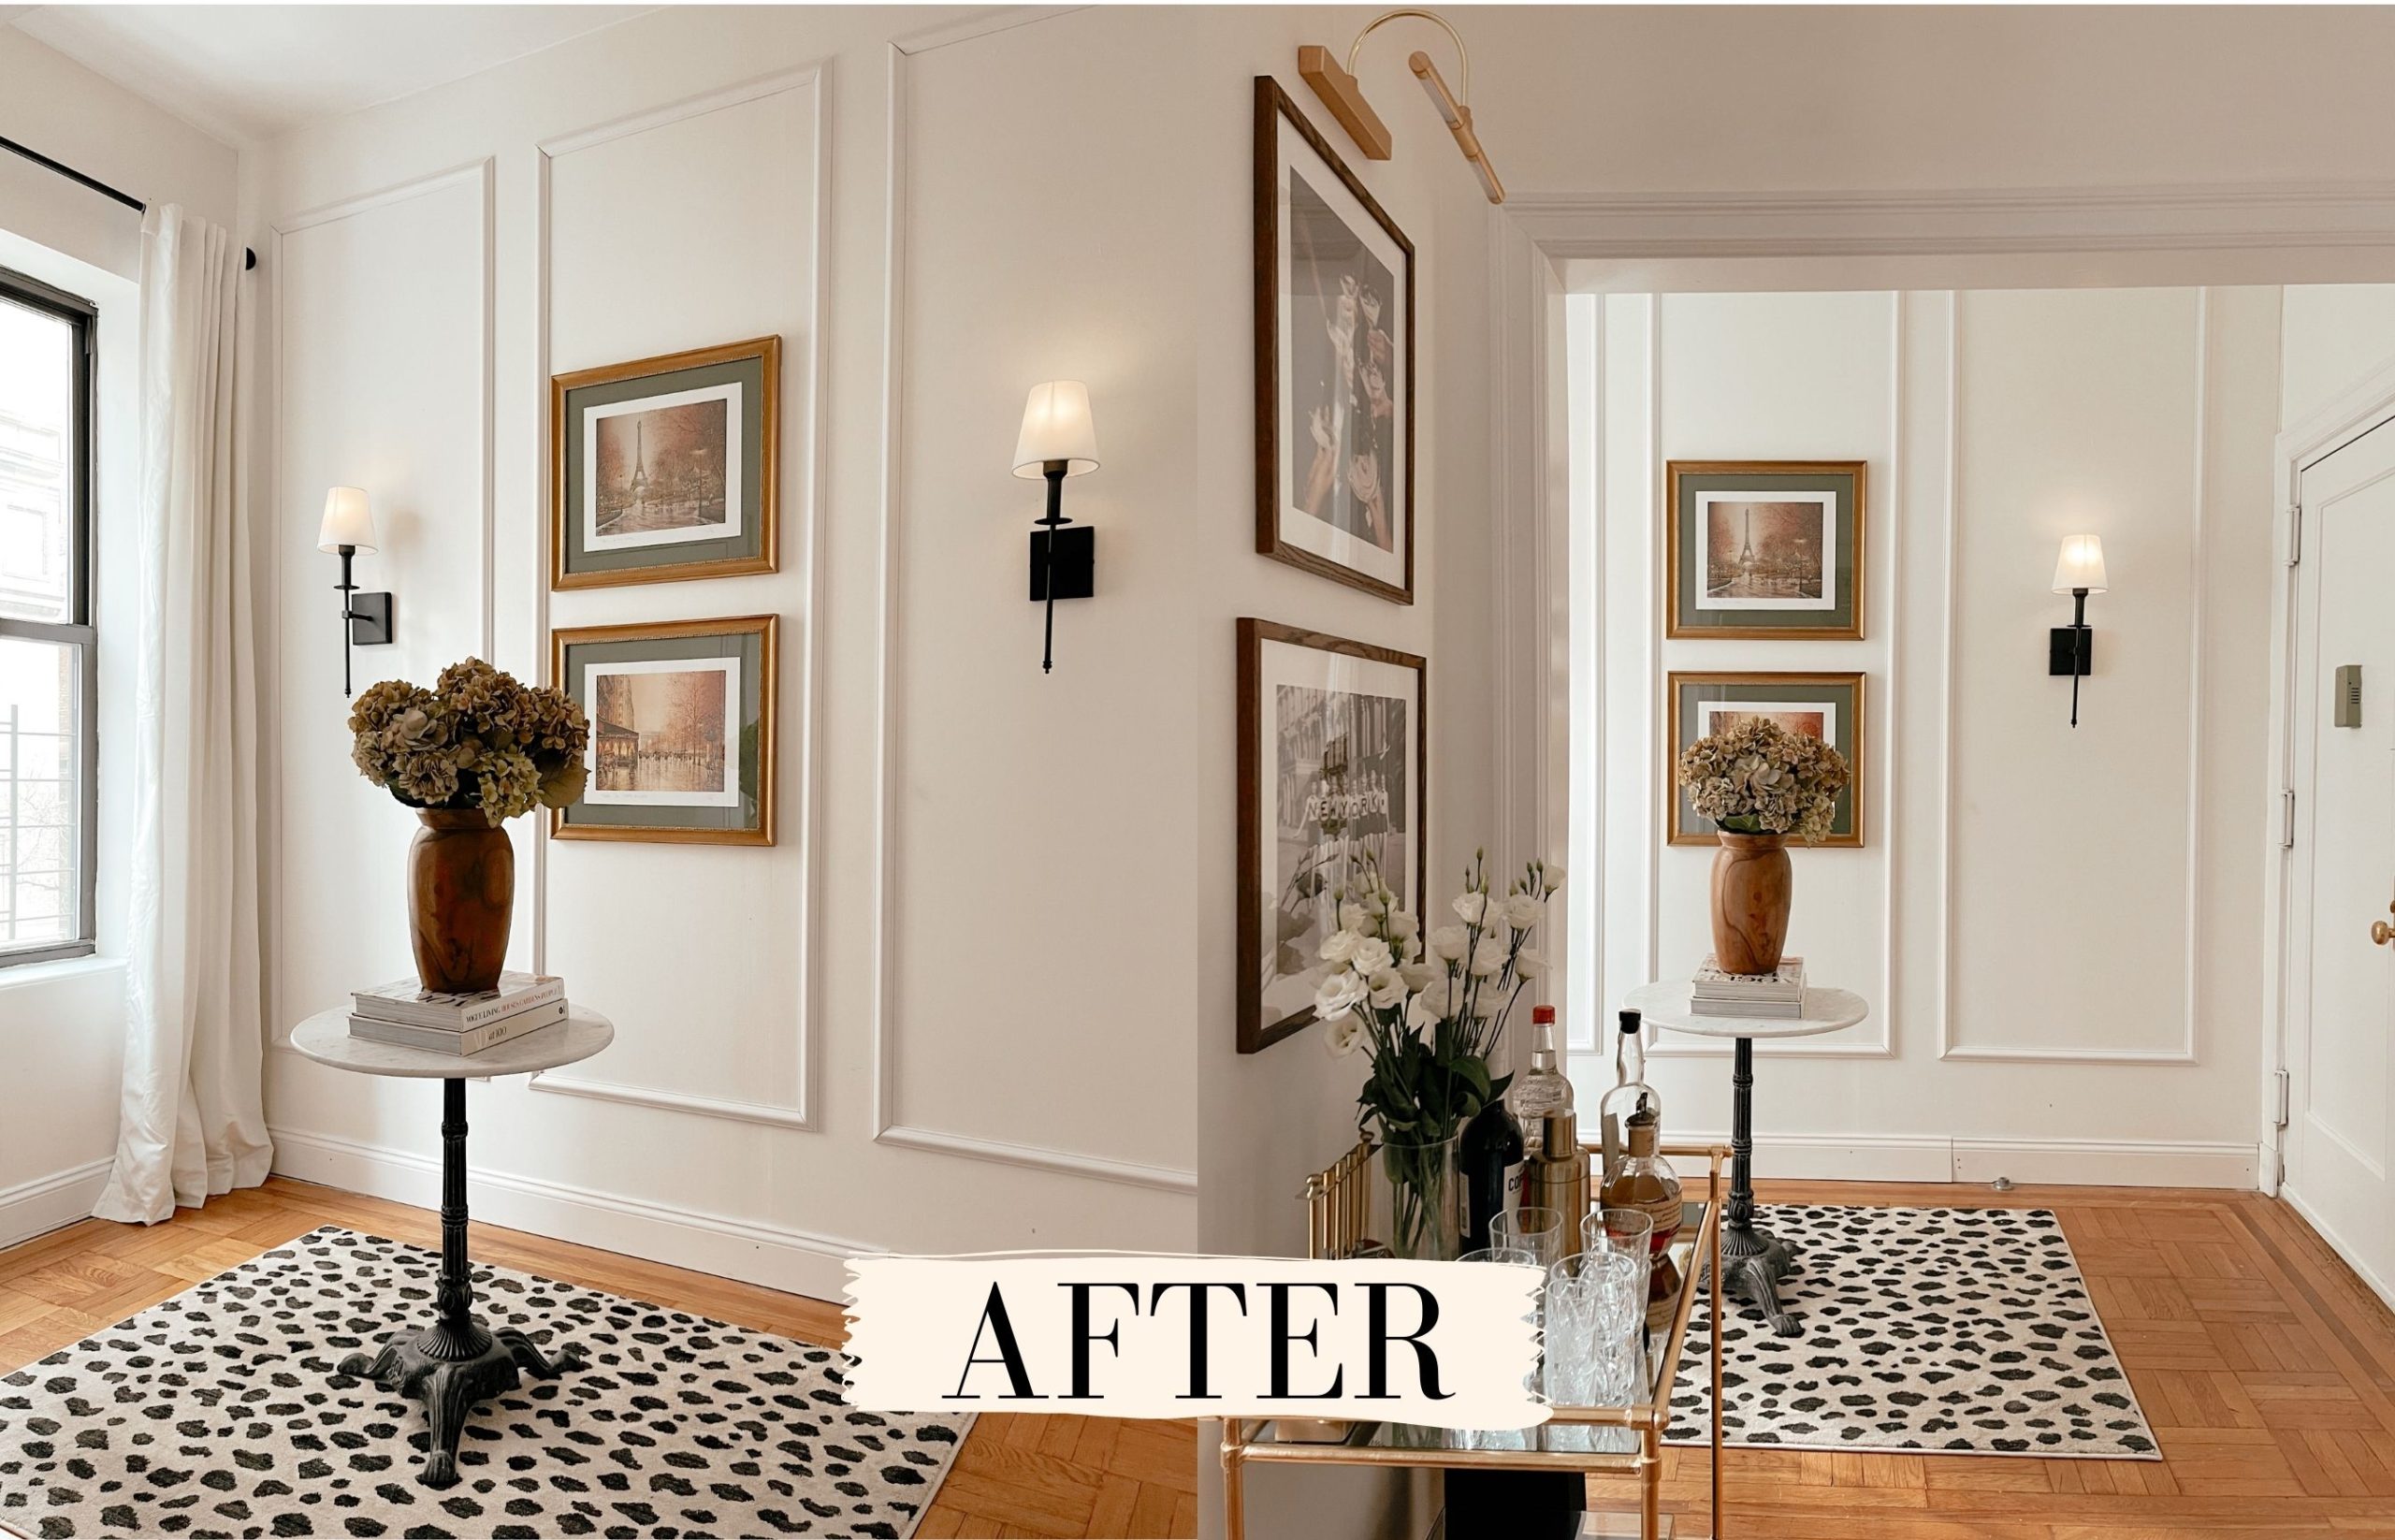
Creating a Feature Wall
Using molding to create geometric shapes or a grid pattern can transform a plain wall into an eye-catching feature. I did this in my living room, adding depth and a custom touch.
Combining Different Types of Molding
Mixing crown molding with wainscoting or picture rail can add visual interest and elegance. Consider painting each type a contrasting color to highlight the differences.
Incorporating Lighting
Installing LED strip lights behind crown molding can create a beautiful ambiance. This trick can make your ceiling look higher and your space more inviting.
Using Molding on Ceilings
Don’t forget about ceiling molding! It can make a room feel cozier and more luxe. I added crown molding to my dining room ceiling, which instantly elevated the space.
Maintenance Tips for Decorative Wood Molding
Keeping your decorative wood molding in good condition will ensure it continues to enhance your space:
Regular Cleaning
Dust your molding regularly to prevent the buildup of dirt and cobwebs. A soft, dry cloth usually does the trick.
Inspect for Damage
Check for cracks or loose sections periodically. Small repairs can often be done with wood glue or filler.
Touch-Up Paint or Stain
If you notice any scratches or chips, touch them up with matching paint or stain to keep your molding looking fresh.
Frequently Asked Questions (FAQs)
1. What type of wood is best for molding?
The best type of wood for molding typically includes pine, oak, or MDF (medium-density fiberboard). Pine is affordable and easy to work with, while oak offers a more durable option.
2. Can I install molding myself?
Absolutely! Many homeowners successfully install molding as a DIY project. Just follow the steps outlined in this guide, and take your time measuring and cutting.
3. How do I choose the right style of molding for my home?
Consider your home’s architectural style and existing decor. Traditional homes often benefit from detailed crown molding, while modern spaces might look best with sleek, minimalistic designs.
4. What’s the cost of decorative wood molding?
The cost can vary widely based on the type of wood and design. Basic molding can start at $1-$3 per linear foot, while more intricate styles made from hardwood can run upwards of $10 or more per foot.
5. How do I paint or stain molding properly?
Before painting or staining, ensure the surface is clean and sanded. Apply a primer if using paint, and then apply your chosen paint or stain evenly. It’s often recommended to do several thin coats for the best finish.