Introduction to Nail Art Decoration
Nail art decoration has taken the beauty world by storm, offering a canvas for creativity that goes beyond just painting your nails a single color. Whether you’re a professional nail artist or a DIY enthusiast, there’s always a new technique or design to explore. In this guide, we will delve into the different types of nail art, tools needed, techniques, tips for perfecting your skills, and the latest trends. With my personal experience and passion for nail art, I hope to inspire you to unleash your creativity.
Types of Nail Art Decoration
1. Freehand Nail Art
Freehand nail art is all about your creativity and skill. You can create anything from simple lines and dots to intricate designs without the use of stencils. This method requires a steady hand and lots of practice.
2. Stamping Nail Art
Nail stamping involves using a specialized stamping plate and a scraper to transfer designs onto nails. This method is great for achieving detailed patterns in a fraction of the time it takes to paint them by hand.
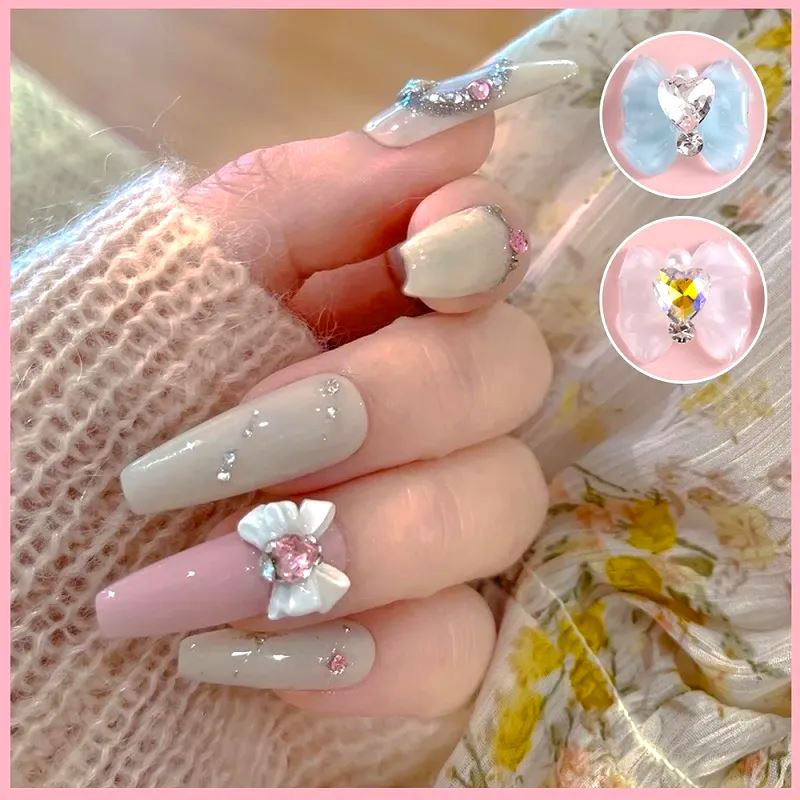
3. 3D Nail Art
For those who want to add some dimension to their nails, 3D nail art can include embellishments like rhinestones, studs, or shapes made from acrylic. These elements can create stunning visual effects that are sure to catch the eye.
4. Gel Nail Art
Gel nails are a popular choice for their durability and glossy finish. Gel polish comes in a variety of colors and can be cured under a UV lamp. This method allows for more intricate nail art designs that last longer than regular polish.
5. Ombre Nails
Ombre nails are a beautiful gradient effect achieved by blending two or more colors. This technique can be subtle or bold, depending on your color choices.
Essential Tools for Nail Art Decoration
To embark on your nail art journey, having the right tools can make all the difference. Here are some essential items you should consider:
- Nail polish in various colors
- Nail art brushes (fine tip, striper, dotting tool)
- Nail stamping kit
- Clear topcoat
- Nail files and buffers
- Cuticle oil
- Palette for mixing colors
- Rhinestones and other embellishments
Step-by-Step Techniques for Nail Art
1. How to Create Freehand Designs
- Start with clean, dry nails.
- Apply a base coat to protect your natural nails.
- Choose your colors and use the fine-tip brush to create your design.
- Allow each layer to dry before adding more details.
- Finish with a clear topcoat to seal your design.
2. How to Use Nail Stamping
- Paint your nails with a base color and let it dry completely.
- Apply a stamping polish to the plate and scrape off the excess.
- Quickly press the stamper onto the design and then onto your nail.
- Seal your design with a topcoat.
Pros and Cons of Different Nail Art Techniques
| Technique | Pros | Cons |
|---|---|---|
| Freehand Nail Art | Highly creative, personal touch | Requires practice, can be time-consuming |
| Nail Stamping | Quick application, precise designs | Limited designs available, needs practice to master |
| 3D Nail Art | Unique appearance, stands out | Can be heavy on the nails, may chip easily |
| Gel Nail Art | Long-lasting, vibrant colors | Requires UV lamp, removal can be difficult |
| Ombre Nails | Versatile, trendy look | Requires blending skills, may take time to perfect |

Nail Art Trends to Watch
Nail art is always evolving, and keeping up with trends can inspire your next design. Some current trends include:
- Negative space designs, where part of the nail is left unpainted
- Minimalist designs with simple lines and dots
- Floral patterns and nature-inspired designs
- Geometric shapes for a modern look
- Metallic and holographic finishes that add a touch of glam
Caring for Your Nails After Decoration
After spending time on your nail art, it’s essential to care for your nails to ensure they remain healthy and beautiful. Here are some tips:
- Use cuticle oil regularly to keep your cuticles and nails hydrated.
- Avoid soaking your hands in water for prolonged periods.
- Wear gloves when cleaning or doing dishes to protect your nails.
- Be gentle when removing polish to prevent damage.
Frequently Asked Questions (FAQs)
What are the best nail polishes for nail art?
For nail art, look for polishes that have a good pigmentation, quick dry time, and a glossy finish. Brands like OPI, Essie, and Gelish offer a variety of options suitable for artistic designs.
How long does nail art last?
The longevity of nail art varies based on the technique and aftercare. Generally, properly applied gel nails can last up to three weeks, while regular polish may chip within a week without a topcoat.

Can I do nail art at home?
Absolutely! Nail art can be done at home with the right tools and a bit of practice. Start with simple designs and gradually try more complex techniques as you gain confidence.
What should I do if my nail art starts to chip?
If your nail art chips, you can touch it up using the same color polish or apply a fresh layer of topcoat. However, if significant damage occurs, it might be best to remove the design and start over.

Is nail art safe for my nails?
When done responsibly, nail art is safe. Ensure you use high-quality products and avoid overusing harsh removers or applying too many layers of polish, which can weaken your nails.
Conclusion
Nail art decoration is a vibrant form of self-expression and creativity. Whether you are looking to try it out for the first time or refine your existing skills, there’s a world of designs, techniques, and trends to explore. Remember that practice makes perfect, and don’t be afraid to experiment with different styles. With the right tools and techniques, you’ll find joy in transforming your nails into miniature works of art. Happy decorating!