As the crisp autumn air settles in and leaves begin to turn, it becomes that magical time of year where creativity flourishes and pumpkins abound! One delightful way to embrace this season is through Nemo pumpkin decorating. Combining the vibrant colors of the iconic Disney character with the traditional pumpkin carving experience is not only fun but can also become a cherished family activity. Drawing from my personal experiences, I’m excited to guide you through the many creative ways to bring Nemo to life on your pumpkins!
What is Nemo Pumpkin Decorating?
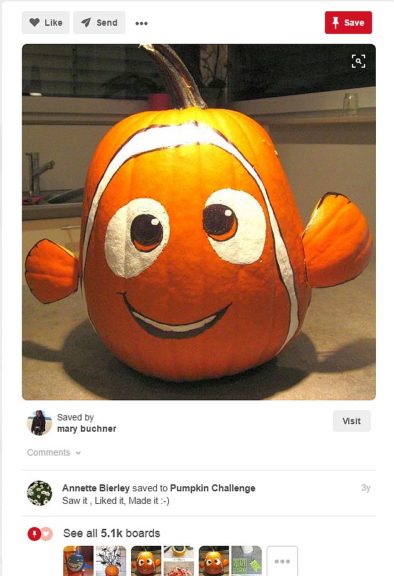
Nemo pumpkin decorating involves transforming an ordinary pumpkin into a delightful representation of Nemo, the beloved clownfish from Disney’s film, *Finding Nemo*. This activity can be particularly appealing to families with children, as it allows for ample creativity and imaginative expression.
Why Choose Nemo for Pumpkin Decorating?
There are several reasons why Nemo is an excellent choice for pumpkin decorating:
- Colorful and Fun: Nemo’s bright orange and white colors make pumpkins visually appealing.
- Inspirational Character: Kids love Nemo! This makes it a relatable and exciting project.
- Versatile Techniques: You can use painting, carving, or even crafting to create your Nemo-inspired designs.
Materials Needed for Nemo Pumpkin Decorating
Before jumping into the fun, let’s gather the materials you’ll need for this creative endeavor:
- Medium to large pumpkin
- Carving tools (for traditional carving)
- Paint brushes and acrylic paints (orange, white, black, blue)
- Optional embellishments (glitter, googly eyes, fabric for fins)
- Tools for clean-up (newspaper, carving kit)
Table of Materials
| Material | Purpose | Cost Estimate |
|---|---|---|
| Pumpkin | Main canvas | $5 – $15 |
| Carving Tools | Carving shapes | $10 – $30 |
| Acrylic Paints | Painting design | $10 – $20 |
| Embellishments | Adding details | $5 – $15 |

Preparation Steps for Nemo Pumpkin Decorating
Engaging in Nemo pumpkin decorating requires a bit of preparation. Here’s a step-by-step guide:
Step 1: Select Your Pumpkin
Choose a medium to large pumpkin that has a smooth surface for easier decorating. Check for any blemishes or soft spots, as these can affect your design.
Step 2: Clean and Prep the Pumpkin
Wash your pumpkin thoroughly to remove dirt. If you’re carving, create a small opening at the top or bottom for hollowing.
Step 3: Sketch Your Design
Using a pencil, sketch Nemo’s face and body on your pumpkin. Don’t be afraid to adjust as needed! If you’re not confident in freehanding, print a template design of Nemo for tracing.
Techniques for Nemo Pumpkin Decorating
Now that the groundwork is laid out, let’s dive into some techniques that you can apply to create your Nemo pumpkin masterpiece. Here are three main methods:
1. Carving Method
This classic method involves using carving tools to create your design. Here’s how to do it effectively:
Steps for Carving
- Use a knife to cut the top off your pumpkin.
- Hollow out the pumpkin completely, removing the seeds and pulp.
- Carefully carve along your sketched lines, starting with the larger areas.
- For finer details, use smaller tools or a fine-tip carving knife.
- Consider adding a light source inside to illuminate your design.
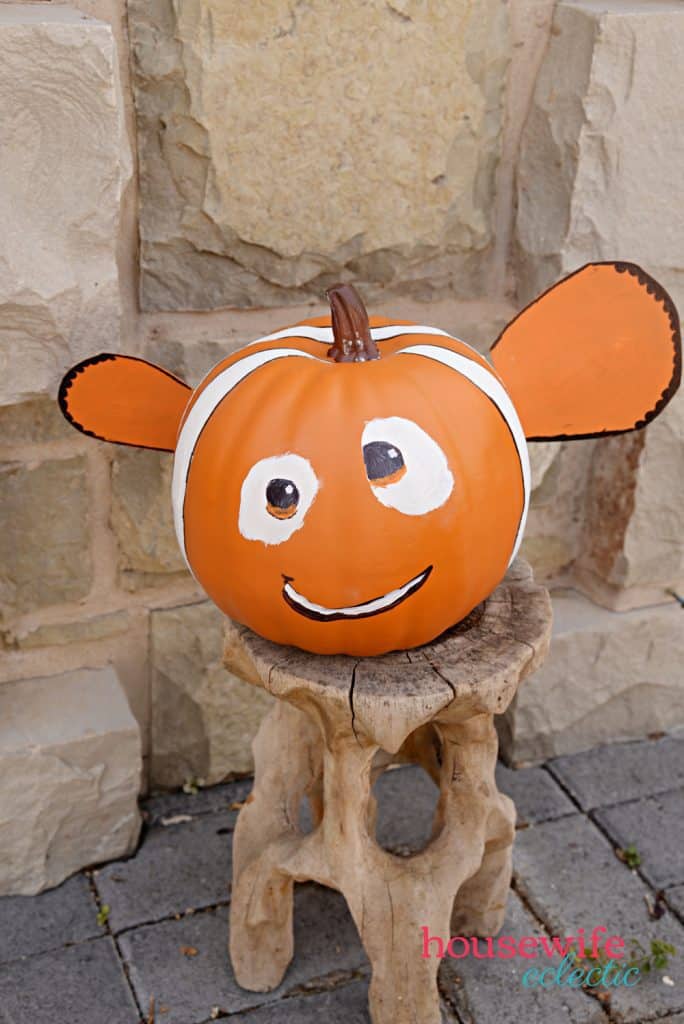
2. Painting Method
If carving isn’t your style or your pumpkin is already quite small, painting is a fantastic alternative:
Steps for Painting
- Prepare your paints and decide on a color scheme that reflects Nemo.
- Use a base coat of orange for the body, letting it dry.
- Paint white stripes on the sides and detail the fins using blue paint.
- Finish with black eyes and any additional features you desire.

3. Crafting with Accessories
For those who want to take it a step further, consider crafting accessories:
Steps for Crafting
- Use fabric to create fins and attach them securely with glue.
- Add googly eyes to bring your pumpkin to life.
- Utilize different materials to add texture and dimension around your pumpkin.
Pros and Cons of Nemo Pumpkin Decorating
Pros
- Encourages creativity and imagination.
- Perfect project for families or groups.
- Can be done with various skill levels and techniques.

Cons
- Can be time-consuming, especially for detailed carvings.
- Requires additional materials that may increase costs.
- Messy cleanup after a carving session.
Personal Experience: My First Nemo Pumpkin
The first time I tried Nemo pumpkin decorating was with my kids a few years ago. We chose a pumpkin that was just the right size for their little hands. I remember the excitement as they sketched Nemo’s features, their eyes lighting up when they recognized their favorite characters on the pumpkin. It turned out to be a beautiful bonding experience, and the finished product became a centerpiece for our Halloween festivities!

Frequently Asked Questions
What type of pumpkin is best for Nemo decorating?
A medium to large pumpkin with a smooth surface is ideal. Look for one that has a sturdy stem and is symmetrical for the best results.
Can I use real pumpkins for decorating?
Absolutely! Real pumpkins are traditional and provide a great canvas. Just be aware they may not last as long as faux pumpkins after carving.

How do I preserve my carved pumpkin?
To keep your carved pumpkin fresh, apply a thin layer of petroleum jelly to the cut edges and store it in a cool, dry place when not on display.
Are there any alternatives to carving?
Yes! Painting, decoupage, and using accessories are all fun alternatives to carving that can still achieve a Nemo look.
Conclusion: Dive into Nemo Pumpkin Decorating
Nemo pumpkin decorating is a wonderful way to celebrate the Halloween season while fostering creativity and family bonding. Whether you choose to carve, paint, or craft, the joy and satisfaction that come from creating your own Nemo pumpkin are priceless. So gather your materials, unleash your imagination, and get started on your own underwater adventure!
Happy decorating!