When it comes to personal grooming, toenails often take a back seat to manicures, but beautifully decorated toenails can elevate your style and self-confidence. In this extensive article, we’ll explore simple yet elegant ways to decorate your toenails, share my personal experiences, and provide tips and tricks to help you achieve stunning results.
Why Decorate Your Toenails?
Decorating toenails isn’t just about aesthetics; it’s also a fantastic way to express your personality. Whether it’s for summer sandals, a special occasion, or simply pampering yourself at home, well-groomed toenails can boost your mood and make you feel fabulous.
Essential Tools and Products for Decorating Toenails
Before diving into the creative designs, let’s ensure you have all the necessary tools and products.
Basic Nail Care Tools
- Nail clippers
- Nail file
- Cuticle pusher
- Buffer block
- Toe separators
Nail Products
- Base coat
- Nail polish (multiple colors)
- Top coat
- Nail art pens or brushes
- Stickers or decals
Optional Tools for Advanced Designs
- Dotting tools
- Striping tape
- Stamping plates

Simple Toenail Design Ideas
Now that we have our tools ready let’s look into some simple yet chic toenail designs.
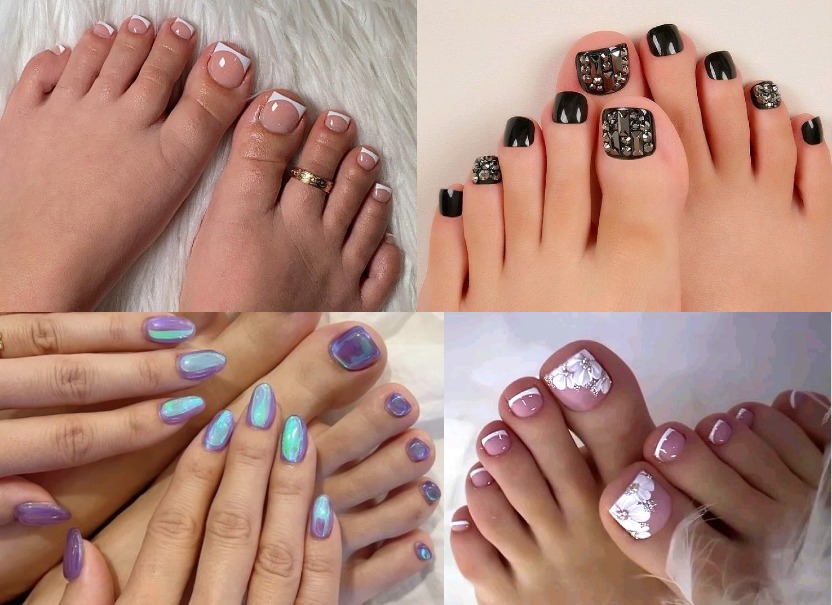
1. Classic French Tips
The French tip is timeless and can be done in various colors. Use a nude or light pink base with white tips for a clean, elegant look.

How to Achieve French Tips
- Apply a base coat.
- Paint your toenails with a nude or light pink polish.
- Once dry, tape off or freehand the tips with white polish.
- Finish with a top coat.
2. Polka Dots
This playful design can be created in any color combination and is perfect for summer.

Steps to Create Polka Dots
- Paint your toenails a solid color.
- Use a dotting tool to apply contrasting color dots.
- Seal with a top coat.
3. Stripes
Stripes can add a modern touch to your toes and can be done in various colors.

Creating Striped Toenails
- Apply your chosen base color.
- Once dry, use striping tape to create lines and fill in with a contrasting color.
- Top it off with a clear coat.
4. Floral Designs
Floral designs can be as simple or as complex as you want. Perfect for beach days!

How to Paint Florals
- Start with a base color.
- Use a fine brush and contrasting colors to paint small flowers and leaves.
- Finish with a top coat to seal the design.
Comparison of Popular Nail Polish Brands for Nail Art
| Brand | Durability | Color Range | Price | Best For |
|---|---|---|---|---|
| OPI | High | Wide | $$$ | Professional Looks |
| Essie | Medium | Wide | $$ | Everyday Use |
| Sally Hansen | Medium | Good | $ | Budget-Friendly |
| Sinful Colors | Low | Limited | $$ | Casual Designs |
Tips for Nail Care Before Decoration
Taking care of your toenails is crucial for a fantastic appearance.
1. Regular Trimming
Keep your toenails trimmed and shaped to your desired length for neatness.

2. Moisturizing
Keep your feet moisturized to prevent dry skin and enhance the look of your nails.
3. Use a Base Coat
A base coat protects your nails from discoloration and helps the polish adhere better.
My Personal Experience with Toenail Decoration
I remember the first time I decided to decorate my toenails; it was for a summer beach trip. I felt hesitant, but once I applied bright blue polish and added white polka dots, I felt transformed. Everyone complimented my toes, and it was a fun conversation starter! Since then, I’ve experimented with many designs, and I can confidently say that decorating your toenails is one of the most rewarding self-care activities.
Common Mistakes to Avoid
Here are some pitfalls to watch out for while decorating your toenails.
1. Skipping the Base Coat
Not using a base coat can lead to stained nails and poor polish adhesion.
2. Overloading on Polish
Too much polish can lead to smudging. Always apply thin layers.
3. Not Allowing Proper Drying Time
Ensure that each layer dries completely before applying the next to avoid smudges.
Frequently Asked Questions (FAQs)
What are the best colors for toenail decoration?
Bright colors like coral, teal, and classic red are popular choices for summer, while darker shades like burgundy and navy work well in fall and winter.
How long do decorated toenails last?
With proper care and application, decorated toenails can last from one to three weeks before needing a touch-up or redo.
Can I decorate my toenails at home?
Absolutely! With the right tools and a little creativity, you can create stunning designs at home.
Are gel nail polishes better for toenails?
Gel polishes tend to last longer and resist chipping better than regular nail polish. However, they require UV light for curing and a more time-consuming removal process.
What should I do if my nail polish chips?
Simply apply a small amount of the same color polish over the chip, then top with a clear coat to seal it. Regular touch-ups can keep your nails looking fresh.
Conclusion
Decorating toenails can be a fun and creative outlet that allows you to express yourself. With simple techniques and a little practice, you can achieve salon-quality results at home. Remember to take care of your nails, choose designs that resonate with your style, and most importantly, have fun with the process. Happy decorating!