Introduction
Surfing isn’t just about the thrill of catching waves; it’s also an expression of individuality and style. One of the best ways to showcase your personality is through DIY surfboard decoration. In this article, I’ll share my personal experiences, tips, and a variety of creative ideas to help you transform your plain surfboard into a stunning work of art.
Why Decorate Your Surfboard?
Decorating your surfboard is more than just aesthetics. It allows you to:
- Express your personality and style.
- Make your board easily recognizable.
- Enhance your surfing experience with a board you love.
- Showcase your creativity and artistic skills.
Gathering Your Materials
Essential Tools and Supplies
Before diving into DIY surfboard decoration, gather the necessary materials:
- Sandpaper (various grits)
- Masking tape
- Paints (acrylic or spray paint)
- Paintbrushes and sponges
- Stencil materials (if needed)
- Waterproof sealant or clear coat
- Optional: Vinyl decals, stickers, and other embellishments.
Choosing Your Decoration Style
Popular Surfboard Decoration Ideas
Here are some popular styles you can consider for your DIY surfboard decoration:
- Graphic Designs: Use stencils or freehand techniques to create eye-catching graphics.
- Nature-Inspired: Incorporate elements like waves, sunsets, or tropical themes.
- Minimalism: Sometimes less is more; a simple color block can be very effective.
- Personal Artwork: Create a mural or original design that tells your story.
Step-by-Step Guide to Decorating Your Surfboard
Now that you have your materials and a decoration style in mind, let’s get into the steps of transforming your surfboard:
Step 1: Prepare Your Surfboard
Start by cleaning your surfboard to remove any wax, dirt, or debris. Next, sand down the areas you plan to paint. This will help the paint adhere better. Use fine-grit sandpaper for a smooth finish.

Step 2: Plan Your Design
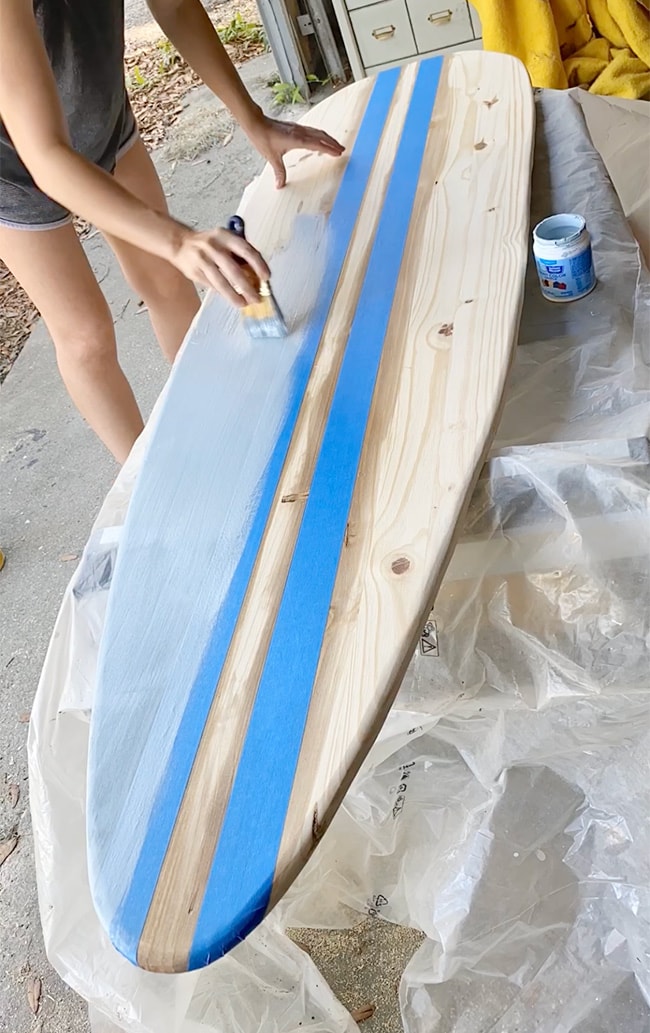
Sketch your design on paper before applying it to the board. Use masking tape to outline areas on the surfboard where you want clean lines or specific patterns.
Step 3: Paint Your Surfboard
Using acrylic or spray paint, begin applying your colors based on your design. Remember to apply thin layers, allowing each coat to dry before adding the next. This helps prevent drips and uneven coverage.

Step 4: Add Details
Once the base coat is dry, add details with a smaller brush or additional colors. For stenciled designs, make sure to remove the stencil while the paint is slightly wet for a cleaner edge.
Step 5: Seal Your Artwork
After your design is complete and fully dry, apply a waterproof sealant or clear coat. This protects your artwork from the elements and prolongs the life of your surfboard.
DIY Surfboard Decoration Techniques
1. Airbrushing
Airbrushing allows for smooth gradients and intricate designs. It’s great for creating a professional look, but it requires a bit of practice and the right equipment.
2. Decal Application
If you’re not confident in your painting skills, consider using vinyl decals. These come in a wide variety of designs and are easy to apply.

3. Fabric and Mixed Media
For a unique touch, incorporate fabric or mixed media elements. You can glue down patches or use textile paint for different textures.
Comparison of Decoration Methods
| Method | Pros | Cons |
|---|---|---|
| Airbrushing | Smooth gradients, professional finish | Requires practice, specialized equipment |
| Decals | Easy application, variety of designs | Limited customization, can peel off |
| Mixed Media | Unique textures and look | May require more maintenance |

Maintaining Your Decorated Surfboard
To keep your DIY surfboard looking fresh, follow these simple maintenance tips:
- Regularly wipe down your board with a soft cloth.
- Avoid leaving your surfboard in direct sunlight for extended periods.
- Rinse the board with fresh water after surfing to remove salt and sand.
- Reapply sealant as needed to protect against wear and tear.
Personal Experience: My DIY Surfboard Journey
When I first decorated my surfboard, I was a bit nervous about ruining it. However, the experience turned out to be incredibly rewarding! I chose a vibrant sunset theme, reflecting my love for evening surf sessions. The process helped me connect with my board on a deeper level. Seeing my artwork gliding through the waves was simply exhilarating!
FAQ about DIY Surfboard Decoration
1. Can I use regular paint on my surfboard?
It’s best to use acrylics or specific surfboard paints as they are designed to withstand water exposure and impact.
2. How long does the decoration last?
With proper sealing and care, your decorations can last for several months or even years.
3. Can I remove paint from my surfboard?
Yes, you can sand down the painted areas, but this may require careful attention to not damage the underlying board.
4. Do I need to seal my artwork?
Yes, sealing your artwork is crucial to protect it from water and physical wear.
Conclusion
Decorating your surfboard is an exciting project that lets you express your individuality and creativity. With the tips I’ve shared, you can easily create a unique design that stands out in the waves. So grab your materials, unleash your artistic spirit, and enjoy the process of DIY surfboard decoration!