Introduction
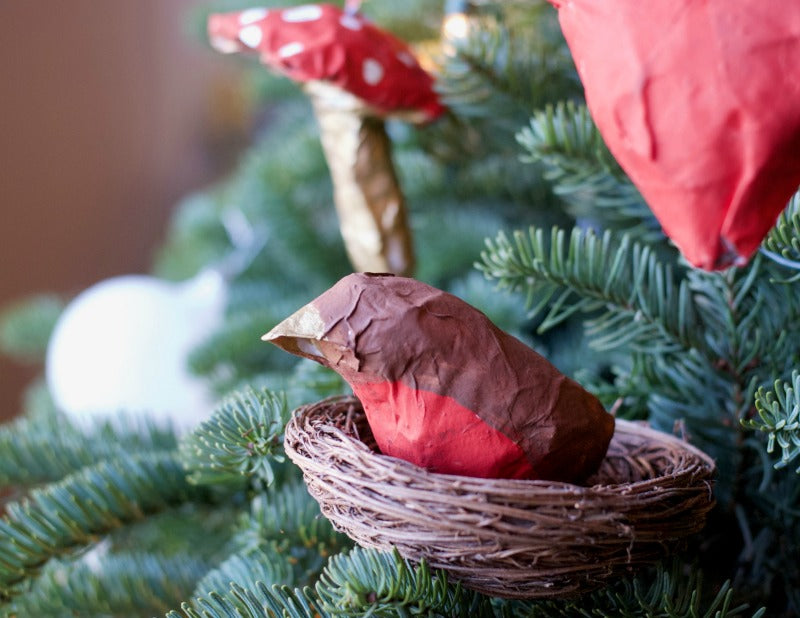
As the holiday season approaches, many of us start thinking about how to make our homes feel warm and festive. One of my favorite pastimes is creating unique decorations, and this year, I’m excited to share my love for paper mache Christmas decorations! There’s something incredibly satisfying about crafting something beautiful from simple materials. In this article, I will guide you through the entire process, from techniques to finished products, ensuring you have all the information needed to spark a festive spirit in your home.
What is Paper Mache?
Paper mache is a French term meaning “chewed paper.” Essentially, it is a crafting technique that involves using paper pieces, usually mixed with glue or paste, to create a sculpted object. This method allows for a lightweight but strong end product, making it perfect for seasonal decorations.
Why Choose Paper Mache for Christmas Decorations?
There are countless reasons to opt for paper mache when crafting your Christmas décor:
- Cost-Effective: Most materials are inexpensive and can be found around your home.
- Eco-Friendly: You can recycle old newspapers and magazines.
- Customizable: Paint, embellish, and decorate to match your home’s style.
- Fun for All Ages: It’s a great activity to do with family and friends.
Materials Needed for Paper Mache Christmas Decorations
Before diving into the crafting process, gather the following materials:
| Material | Description | Where to Buy |
|---|---|---|
| Paper | Old newspapers, brown paper bags, or craft paper | Local newsstands, craft stores |
| Adhesive | PVA glue, flour and water mix, or crafted paste | Art supply stores, supermarkets |
| Balloon | For creating hollow shapes or bases | Party supply stores |
| Paint | Acrylic or water-based paints for decoration | Art supply stores, online |
| Varnish | To seal and protect your decorations | Hardware stores, online |

Creating Your Paper Mache Christmas Decorations
Step-by-Step Guide
Step 1: Prepare Your Workspace
Start by covering your workspace with newspaper or a plastic sheet to protect it from glue and paint.
Step 2: Create Your Paper Mache Paste
You can use a simple flour-water mix or store-bought PVA glue. If using flour, mix 1 part flour with 2 parts water and stir until smooth.

Step 3: Tear the Paper
Tear your paper into strips rather than cutting it. This will create better adhesion.
Step 4: Start Layering
Dip the paper strips into your paste, remove excess, then apply them to your chosen mold or shape. Build up layers for strength, allowing each layer to dry before adding the next.

Step 5: Drying Time
Let your creation dry completely, which may take up to 24 hours depending on humidity.
Step 6: Paint and Decorate
Once dry, paint and embellish as desired. Glitter, sequins, or ribbons can add a festive touch!

Step 7: Finishing Touches
Seal your decorations with a coat of varnish to make them durable for years to come.
Creative Ideas for Paper Mache Christmas Decorations
Unique Decoration Ideas
Here are some creative ideas to inspire your crafting:
- Ornamental Baubles: Create stunning hanging baubles for your Christmas tree.
- Nativity Scene: Craft a beautiful nativity scene to celebrate the season.
- Christmas Characters: Make Santa Claus, reindeer, and snowmen figures.
- Wreaths: Fashion a wreath using paper mache for a unique front door display.

Pros and Cons of Paper Mache Christmas Decorations
Benefits
- Affordable: Low-cost materials make it accessible for everyone.
- Versatile: Can be shaped into various forms and sizes.
- Eco-Friendly: Great way to recycle old papers.
Drawbacks
- Messy: The process can be quite messy and requires cleanup.
- Time-Consuming: Requires time to dry between layers.
- Fragile: If not adequately sealed, decorations can be easily damaged.

Tips for Successful Paper Mache Projects
Best Practices
- Make sure to use thin layers of paper for quicker drying time.
- Use a fan or a warm place to speed up the drying process.
- Experiment! Don’t be afraid to try different shapes and styles.
Cleaning and Storing Your Paper Mache Decorations
To ensure your decorations last for years, consider the following:
Cleaning
Gently wipe with a damp cloth to remove dust. Avoid excessive moisture.
Storage
Store in a cool, dry place. Use tissue paper between decorations to prevent scratching.
Frequently Asked Questions
Can I use regular glue for paper mache?
Yes, PVA glue works well, but ensure it’s diluted with water for better adhesion.
How long does it take for paper mache to dry?
Drying times can vary based on humidity and thickness of your layers, but typically 24 hours is recommended.
What paint is best for paper mache?
Acrylic paint is recommended as it adheres well to paper mache and dries quickly.
How do I hang my paper mache decorations?
You can poke a small hole and thread twine or attach hooks for hanging.
Conclusion
Creating paper mache Christmas decorations is not just a fun and engaging activity, but it also adds a personal touch to your holiday celebrations. By following the techniques and tips outlined in this guide, you can craft beautiful decorations that can be cherished for years to come. So gather your materials, unleash your creativity, and let the holiday spirit shine through your handmade creations!