Nail art has become a popular trend in recent years, transforming our nails into canvases for creativity and self-expression. Whether you’re a beginner or an experienced nail artist, a nail decoration kit can enhance your nail art game, allowing you to try various styles and techniques from the comfort of your home. In this article, I’ll share my personal experiences with nail decoration kits, along with tips, comparisons, pros and cons, and frequently asked questions to help you choose the best kit for your needs.
What is a Nail Decoration Kit?
A nail decoration kit typically includes a variety of tools and supplies that enable you to create intricate nail designs. Kits can range from basic sets containing nail polish and brushes to more advanced options featuring nail gems, decals, and stamping plates. The right kit can help you achieve salon-quality nails without leaving your home.
Why You Should Invest in a Nail Decoration Kit
Investing in a nail decoration kit has several benefits:
- Cost-Effective: Save money on trips to the salon by doing your own nails.
- Endless Creativity: Experiment with different designs, colors, and techniques.
- Convenience: Do your nails anytime, without appointments or waiting times.
- Bonding Activity: A fun way to spend time with friends or family while creating beautiful designs.
Types of Nail Decoration Kits
There are several types of nail decoration kits available, each catering to different skill levels and artistic preferences. Here’s a breakdown:
Basic Nail Art Kit
These kits usually include essential items like nail polish, brushes, and dotting tools. They are perfect for beginners who want to experiment with simple designs.

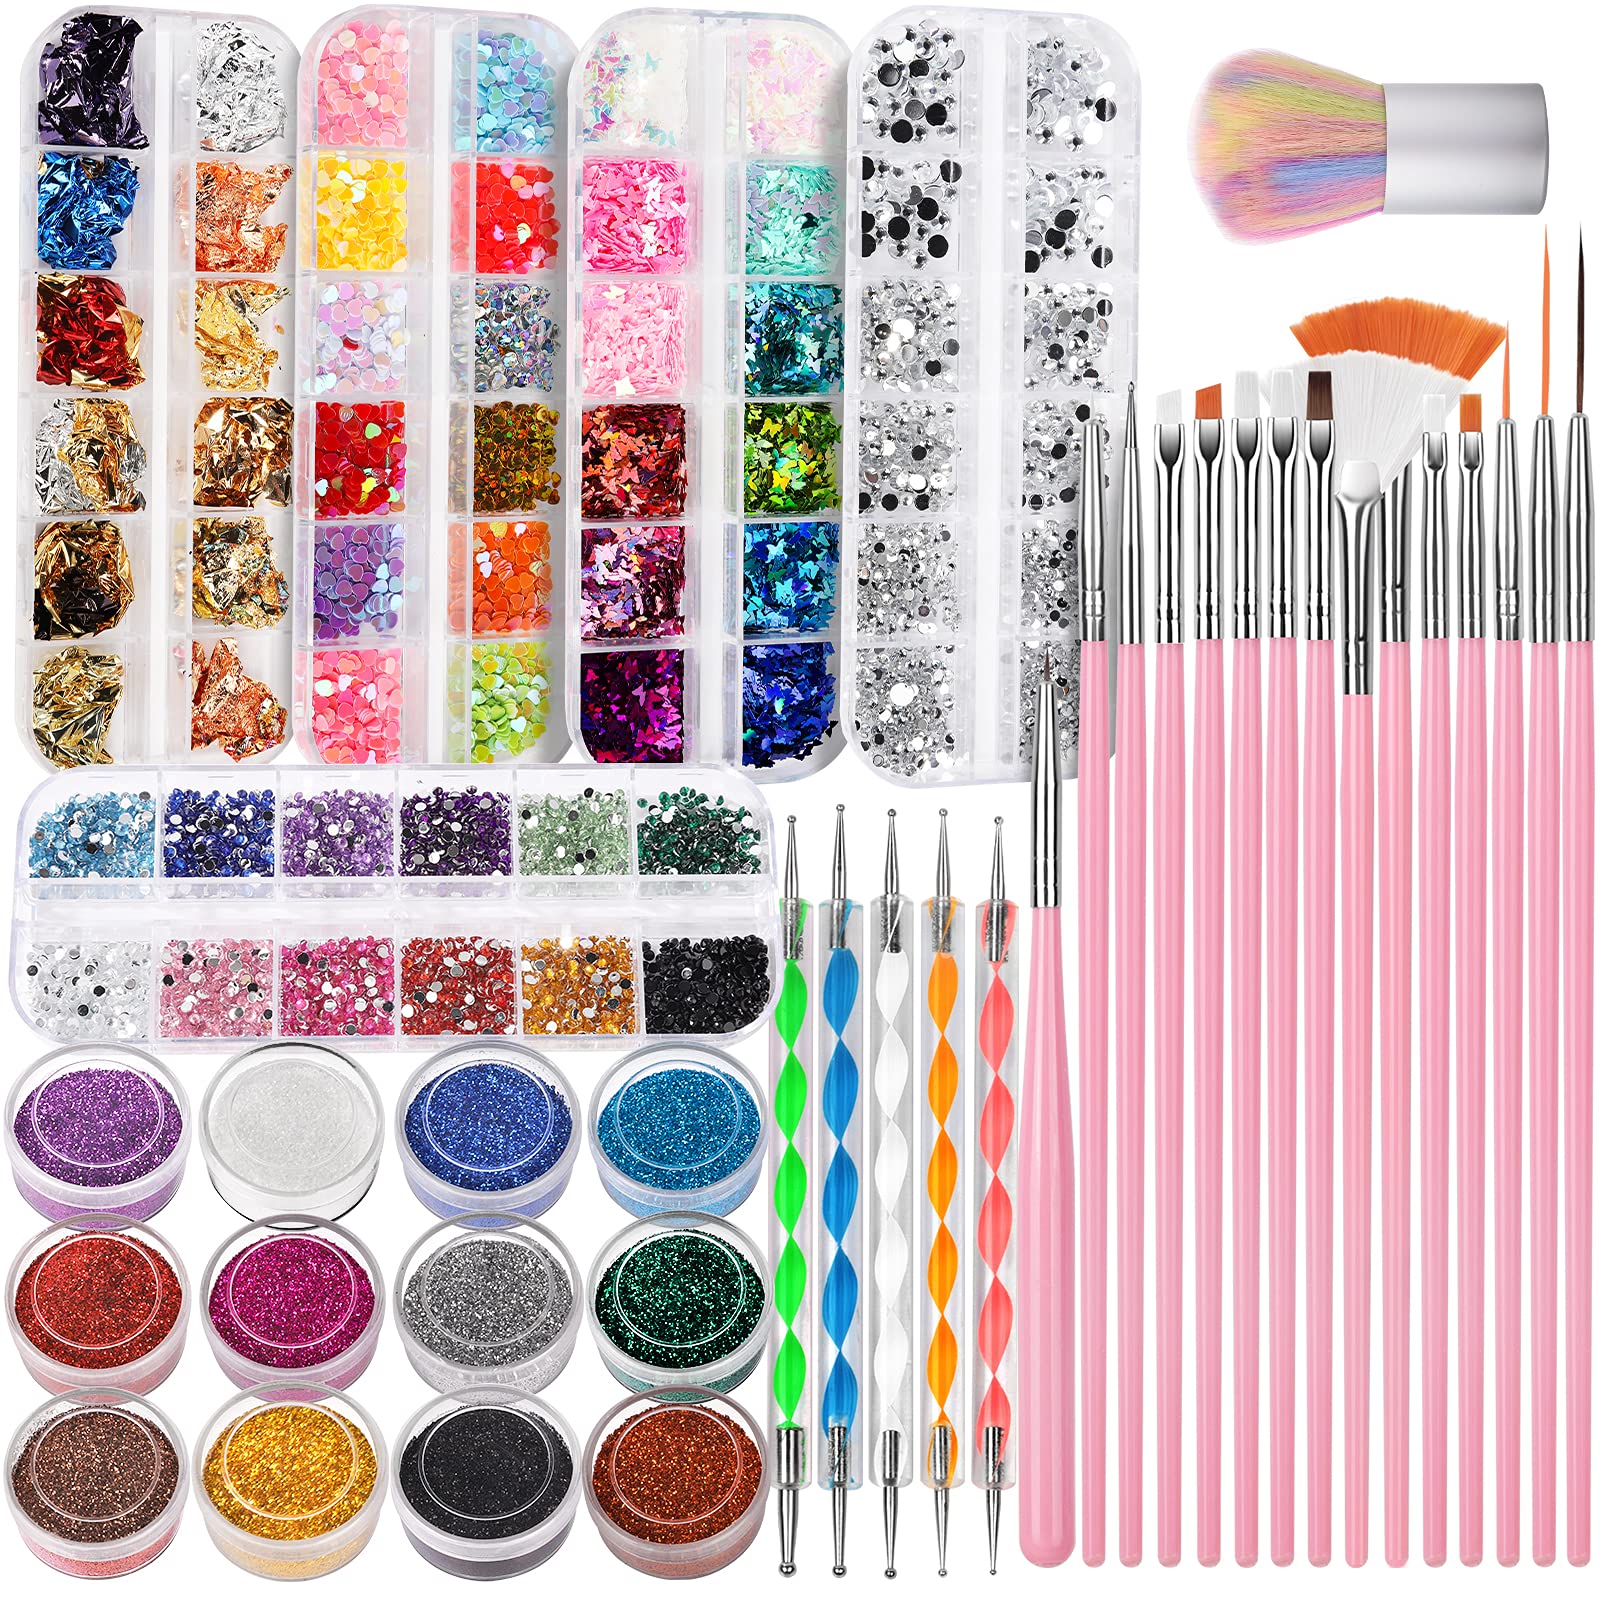
Advanced Nail Art Kit
These kits come with a wider range of tools, including nail stickers, rhinestones, and stamping plates, suitable for more intricate designs.
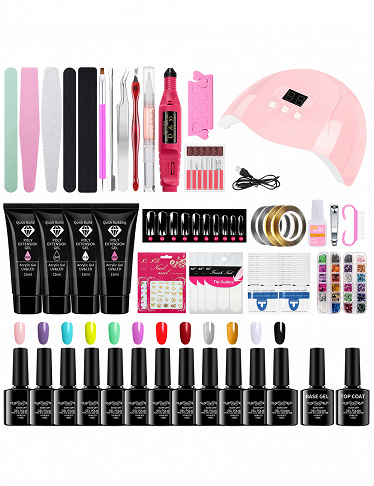
Professional Nail Art Kit
Designed for serious nail artists, these kits may feature high-quality gels, electric nail files, and extensive design materials for comprehensive nail art.
What to Look for in a Nail Decoration Kit
When selecting the right nail decoration kit, consider the following factors:
Quality of Products
Always check reviews for the quality of nail polishes and tools included in the kit. High-quality products ensure better application and longevity of your designs.

Variety of Tools
A diverse range of tools allows you to explore different nail art techniques and styles, making your kit more versatile.
User-Friendly Instructions
Especially for beginners, having clear instructions and tutorials can greatly enhance the learning experience.

Top 5 Nail Decoration Kits of 2023
After analyzing popular offerings and personal experience, here are the top nail decoration kits of 2023:
| Brand/Name | Included Tools | Best For | Price Range | Pros | Cons |
|---|---|---|---|---|---|
| Beetles Gel Nail Kit | Gel nail polish, top/base coat, nail tools | Advanced users | $30-$50 | High-quality gel, long-lasting | Requires UV lamp |
| Saviland Nail Art Kit | Nail polish, dotting tools, brushes, decals | Beginners | $20-$35 | Variety of tools, user-friendly | Polish needs several coats |
| Artistic Nail Design Pro Kit | Stickers, rhinestones, gel polish | Professional artists | $60-$80 | Comprehensive design options | Higher price point |
| Makartt Nail Art Starter Kit | Polish, brushes, stamping plates | Beginners to intermediates | $25-$40 | Affordable, decent quality | Limited advanced tools |
| Sunny Nail Art Supply Kit | Polish, nail art pen, glitter | Casual users | $15-$30 | Budget-friendly | Less variety in designs |
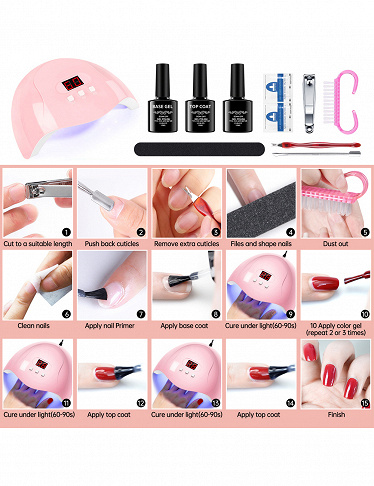
Using Your Nail Decoration Kit: Step-by-Step Guide
Once you’ve chosen your nail decoration kit, it’s time to dive into the art of nail decoration. Here’s a simple step-by-step guide based on my personal experience:
Step 1: Prepare Your Nails
Start with clean and dry nails. Remove any old nail polish, and shape your nails by filing them to your desired length and shape.

Step 2: Apply a Base Coat
Applying a base coat helps prevent staining and allows the nail polish to adhere better. Wait for it to dry completely.
Step 3: Apply Your Chosen Nail Polish
Use your chosen nail polish from the kit and apply it evenly across each nail. Depending on the opacity, you may need two to three coats. Wait for each coat to dry before applying the next.
Step 4: Add Decorations
Once your base color is dry, use nail art tools from your kit to add decorations. Whether it’s dots, lines, or gems, let your creativity flow!
Step 5: Seal with a Top Coat
Finish with a top coat to seal your design and give it that glossy finish. This step enhances durability and prevents chipping.
Step 6: Clean Up
Use a clean brush dipped in acetone to tidy up any excess polish around your cuticles, giving your nails a professional look.
Tips for Maintaining Beautiful Nail Art
To ensure your nail art lasts as long as possible, follow these maintenance tips:
- Wear Gloves: Protect your nails while doing household chores.
- Avoid Prolonged Water Exposure: Water can weaken your nail polish and decorations.
- Moisturize: Keep your cuticles and hands moisturized to prevent dryness.
- Avoid Using Your Nails as Tools: This prevents chips and breaks.
Common Nail Decoration Techniques
Here are some popular nail decoration techniques you can try using your kit:
1. Dotting
Using a dotting tool, create dots of various sizes for fun patterns. This technique is excellent for flowers or polka dots.
2. Striping
With a striping brush, you can make thin lines and intricate designs. Experiment with geometric patterns for a modern look.
3. Stamping
Nail stamping involves using plates with designs that can be transferred onto the nails. It’s a quick way to achieve detailed patterns.
4. Ombre
Create a gradient effect by blending two colors. This technique is ideal for a softer, more blended look.
Pros and Cons of Using Nail Decoration Kits
Like any product, nail decoration kits come with their advantages and disadvantages:
Pros
- Cost savings compared to salon visits.
- Ability to customize your designs.
- A great way to express your personality.
Cons
- Can be time-consuming, especially for beginners.
- Possible frustration when learning new techniques.
- Initial investment cost for comprehensive kits.
Frequently Asked Questions (FAQs)
What is the best nail decoration kit for beginners?
The Saviland Nail Art Kit is an excellent choice for beginners due to its user-friendly tools and instructions.
How can I remove nail decorations safely?
Use acetone or a non-acetone nail polish remover to gently dissolve the polish without damaging your nails.
Are gel nail kits worth it?
Yes, gel nail kits can provide long-lasting results and are worth the investment if you prefer durable and glossy finishes.
Can I use regular nail polish with nail decoration kits?
Absolutely! Most nail decoration kits are compatible with regular nail polish, allowing for varied designs.
How can I make my nail art last longer?
Ensure you always apply a base and top coat, avoid water exposure, and keep your nails moisturized.
Conclusion
A nail decoration kit is a fantastic investment for anyone looking to explore the world of nail art. With the right tools and a little practice, you can create stunning designs that reflect your personality. Remember to have fun with it, experiment with different techniques, and, most importantly, enjoy the process! Happy decorating!