Welcome to the delightful world of cake decorating! If you’ve ever gazed longingly at a beautifully decorated cake and thought, “I wish I could do that,” you’re in the right place. In this article, we are diving deep into the art of star tip cake decorating. With my personal experience and love for baking, I’ll guide you through everything you need to know to transform your cakes into stunning masterpieces. Whether you’re a beginner or looking to refine your skills, you’re sure to find valuable tips here.
What Is Star Tip Cake Decorating?
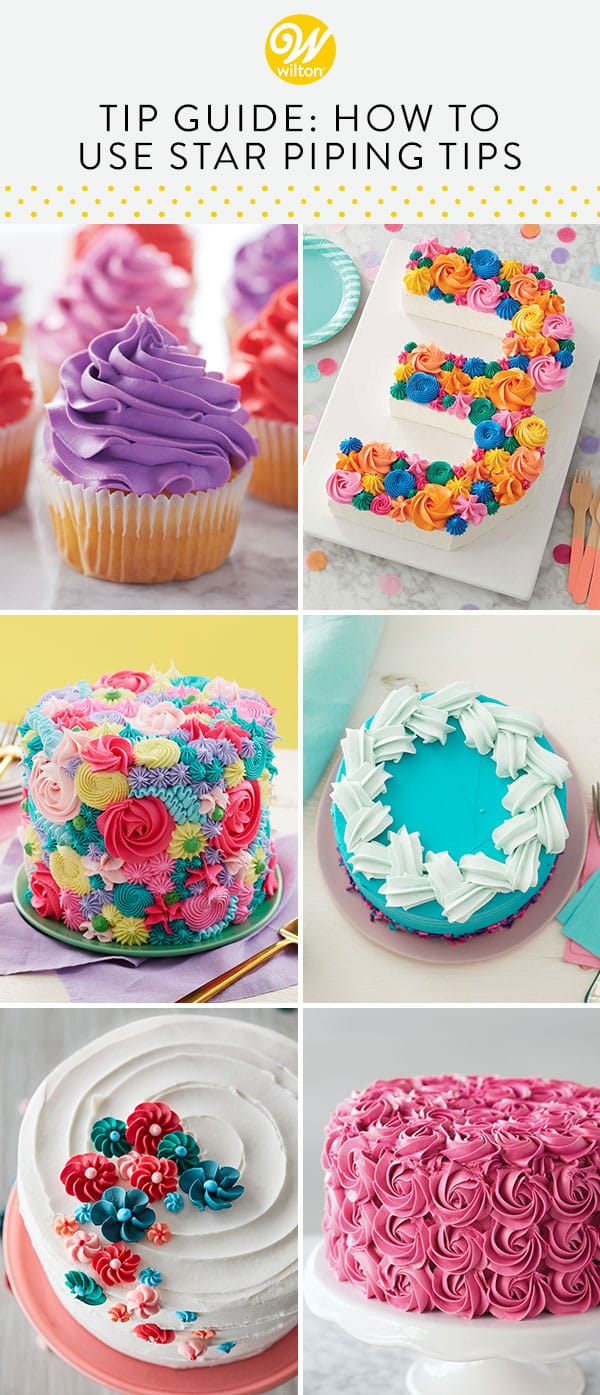
Star tip cake decorating involves using a specific piping tip—commonly referred to as a star tip—to create various decorative designs on cakes. These tips have a star-shaped opening that can produce different textures and patterns depending on how you hold and manipulate the piping bag.
A Brief History of Cake Decorating
Cake decorating has evolved tremendously over the years, from simple icing techniques to elaborate designs that can reflect personal stories, themes, or even complex artistry. The star tip, introduced in the early 20th century, quickly became a favorite among bakers for its versatility.

Understanding Star Tips
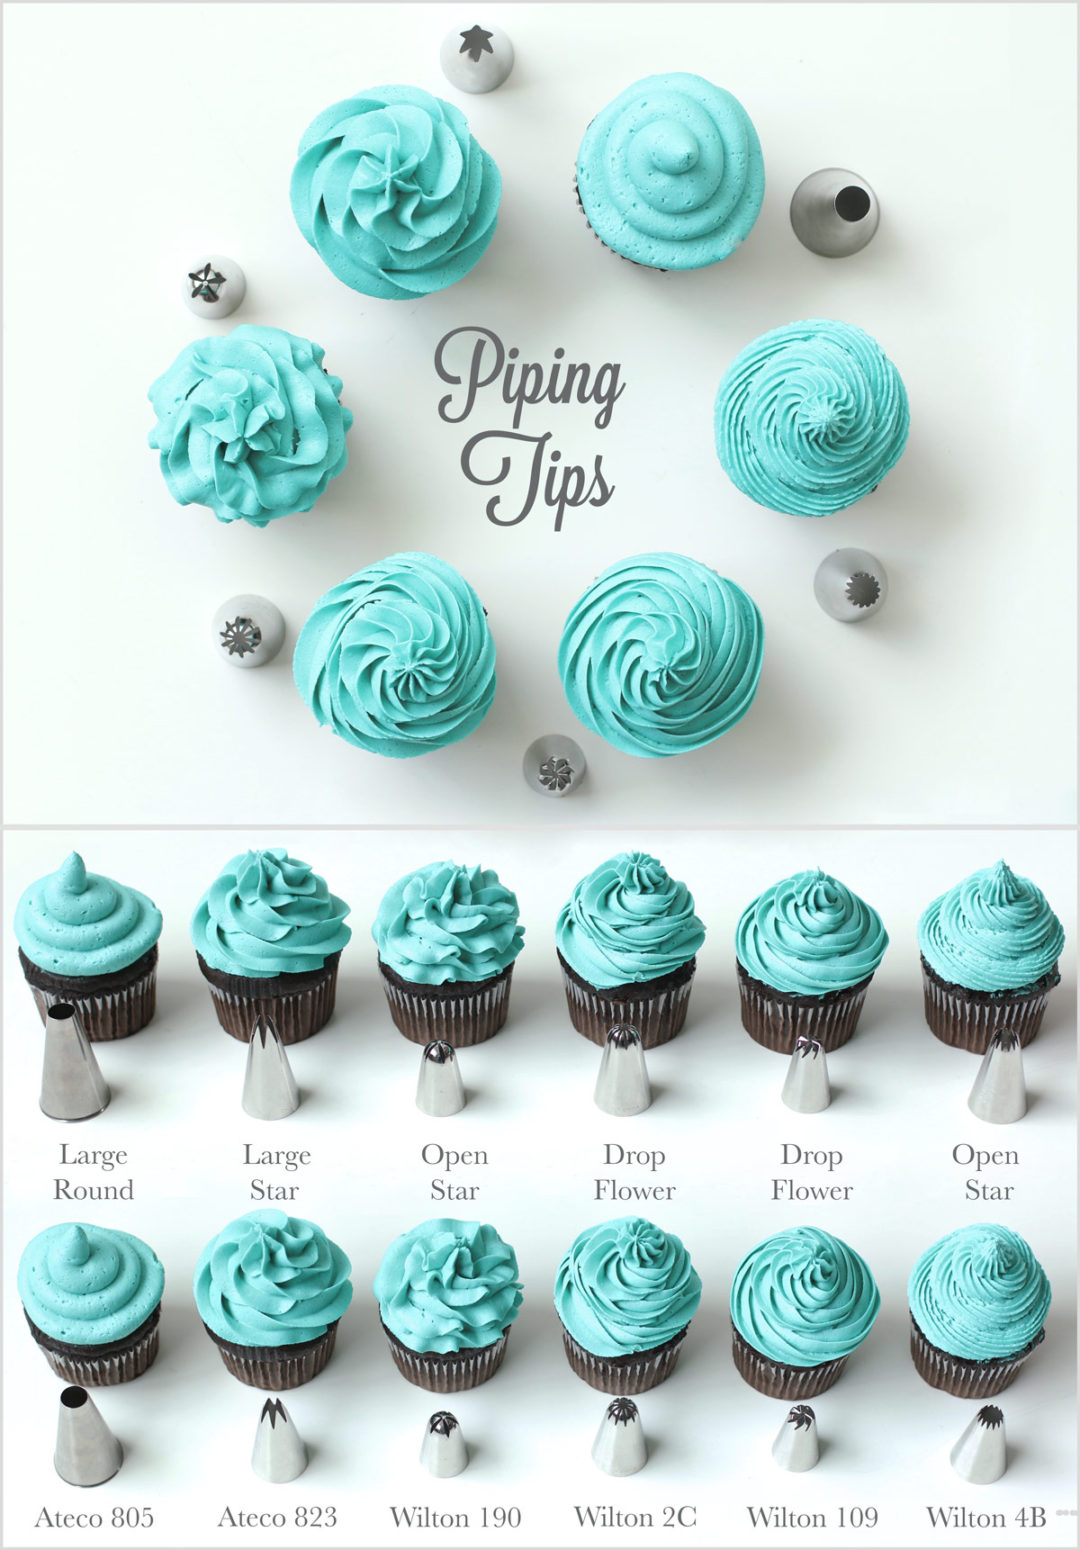
Types of Star Tips

Star tips come in various sizes and designs, each offering unique textural capabilities. Here’s a quick overview:
| Star Tip | Size | Best for |
|---|---|---|
| Wilton 1M | Large | Swirls, rosettes, borders |
| Wilton 21 | Medium | Decorative borders, flowers |
| Wilton 18 | Small | Fine details, writing |
| Ateco 847 | Jumbo | Large decorative swirls |

How to Choose the Right Star Tip
Choosing the right star tip depends on the design you want to create. Here are some tips:
- For large, eye-catching decorations, go for larger tips like the Wilton 1M.
- For intricate details and smaller designs, opt for smaller tips like the Wilton 18.
- Consider experimenting with different sizes to find your personal preference.
Essential Tools for Star Tip Cake Decorating
Before diving into decorating, it’s crucial to have the right tools at your disposal. Here’s a list of essentials:
Baking and Decorating Tools
- Piping bags: Disposable or reusable, both work well.
- Couplers: For easy swapping of piping tips.
- Turntable: Makes decorating cakes much easier.
- Offset spatula: Great for smoothing icing.
- Scissors: For cutting piping bags.
- Paintbrush or toothpicks: For fine details.

Creating Buttercream for Piping
The quality of your buttercream can make or break your star tip cake decorating. Here’s my go-to recipe:
Classic Buttercream Recipe
- Ingredients:
- 1 cup unsalted butter, softened
- 4 cups powdered sugar
- 1/4 cup heavy cream
- 1 tsp vanilla extract
- Instructions:
- In a mixing bowl, beat the softened butter until creamy.
- Gradually add powdered sugar, mixing well.
- Pour in heavy cream and vanilla extract, mixing until smooth.
Tips for Achieving the Perfect Consistency
The buttercream should be creamy and spreadable, but not too runny. If it’s too stiff, add a bit more cream; if it’s too runny, gradually add more powdered sugar. Finding that sweet spot is key to achieving beautiful designs.
Techniques for Star Tip Cake Decorating
Now, let’s get to the fun part—techniques! Here are some essential techniques you can master for stunning results.
Piping Rosettes
One of the most popular designs using a star tip is the rosette. Here’s how to do it:
- Begin by holding your piping bag perpendicular to the cake.
- Start in the center of where you want your rosette and squeeze gently.
- Move the bag in a circular motion outward while releasing pressure.
- Finish the rosette by pulling the tip away gently.
Creating Borders
Borders can elegantly finish off your cake. Follow these steps:
- Hold your piping bag at a 45-degree angle.
- Pipe a star shape by applying pressure, then lift to form a point.
- Continue this pattern along the edge of your cake.
Making Stars and Shells
Stars and shells add texture to your cake. To pipe stars:
- Hold the piping bag vertically above the surface.
- Squeeze then release, pulling away to form a star.
For shells:
- Start at the base, squeezing while moving in a wave-like motion.
- Release pressure as you finish to create the pointed tip.
Understanding Pressure Control
One of the most important aspects of star tip decorating is managing pressure. Too much pressure will create large blobs, while too little will cause a lack of definition. Practice is key! I’ve spent countless hours practicing on parchment paper, which is a great way to refine your technique without pressure.
Common Mistakes and How to Avoid Them
Every decorator makes mistakes—it’s part of the learning process! Here are some common pitfalls and tips to avoid them:
- Too Much Pressure: If your designs look irregular, check the pressure you’re applying.
- Piping Bag Not Filled Correctly: Ensure that your piping bag is not overfilled, as this can cause a mess.
- Not Cleaning the Tip: Remember to wipe off your piping tip frequently to maintain clean lines.
Advanced Techniques for Star Tip Cake Decorating
Once you’ve mastered the basics, it’s time to explore some advanced techniques!
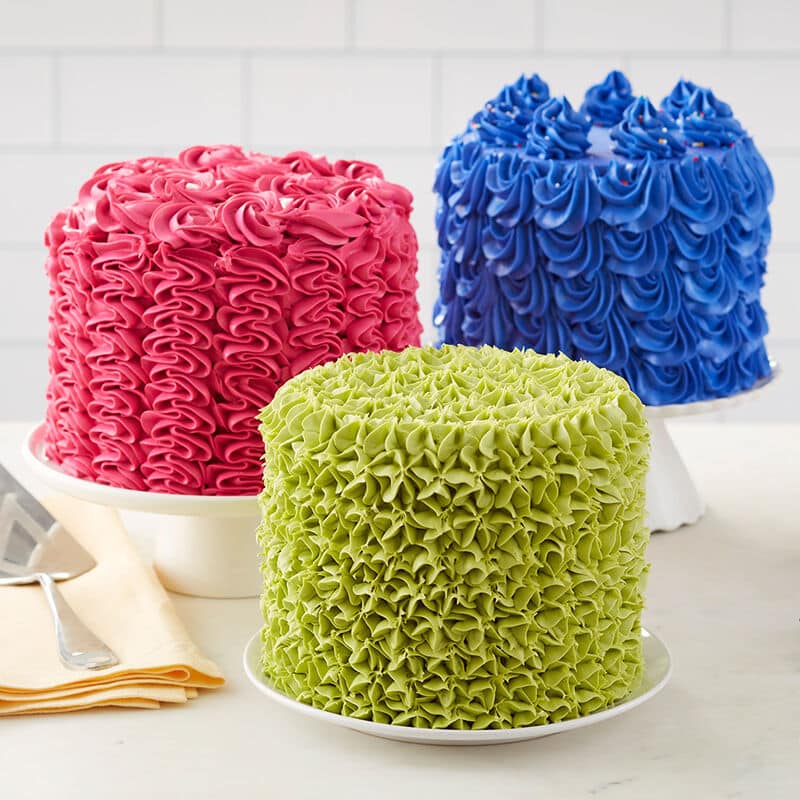
Layering and Texturing
Combining multiple star tips can create eye-catching textures. Try mixing large and small stars for a layered effect!
Color Techniques
Using multiple colors in your piping can elevate your cake design. Here’s how:
- Use a multi-color piping bag where you can fill it with different colors of buttercream.
- Twist the bag to mix the colors slightly, creating a marble effect.
Star Tip Cake Decorating for Special Occasions
From birthdays to weddings, star tip designs can elevate any celebration!
Birthday Cakes
Consider personalizing birthday cakes with the recipient’s favorite colors and themes. Rosette cakes are always a hit!
Wedding Cakes
Elegant, understated designs work beautifully for weddings. Combining soft colors with intricate borders adds a touch of sophistication.
Maintaining Your Piping Tools
It’s essential to keep your decorating tools in good shape. Here are some quick tips:
- Wash piping tips in warm, soapy water after each use.
- Store piping bags rolled up to prevent dust accumulation.
- Inspect your tools regularly for any wear and tear.
Frequently Asked Questions (FAQs)
What type of frosting is best for star tip decorating?
Buttercream is the most popular choice as it holds its shape well. Cream cheese frosting can be used too but may not be as stable.
Can I use a star tip with whipped cream?
While you can use whipped cream, it often has trouble holding its shape. If using whipped cream, work quickly!
How do I color my buttercream for piping?
Use gel food coloring for the best results. Add a small amount to your buttercream and mix until you achieve the desired color.
Can I freeze decorated cakes?
Yes, you can freeze cakes! Just make sure they’re fully cooled and decorated with buttercream before wrapping them tightly in plastic wrap.
How do I clean a star tip after use?
Simply soak the tips in warm, soapy water for a few minutes and scrub with a brush if needed.
Conclusion
Star tip cake decorating is a wonderful way to express your creativity and bring joy to your baking projects. Whether you’re decorating for a special occasion or just for fun, mastering these techniques will enhance your skills and confidence in the kitchen. Remember, practice makes perfect, so don’t hesitate to experiment and make mistakes along the way. Happy decorating, and may your cakes always be as beautiful as they are delicious!