When winter arrives and the holidays are near, there’s something magical about crafting delightful snowflake cookies. Each cookie can become a unique work of art, showcasing your creativity and culinary skills. In this comprehensive guide, I’ll take you through everything you need to know about cookie decorating snowflakes, from selecting the right ingredients to mastering decorating techniques. So, grab your apron and let’s get started!
Getting Started with Snowflake Cookies
Choosing the Right Cookie Recipe
The first step in your cookie decorating journey is selecting the perfect cookie recipe. While there are numerous types of cookies out there, sugar cookies are the ideal base for intricate designs due to their sturdy structure and delightful taste.
| Recipe Type | Flavor | Texture | Best For |
|---|---|---|---|
| Sugar Cookies | Sweet | Soft & Chewy | Decorating with Icing |
| Gingerbread Cookies | Spicy | Crispy | Holiday Themes |
| Almond Cookies | Nuts | Crispy | Flavor Variety |
In my experience, step back and evaluate your preferences and those of your guests to make the best choice!
Essential Ingredients for Decorating Snowflake Cookies

Before we dive into decorating, it’s essential to gather quality ingredients. While sugar cookies form the base, we’ll need royal icing for decoration. Here’s what you need:
- Granulated sugar
- All-purpose flour
- Butter (unsalted)
- Eggs
- Vanilla extract
- Baking powder
- Powdered sugar (for royal icing)
- Egg whites or meringue powder (for royal icing)
- Gel food coloring
Making Sugar Cookies for Decorating
Classic Sugar Cookie Recipe
Here’s a simple sugar cookie recipe that will yield soft, delicious cookies that are perfect for decorating.
Ingredients
- 2 ¾ cups all-purpose flour
- 1 teaspoon baking powder
- 1 cup unsalted butter, softened
- 1 ½ cups granulated sugar
- 1 egg
- 1 teaspoon vanilla extract
- ½ teaspoon salt
Instructions
- Preheat your oven to 350°F (175°C).
- In a bowl, mix flour, baking powder, and salt; set aside.
- In another bowl, cream together the butter and sugar until light and fluffy.
- Add the egg and vanilla extract, mixing well.
- Gradually add the dry ingredients until well combined.
- Roll out the dough to about ¼ inch thick and cut out snowflake shapes using cookie cutters.
- Place on baking sheets lined with parchment paper and bake for about 8-10 minutes, or until the edges are lightly golden.
- Let the cookies cool completely before decorating.
The Art of Decorating Snowflake Cookies
Understanding Royal Icing
Royal icing is a staple in cookie decorating, as it dries hard and allows for detailed designs. It’s made with powdered sugar, egg whites, and lemon juice or water. Here’s a simple royal icing recipe to get you started:
Royal Icing Recipe
- 4 cups powdered sugar
- 3 tablespoons meringue powder or 2 egg whites
- 5-6 tablespoons water (adjust consistency as needed)
Instructions
- In a mixing bowl, combine powdered sugar and meringue powder.
- Add water gradually until the mixture reaches a thick, but pourable consistency.
- Mix on medium speed for about 5-7 minutes until the icing stands in stiff peaks.
Consistency is Key
When working with royal icing, it’s crucial to understand the different consistencies:
- Outline Consistency: Thick enough to hold its shape and create borders.
- Flood Consistency: Thinner and perfect for filling in outlines.
Decorating Techniques for Snowflake Cookies
Basic Decorating Techniques
Here are some foundational techniques you can use to create beautiful snowflake designs:
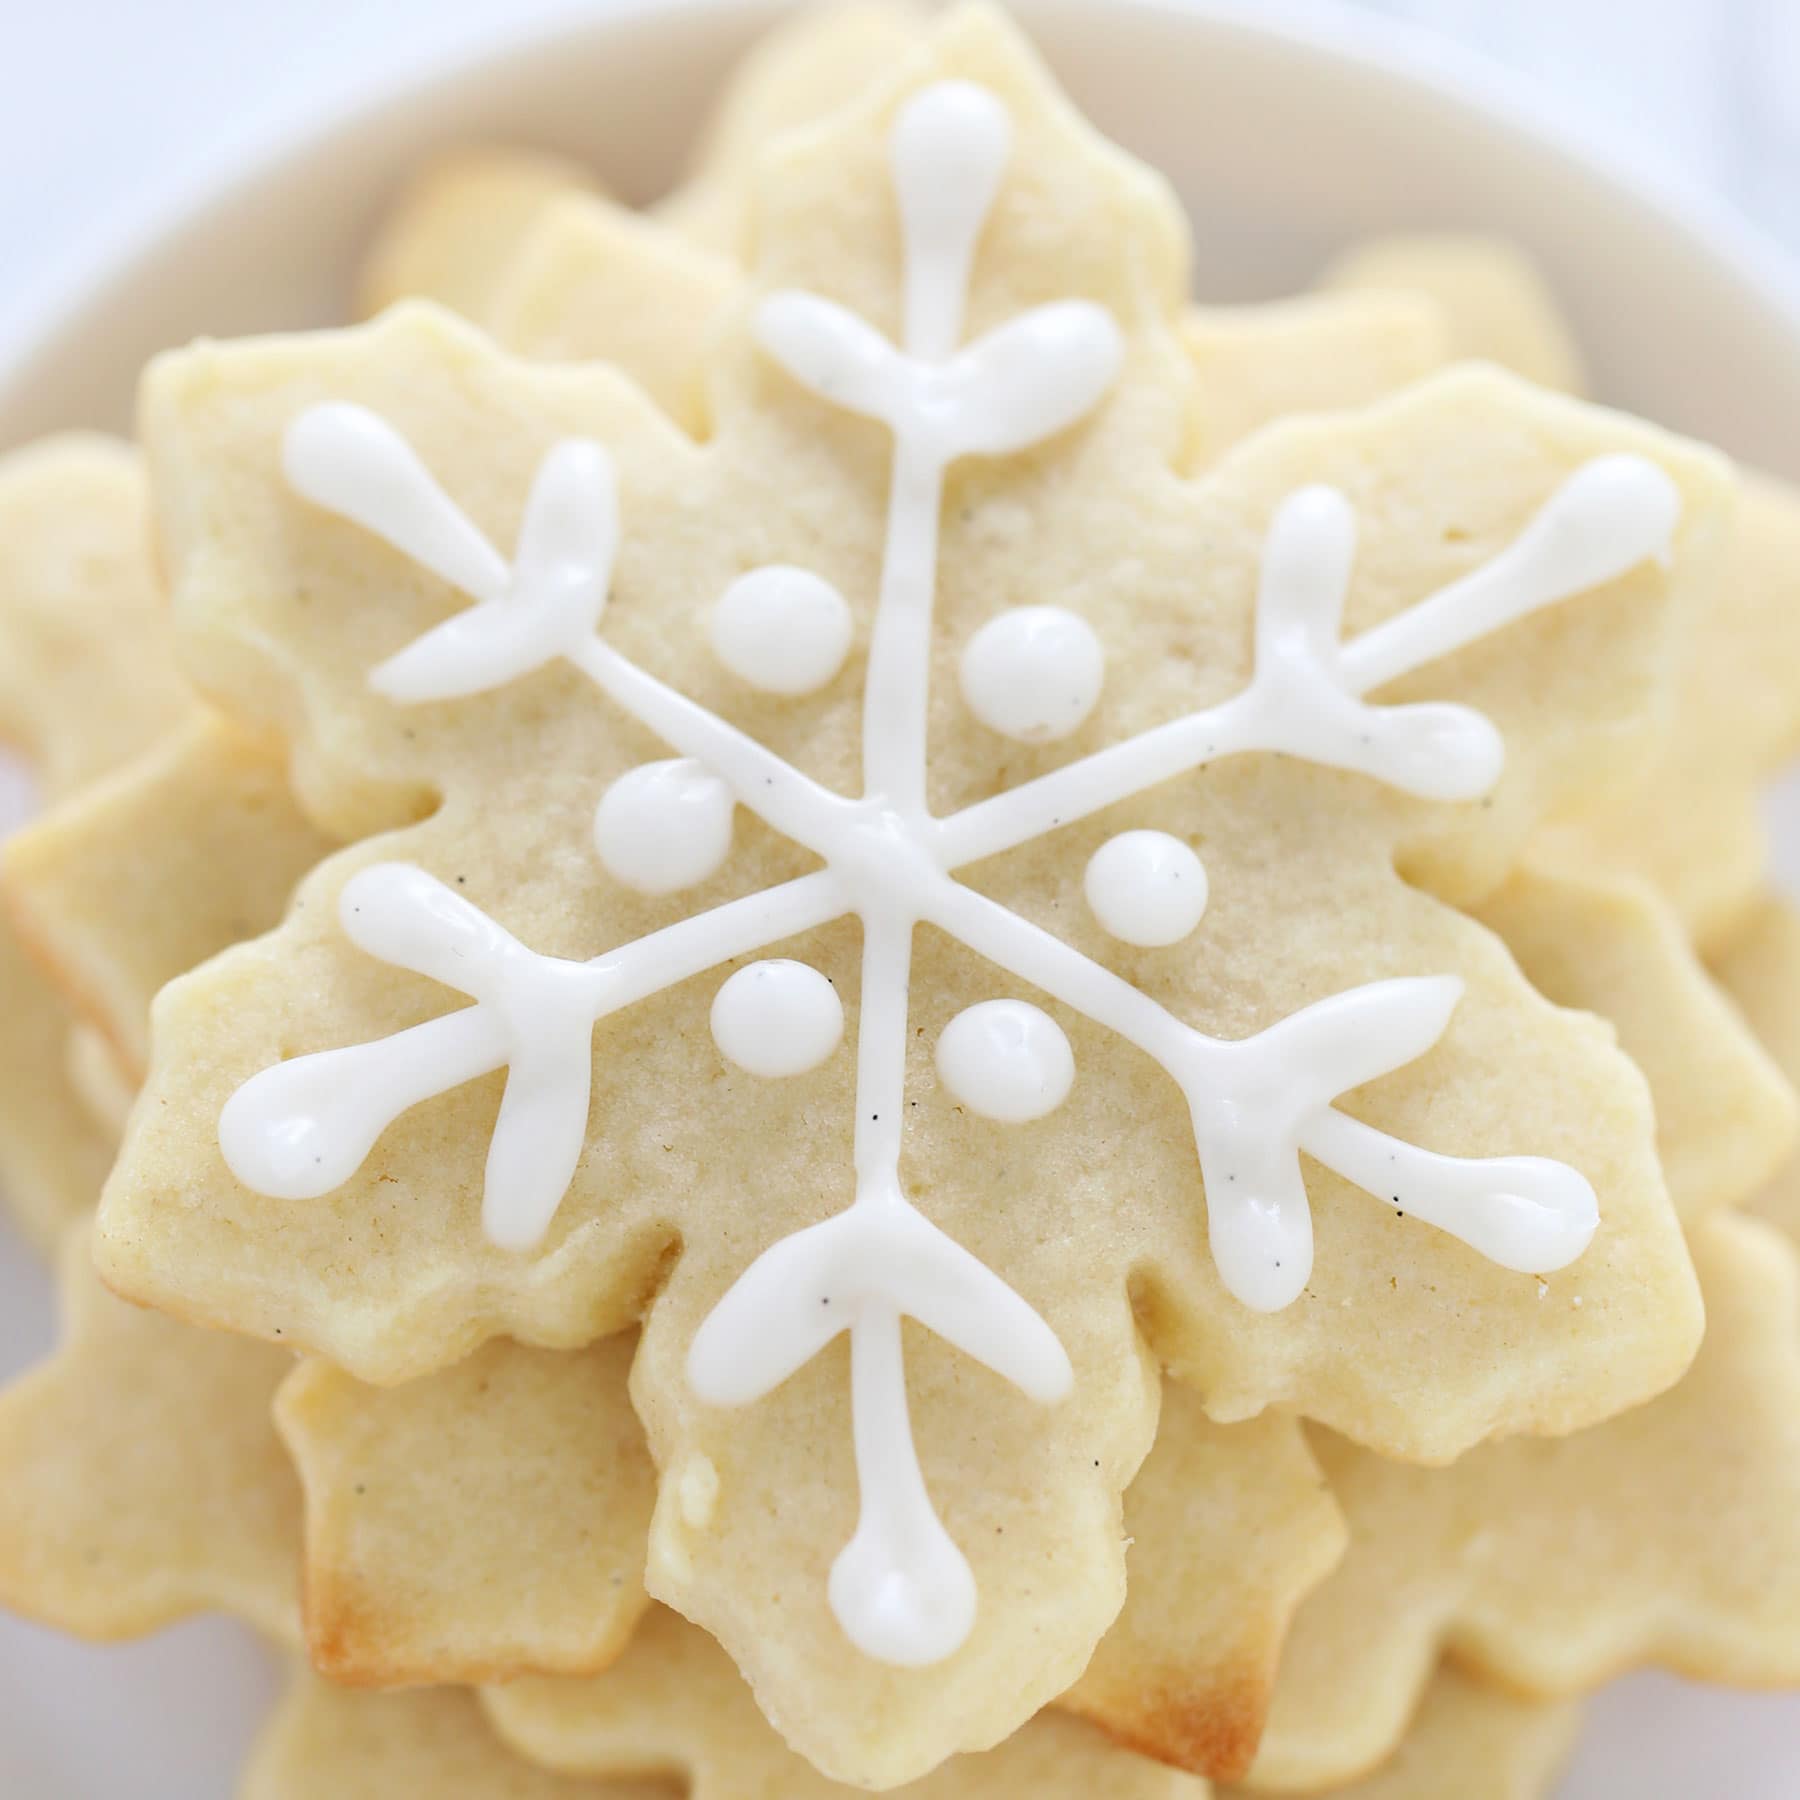
Piping
Using a piping bag fitted with a small round tip, you can create detailed designs. This technique is perfect for outlining and adding details.
Flooding
After outlining your cookie with royal icing, use a thinner icing to fill in the shape. This technique helps to achieve a smooth finish.
Painting
Once the icing is dry, you can use edible paints or food coloring to add detailed designs and textures to your cookies.
Advanced Techniques
Layering
After the first layer of icing dries, you can add additional layers to create depth and detail. Combining different techniques adds complexity to your designs.
Texture
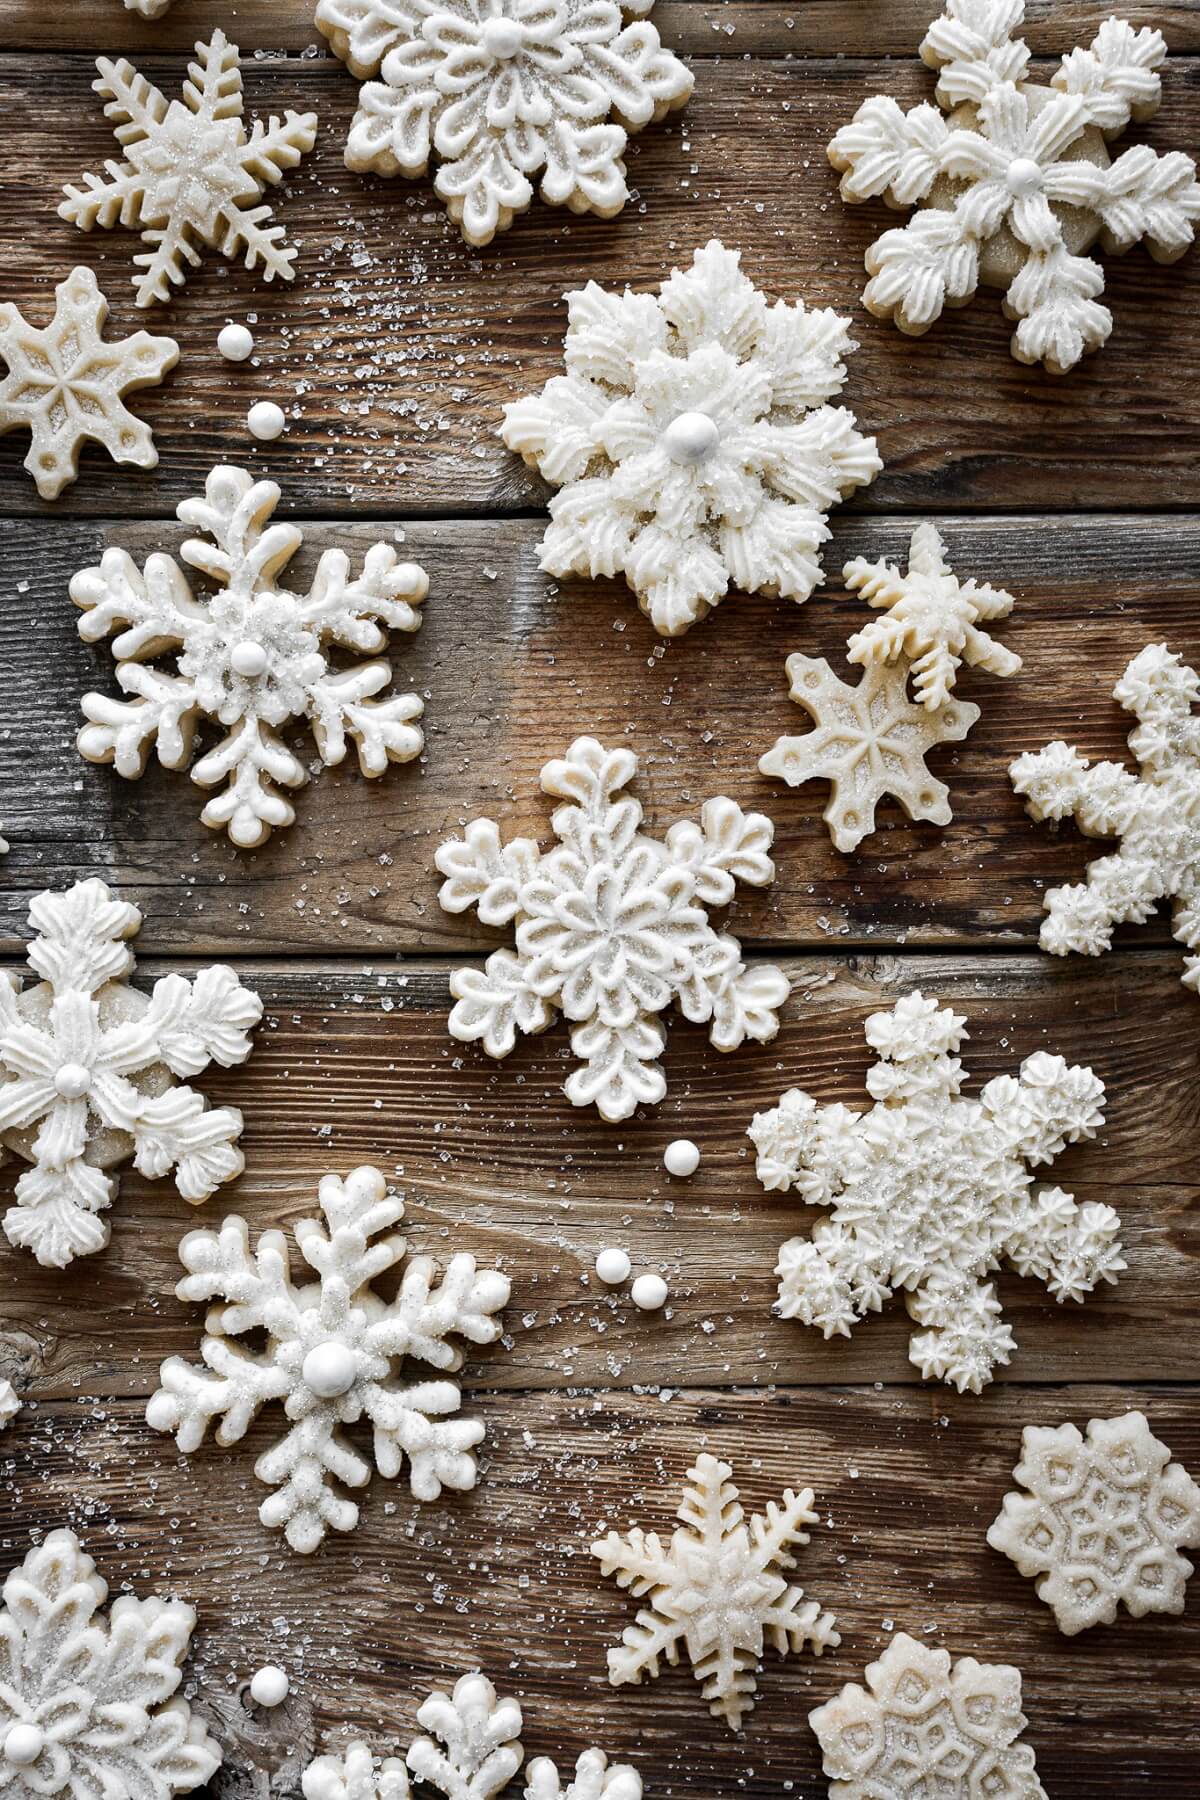
Adding sprinkles, sanding sugar, or edible glitter provides texture and visual interest to your cookies.
Creative Snowflake Designs
Classic White Snowflakes
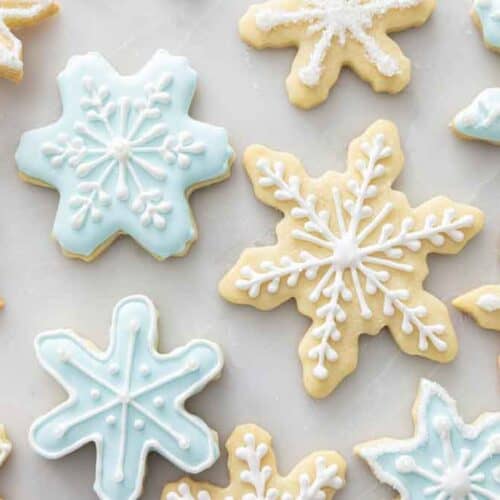
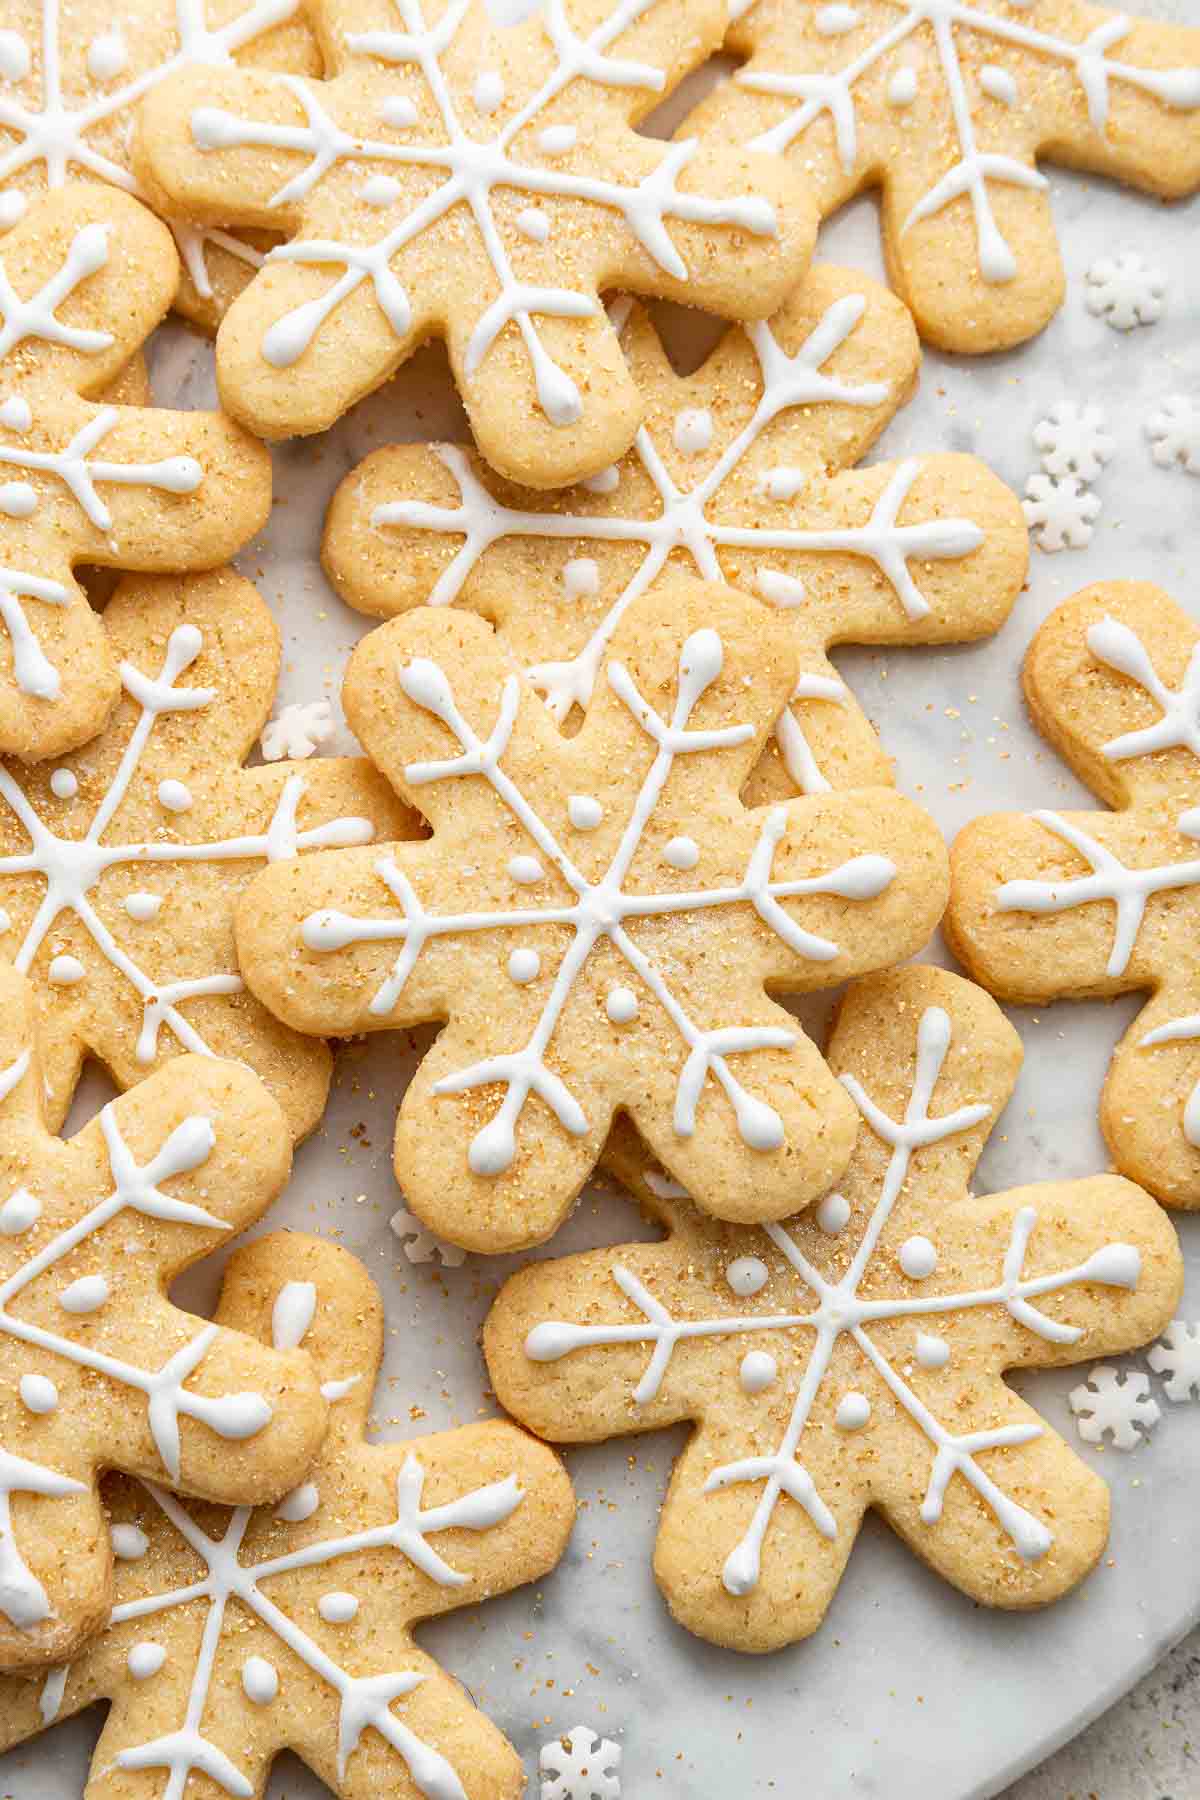
Using white royal icing on blue or purple backgrounds creates a classic winter look. Add small silver edible balls for a touch of elegance!
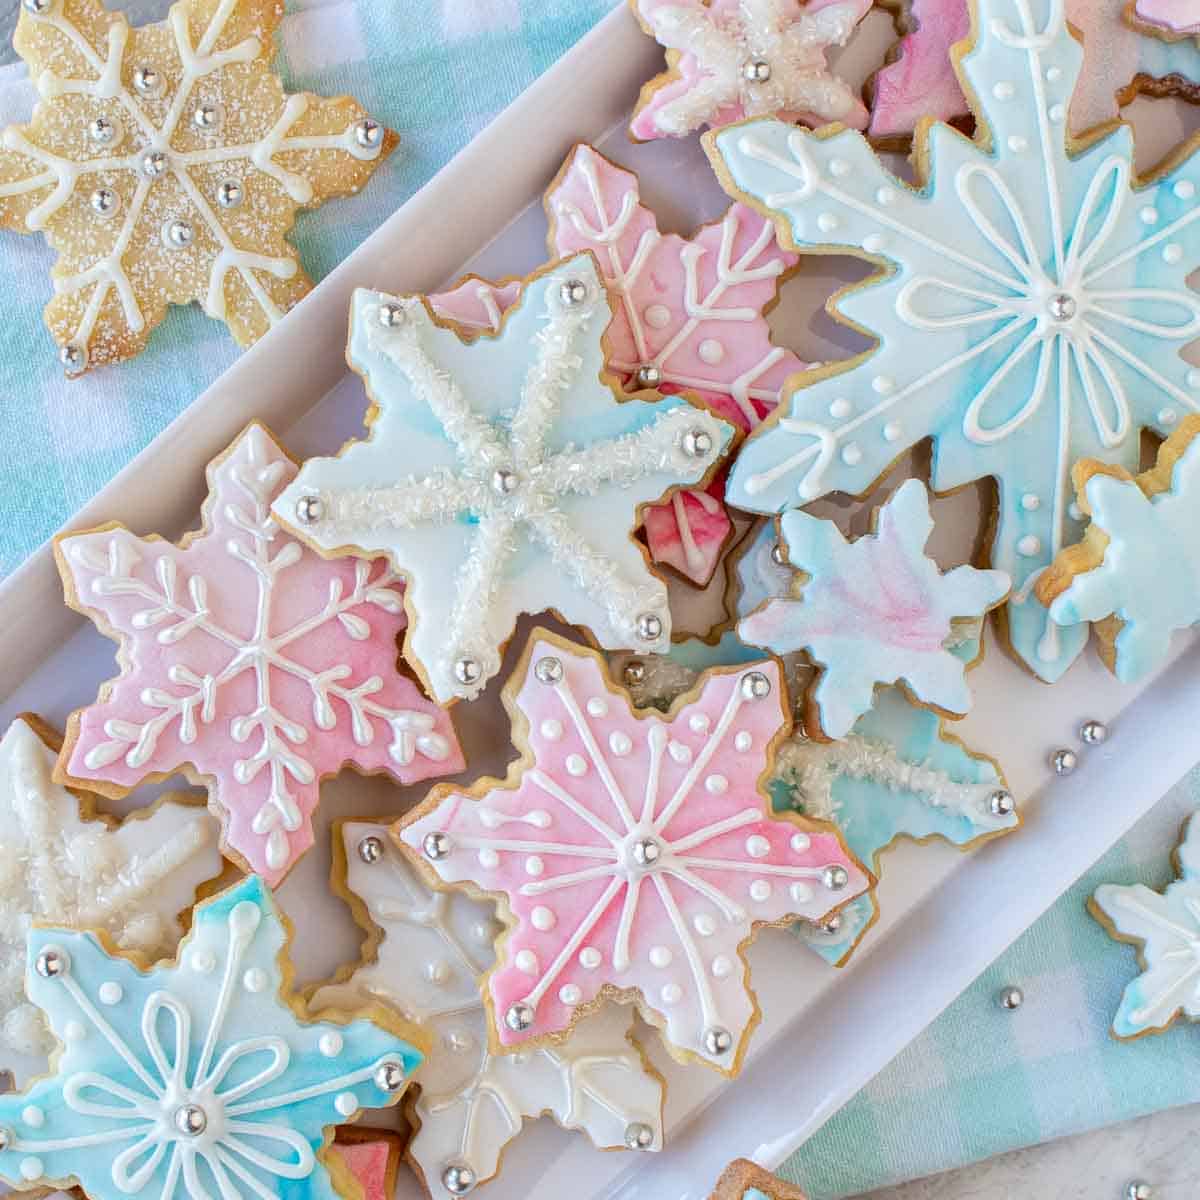
Colorful Snowflakes
Experiment with vibrant colors to create whimsical snowflakes. You can blend colors for an ombre effect or use stencils for intricate patterns.
Metallic Finishes
Adding metallic accents with edible gold or silver paints can elevate your snowflake cookies to a gourmet level.
Tips for a Successful Cookie Decorating Experience
Practice Makes Perfect
Don’t get discouraged if your first few cookies don’t turn out exactly as you hoped. Each decorating session is a learning experience!
Timing is Everything
Allow your cookies and icing to dry completely between steps. Patience will lead to better results.
Invest in Quality Tools
Using high-quality piping bags, tips, and food coloring will significantly enhance your cookie decorating experience.
Storing and Gifting Your Decorated Cookies
How to Store Your Snowflake Cookies
To keep your cookies fresh, store them in an airtight container at room temperature. Avoid stacking them until the icing is completely dry to prevent smudging.
Creative Packaging Ideas
Gifting decorated cookies is a lovely gesture during the holiday season! Use clear bags tied with festive ribbons or decorate boxes with personalized labels for a special touch.
FAQ Section
What kind of icing is best for decorating cookies?
Royal icing is generally the best choice for cookie decorating because it dries hard and holds its shape well. You can also use fondant or buttercream, but they may not provide the same results.
Can I freeze decorated cookies?
Yes, you can freeze decorated cookies! Make sure they are completely dry before wrapping them in plastic wrap or placing them in an airtight container. Allow them to thaw at room temperature before serving.
How long do decorated cookies last?
Decorated cookies can last up to two weeks when stored properly in an airtight container. Flavors may fade over time, so it’s best to enjoy them sooner rather than later.
What tools do I need to start cookie decorating?
Essential tools include piping bags, various piping tips, food coloring, a coupler, and a spatula for smoothing icing. As you progress, you may want to incorporate stencils and other specialized tools.
Conclusion
Decorating snowflake cookies is a joyful and rewarding activity that can bring a touch of magic to your holiday celebrations. From selecting the right ingredients to mastering various techniques, creating beautiful snowflake cookies is within reach for everyone. Whether you’re making them for a festive gathering, as gifts, or just for fun, you can unleash your creativity and make magical treats that everyone will love!
Happy decorating, and may your cookies turn out as beautiful as a snowy winter wonderland!