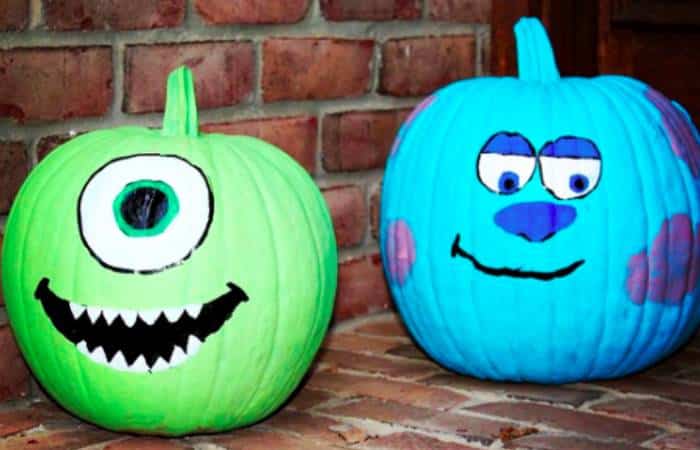
As the autumn season rolls in and the leaves start to change, one of the most beloved symbols of fall makes its appearance—pumpkins! While carving pumpkins is a classic Halloween tradition, painting and decorating them offers a unique twist. In this article, I’ll share personal experiences, step-by-step guides, and innovative tips on how to create stunning painted and decorated pumpkins that will impress friends and family alike.
Why Choose Painting and Decorating Over Traditional Carving?
For many, carving pumpkins is a cherished tradition. However, it does come with several drawbacks:
- Shorter lifespan: Carved pumpkins tend to rot quickly, usually within a week.
- Messy process: Carving can get messy, with seeds and guts everywhere.
- Limited design: Carving restricts you to certain designs.
On the other hand, painting and decorating pumpkins come with numerous advantages:

- Longevity: Painted pumpkins can last throughout the season.
- Less mess: You won’t have to deal with the sticky insides of a pumpkin.
- Creative freedom: There’s no limit to your design possibilities.
Getting Started: Supplies You’ll Need

Whether you’re a seasoned pumpkin decorator or a beginner, having the right supplies is crucial. Here’s a comprehensive list of everything you’ll need:
| Supplies | Description |
|---|---|
| Pumpkins | Choose a variety of sizes and shapes. |
| Acrylic Paint | Non-toxic paints are best for easy application. |
| Paintbrushes | Various sizes for detail work and broad strokes. |
| Spray Paint | Great for a smooth, even color application. |
| Mod Podge | To seal your designs and give a glossy finish. |
| Stencils | For precise designs and patterns. |
| Glitter & Embellishments | For added sparkle and texture. |
| Sealer Spray | To protect the finished product from weather elements. |

Step-by-Step Guide to Painting Pumpkins
1. Choose Your Pumpkin
When selecting pumpkins, look for ones that are firm and free from blemishes. I find that white pumpkins are fantastic canvases for intricate designs, while traditional orange ones bring comfort and nostalgia.

2. Clean Your Pumpkin
Wash your pumpkin with soap and water to remove any dirt. This step helps the paint adhere better.
3. Choose Your Design
Think about what you want to create. Here are a few creative ideas:
- Geometric patterns
- Animal faces
- Floral designs
- Seasonal themes (Halloween, Thanksgiving, etc.)
Sketch your design lightly on the pumpkin surface with a pencil.

4. Start Painting
Use paints in layers for vibrant colors. For my pumpkins, I often use a combination of brushes for broad strokes and fine detail work.
5. Add Embellishments
Embellish your painted pumpkins with glitter, ribbons, or other materials to enhance their charm. Mixing textures creates depth!

6. Seal Your Work
Once everything is dry, apply Mod Podge or a sealer spray to protect your pumpkin from the elements. This is crucial especially if you plan to display them outdoors.
Creative Pumpkin Decorating Ideas

Classic Characters
Transform your pumpkin into a character from a beloved story, like a witch or a friendly ghost. Personalize them to represent your family or favorite themes.
Seasonal Themes
Use fall colors and motifs like leaves, acorns, and harvest scenes. This approach ties your pumpkin decor into the autumn ambiance.
Modern Abstract Designs
If you prefer contemporary aesthetics, consider abstract shapes and splashes of colors. The beauty of painting pumpkins is the freedom to express your style!
Pros and Cons of Painting vs. Carving Pumpkins
| Painting | Carving | |
|---|---|---|
| Longevity | Longer-lasting | Decays quickly |
| Mess | Less messy | Very messy |
| Creativity | Unlimited designs | Limited to cut shapes |
| Tools Required | Paintbrushes and paints | Carving kit |
| Safety | Generally safe | Requires careful handling of sharp tools |
Frequently Asked Questions (FAQs)
Can I use regular paint on pumpkins?
While you can, it’s advisable to use acrylic paint since it adheres better and is less likely to peel. Always opt for non-toxic options if kids are involved in the painting process.
How long do painted pumpkins last?
Painted pumpkins can last for several weeks, especially if protected with a sealant and kept in a cool place away from direct sunlight.
Can I paint a carved pumpkin?
Yes! You can definitely paint over a carved pumpkin. Just make sure it’s clean and dry before applying the paint.
What types of pumpkins are best for painting?
Any pumpkin will do, but white pumpkins have become increasingly popular as they provide a great canvas. Small decorative pumpkins are also fun for intricate designs.
Is it better to paint or carve pumpkins with kids?
Painting is generally safer and less messy, making it a great option for kids. They can also get more creative without the dangers of sharp tools.
In Conclusion
Painting and decorating pumpkins is a delightful way to welcome fall into your home without the mess and short lifespan associated with carving. With a wealth of creative ideas and an easy-to-follow process, anyone can craft beautiful, eye-catching designs. Join me in celebrating this season by letting your imagination soar and creating your own stunning painted pumpkins.
So gather your supplies, invite your friends or family, and let the pumpkin decorating fun begin! You might just start a new fall tradition of your own!