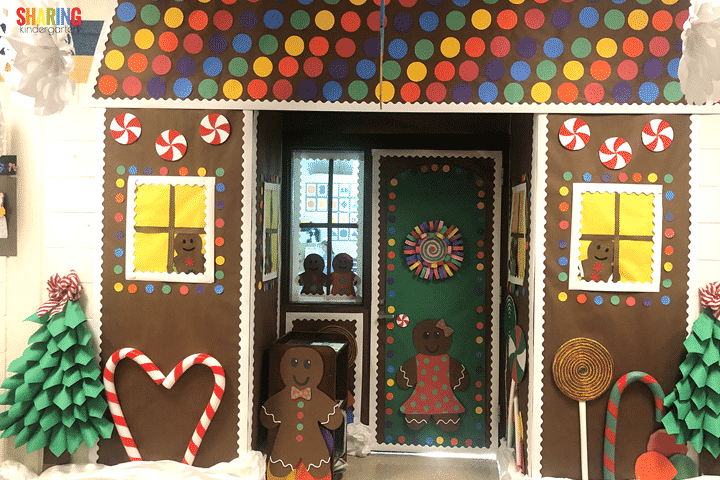
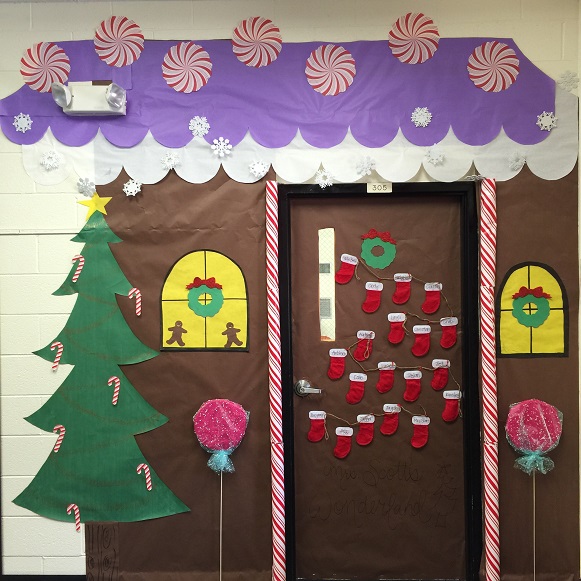
As the holiday season approaches, classrooms transform into magical spaces filled with joy, creativity, and the delightful scent of gingerbread. One of the most charming ways to celebrate this season is through classroom gingerbread house door decorations. These decorations not only bring smiles but also create an inviting atmosphere for students, teachers, and visitors alike. Drawing on my own experiences as both a teacher and a decorator, I’m excited to share a complete guide to gingerbread house door decorations that will make your classroom stand out this holiday season!
Why Use Gingerbread House Door Decorations?
Gingerbread houses evoke a sense of nostalgia and joy, reminding us of cherished holiday traditions. Decorating classroom doors with gingerbread house themes can:
- Enhance creativity: Inspire students to engage in festive arts and crafts.
- Foster community: Encourage collaboration among students and staff during decoration activities.
- Celebrate diversity: Showcase different cultural interpretations of holiday traditions.
- Create a festive atmosphere: Instantly brighten up the classroom and lift spirits during the winter months.
Essential Materials for Gingerbread House Door Decorations

Before diving into the projects, gather the essential materials. Here’s a comprehensive list:
| **Materials** | **Description** |
|—————————-|———————————————————–|
| Construction paper | Use for the base and decoration designs. |
| Scissors | Essential for cutting out shapes and decorations. |
| Glue or glue sticks | To attach various components securely. |
| Markers and crayons | For adding colorful designs and patterns. |
| Cotton balls | To represent snow, giving a wintery effect. |
| Glitter | For a magical sparkling touch. |
| Holiday-themed stickers | Easy decorations to enhance the festive mood. |

Personal Experience: The Joy of Decorating
Last year, my class and I decided to create a giant gingerbread house as our door decoration. The excitement was palpable as we transformed the bland door into a delightful scene. It wasn’t just about the end result; it was the process that fostered collaboration and creativity among the students. We ended up bonding over the project, and the final creation brought joy to everyone who passed by.

Step-by-Step Guide to Creating Gingerbread House Door Decorations
Step 1: Planning Your Design

Start by brainstorming ideas with your students. You can draw inspiration from traditional gingerbread houses, fairy tales, or even create a unique design. Here are a few design themes to consider:
- Classic Gingerbread House: Use brown construction paper for the base and white for the icing details.
- Fairytale Cottage: Incorporate whimsical elements like candy canes and gumdrops.
- Winter Wonderland: Feature snowflakes, icicles, and a snowy landscape.

Step 2: Preparing the Door
Make sure the door is clean and free of obstructions. You might want to cover the door with a large sheet of construction paper or butcher paper to create a blank canvas.

Step 3: Creating the Base Structure
Using brown construction paper, create the main structure of the gingerbread house. You can use cutouts for the walls and roof. Tape or glue them to the door securely.
Step 4: Adding Decorative Elements
Now comes the fun part! Let your students get creative:
- Trim the House: Use white paper or cotton balls for icing trim.
- Windows and Doors: Create cutouts from colored paper to add windows and a door.
- Landscape: Use glitter for snow and stickers for additional decorations.
Step 5: Final Touches
Inspect the decoration and make any final adjustments. Add more glitter or cotton for a snowy effect, and don’t forget to include the students’ names or class number for a personal touch!
Tips for a Successful Decoration Process
Encourage Teamwork
Each student can contribute to different sections of the decoration. Create a rotation system so everyone gets a chance to work on the parts they love!
Set a Time Limit
To keep the excitement alive, set a time limit for each decorating session. This will help maintain focus and energy.
Document the Process
Take photos throughout the process to capture the joy and creativity. You can share these moments in a class newsletter or on social media.
Showcase of Creative Gingerbread House Door Decorations
1. The Classic Gingerbread House
A traditional design featuring candy canes, gumdrops, and icing trim.
Pros: Timeless appeal, easy to create.
Cons: Might lack originality.
2. The Winter Wonderland
A snowy scene with snowflakes and icicles made of cotton and glitter.
Pros: Magical ambiance.
Cons: More materials required for a full effect.
3. The Fairytale Cottage
Bright colors and whimsical elements that tell a story.
Pros: Encourages creativity and storytelling.
Cons: May require more planning and design time.
Frequently Asked Questions (FAQs)
What are some budget-friendly ideas for gingerbread house decorations?
Utilize recycled materials like cardboard or old wrapping paper. Items from nature, such as pinecones and twigs, can also add charm to your designs!
Can we use edible materials for classroom decorations?
While edible decorations can be fun, they may attract unwanted attention from pests. It’s best to stick with non-edible materials for classroom displays.
How can I involve parents in the decoration process?
Organize a decorating day where parents can come in to assist students. This builds community and brings an extra set of hands for creativity!
What do I do with the decorations after the holidays?
Consider repurposing the materials for art projects in the new year. Alternatively, you can store them for next year’s holiday season!
Conclusion: Bring Festivity to Your Classroom
Classroom gingerbread house door decorations are not just about aesthetics; they create a joyful learning environment and foster community among students and staff. By following the tips and steps provided in this article, you’re sure to create a festive door display that will bring cheer to everyone. So gather your materials, unleash your creativity, and let the decorating begin!