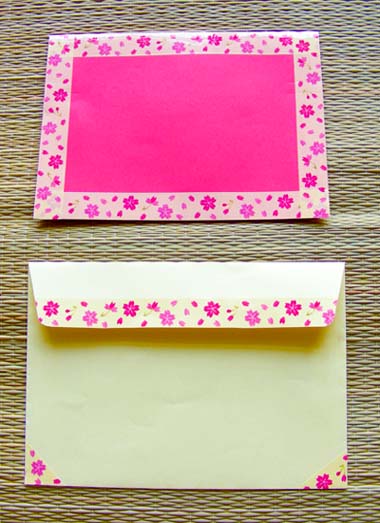
When it comes to sending letters, invitations, or gifts, a decorated envelope can turn an ordinary mail piece into something special. I’ve always believed that the first impression begins with the envelope. In this article, I’ll share a treasure trove of ideas, tips, and techniques for creating beautifully decorated envelopes that add a personal touch to your correspondence.
Why Decorated Envelopes Matter
Decorated envelopes are more than just an aesthetic choice. Here are some reasons why they matter:
- First Impressions: A beautifully decorated envelope sets the tone for what’s inside.
- Personal Touch: Handmade envelopes demonstrate thoughtfulness and care.
- Creative Expression: They reflect your personality and creativity.
- Stand Out in the Mailbox: Bright colors and unique designs make your mail noticeable.
Essential Supplies for Decorating Envelopes
What You Need
Before diving into design ideas, let’s gather some essential supplies:
- Plain envelopes (various sizes)
- Colored pens or markers
- Stickers and washi tape
- Rubber stamps and ink pads
- Paint (watercolor, acrylic)
- Glue and scissors
- Stencils and templates
- Craft paper and fabric scraps
Decorated Envelope Ideas
1. Hand-Painted Designs
Nothing beats the charm of a hand-painted envelope. Here’s how you can create your own:
Steps to Create Hand-Painted Envelopes
- Select a color palette that reflects the occasion.
- Use watercolor or acrylic paints to create patterns, such as flowers or abstract designs.
- Allow the envelope to dry completely before addressing it.
Pros and Cons
| Pros | Cons |
|---|---|
| Unique and personal touch | Time-consuming |
| Customizable to any theme | Requires some artistic skill |
2. Stamped Envelopes
Using stamps can add a whimsical aspect to your envelopes.
Types of Stamps to Use
- Floral patterns
- Seasonal themes (holidays, birthdays)
- Custom rubber stamps with names or messages

3. Washi Tape Magic
Washi tape is a versatile decorative tool that can transform a plain envelope into a stunning piece.
How to Use Washi Tape
- Choose a few complementary washi tape designs.
- Layer them across the envelope, either horizontally or vertically.
- Add additional elements like stickers or stamps for variety.
4. Calligraphy and Hand-Lettering
Beautiful handwriting can elevate your envelope design significantly.
Tips for Calligraphy
- Practice with different fonts before committing to one.
- Use a brush pen for a trendy script look.
- Incorporate flourishes and embellishments to enhance the style.

5. Collage Style Envelopes
Create a fun, eclectic look by using a collage technique.
How to Create Collage Envelopes
- Gather images from magazines, newspapers, or printed materials.
- Cut out shapes, characters, or patterns.
- Glue them onto the envelope for a layered effect.
6. Nature-Inspired Designs
Take inspiration from the great outdoors. Let’s explore some nature-themed design ideas.
Ideas for Nature-Inspired Envelopes
- Press flowers or leaves onto the envelope.
- Use twine or natural fibers for a rustic look.
- Draw or paint trees, mountains, or the ocean.

7. Themed Envelopes for Special Occasions
Align your envelope design with the occasion for a cohesive look.
Ideas for Different Occasions
| Occasion | Decoration Ideas |
|---|---|
| Weddings | Elegant calligraphy, gold foil accents |
| Birthdays | Bright colors, balloons, and confetti |
| Holidays | Seasonal stamps, holiday-themed washi tape |
Tips for Effective Envelope Decoration
Consider the Recipient
When decorating your envelope, think about the recipient’s personality. A whimsical design may suit a friend, while a more traditional approach is better for formal invitations.

Use High-Quality Materials
Investing in good-quality paper and tools will ensure that your designs look professional and withstand the mail process.
Mind the Postage
Make sure your decorations won’t interfere with postage. Avoid placing stickers or decorations in the corners where stamps and addresses go.

Decorating Envelopes: A Personal Touch
Over the years, I’ve received countless compliments on my decorated envelopes. It’s always a joy to see the recipient smile upon opening the mail. The time spent creating each envelope is a reflection of the care I put into my communication, whether it’s a heartfelt letter, a professional invitation, or a simple thank-you note. Remember, your creativity can inspire someone else, so don’t hesitate to share your envelope designs on social media or with friends!
FAQs about Decorated Envelopes
1. Can I use any kind of envelope for decorating?
Yes! You can use plain or colored envelopes. Just avoid any that have strong textures or designs that might interfere with your decorations.

2. What are some easy ways to decorate envelopes for beginners?
For beginners, using washi tape, stickers, or colorful pens are simple yet effective ways to create eye-catching envelopes.
3. How can I prevent ink from smudging on my decorated envelopes?
If you’re using markers or paints, allow sufficient drying time. Additionally, a spray fixative can help seal the ink and prevent smudging.

4. Are there envelope sizes that work better for decorating?
Standard sizes like A4 or A5 are great for decorating. They provide ample space for embellishments while remaining functional for mailing.
5. Can I decorate envelopes for formal events?
Absolutely! Just choose more sophisticated designs, like elegant calligraphy, and stick to a refined color palette.
Conclusion
Decorated envelopes are a wonderful way to express your creativity and make your mail memorable. Whether you’re preparing invitations for a wedding, sending a heartfelt letter, or just looking to brighten someone’s day, a personalized envelope can set the right tone and show that you care. So gather your supplies, unleash your creativity and start decorating today!