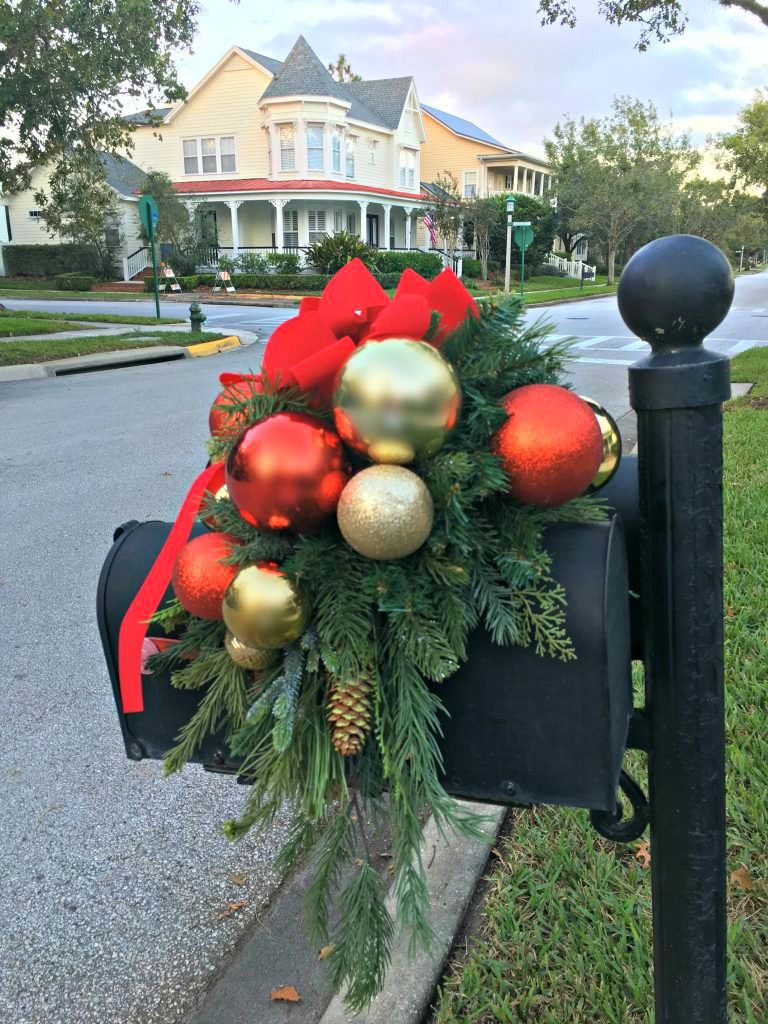
The holiday season is a magical time of year filled with joy, warmth, and festivity. One delightful way to express your holiday spirit is through mailbox decorations. Your mailbox is not just a functional item; it can be a canvas for creativity that spreads cheer to your neighborhood. In this article, I’ll share my personal experiences and insights on how to decorate your mailbox for the holidays, including tips, tricks, and plenty of inspiration to make your decorations stand out.
Why Decorate Your Mailbox for the Holidays?
Decorating your mailbox during the holidays isn’t just about aesthetics; it brings a sense of joy and community spirit. Here are several reasons why you should consider sprucing up your mailbox:
- Festive Spirit: A decorative mailbox can uplift the mood of passersby and spread the holiday cheer.
- Personal Touch: It allows you to express your unique style and celebrate traditions.
- Neighborhood Connection: Well-decorated mailboxes foster a sense of community and encourage neighbors to do the same.
Popular Themes for Holiday Mailbox Decorations
When it comes to decorating your mailbox, several themes can bring out the holiday spirit. Below are some popular themes that are both fun and festive:
1. Traditional Christmas
This classic theme often includes colors like red, green, and gold, with decorations like holly, wreaths, and bows.

2. Winter Wonderland
Think white and silver with snowflakes, icicles, and faux snow to create a serene winter scene.
3. Santa’s Workshop
Bring some whimsy into your decorations with playful characters such as Santa, reindeer, and elves.

4. Rustic Farmhouse
Incorporate natural elements like pinecones, burlap, and simple wooden signs for a cozy feel.
Materials Needed for Holiday Mailbox Decorations
Once you’ve chosen a theme, it’s time to gather your materials. Here’s a comprehensive list of supplies you might need:

- Festive ribbons and bows
- Artificial flowers or greenery
- Wreaths
- Light strings (battery-operated for convenience)
- Personalized signs
- Crafting tools (glue gun, scissors, etc.)
- Paint or glitter for finishing touches
Step-by-Step Guide to Decorating Your Mailbox
Here’s how to turn your mailbox into a holiday masterpiece:

Step 1: Clean Your Mailbox
Before you start decorating, make sure your mailbox is clean and free of any debris or old decorations.
Step 2: Choose a Base Decoration
Start with a base decoration, such as a wreath or a large bow, that sets the tone for your theme.

Step 3: Add Layers
Layer other decorations, such as garlands, lights, and festive signs, to enhance the look. Play with different heights and textures for visual interest.
Step 4: Secure Everything Properly
Ensure that all decorations are securely fastened to withstand winter weather conditions. A glue gun works great for this!

Step 5: Final Touches
Add smaller details like ornaments, crafted items, or handmade gifts to give it a personal touch.
DIY Holiday Mailbox Decoration Ideas
If you’re feeling crafty, here are some simple DIY projects to personalize your mailbox:

1. Christmas Wreath Mailbox Hanger
Make a small wreath using pine branches and attach it to the mailbox. You can even personalize it with your family’s initials.
2. Painted Mailbox
Give your mailbox a fresh coat of paint in festive colors and add hand-painted designs or stencils.
3. Snowman Mailbox Cover
Craft a snowman cover using fabric or plastic and secure it around your mailbox during the winter months.
Comparison of Store-Bought vs. DIY Mailbox Decorations
| Feature | Store-Bought Decorations | DIY Decorations |
|---|---|---|
| Cost | Usually higher | Potentially lower |
| Uniqueness | Less unique | Highly customizable |
| Time Investment | Quick to purchase | Requires more time |
| Durability | Variable quality | Can be made to last |
| Fun Factor | Less engaging | Highly enjoyable |
Pros and Cons of Holiday Mailbox Decorations
Pros
- Enhances curb appeal
- Creates a festive atmosphere
- Engages with the community
Cons
- Requires maintenance throughout the season
- Weather can damage decorations
- Potential costs for store-bought items
Maintaining Your Mailbox Decorations
To keep your decorations looking their best, here are a few maintenance tips:
- Check for damage after storms or heavy winds.
- Replace any faded or broken decorations promptly.
- Consider removing decorations that might attract wildlife.
Conclusion
Holiday mailbox decorations are a wonderful way to spread cheer and showcase your personality during the festive season. Whether you choose to craft your own decorations or purchase them from a store, the most important aspect is to have fun and share the joy of the holidays with your community. As I look back on my own holiday decorations, I can’t help but smile at the memories created while crafting our festive mailbox. It’s a simple yet meaningful way to celebrate with neighbors and friends.
FAQs about Holiday Mailbox Decorations
1. What are some cheap ideas for mailbox decorations?
Consider using materials like burlap, ribbon, or even recycled items from previous holidays. DIY crafts are great for keeping costs low.
2. How do I ensure my decorations withstand the weather?
Use waterproof materials and secure items properly. Avoid lightweight elements that can be easily blown away.
3. Can I use lights on my mailbox?
Yes! Battery-operated fairy lights are a great option to add sparkle. Ensure they are securely attached and weatherproof.
4. Should I take decorations down after the holidays?
It’s best to remove decorations promptly after the holiday season to maintain the mailbox in good condition and to keep the area tidy.
5. Are there mailbox decoration guidelines I should follow?
Check with your local regulations or homeowners’ association, as some areas have specific rules regarding mailbox decorations.