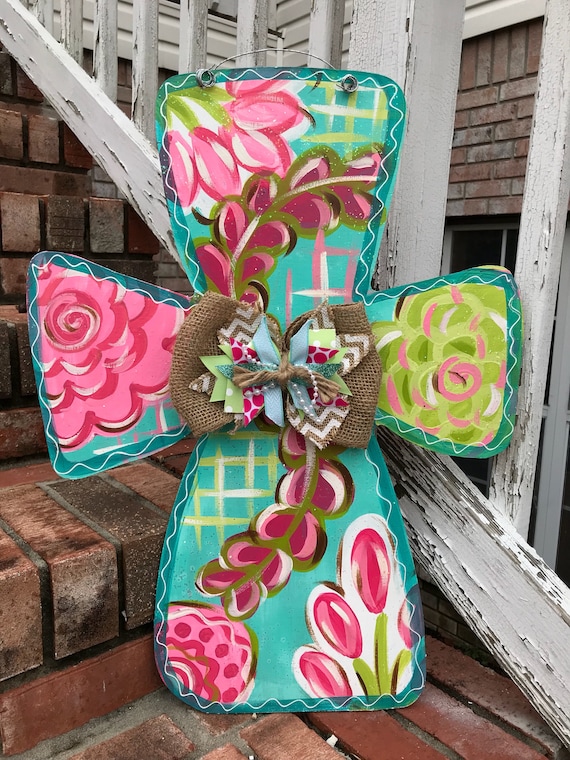
Do you want to add a personal touch to your home decor or make a fun statement for a special event? Decorating door hangers can be a delightful and creative way to express your style. In this article, I’ll share my personal experiences and insights into the world of door hanger decoration—ranging from simple DIY projects to more elaborate designs. Let’s dive in!
What Are Door Hangers?
Door hangers are typically made from cardboard, wood, or plastic and are often used for marketing, signage, or decoration. They hang on doorknobs or door handles and can convey a message, provide information, or simply be an aesthetic addition to your entryway.
Why Decorate Door Hangers?
Decorating door hangers is not just about aesthetics; it can serve various purposes:
- Enhancing the home decor.
- Celebrating holidays or special occasions.
- Communicating messages (like “Do Not Disturb”).
- Creating a welcoming atmosphere for guests.
Benefits of Creating Customized Door Hangers
When you take the time to create your own door hangers, you gain several benefits:
- Personalization: Tailor designs to suit your style or the occasion.
- Cost-Effective: DIY projects often save money compared to store-bought options.
- Creative Expression: Unleash your imagination with various materials and designs.
Supplies You’ll Need
To get started with your door hanger decoration project, here’s a quick list of supplies you’ll need:
- Base material (cardboard, wood, or plastic)
- Paint or markers
- Stickers and embellishments
- Glue or adhesive tape
- Scissors or craft knife
- Ribbons or strings (for hanging)
- Protective sealant (if using paint)

Popular Door Hanger Decoration Ideas
1. Seasonal Themes
Seasonal decorations are a great way to keep your door hangers fresh and relevant throughout the year. Here are some ideas:
Spring
Use pastel colors, floral designs, or bunny motifs for Easter.

Summer
Incorporate beach themes with shells, sun, and surfboards.
Autumn
Fall leaves, pumpkins, and Halloween themed designs can be incorporated.

Winter
Consider snowflakes, holiday themes, or warm wishes for the New Year.
2. Personalized Family Names
Creating a door hanger with your family name or a fun family saying can add a touch of homey charm. For example, “The Smith Family Welcomes You!”

3. Special Occasion Themes
Make door hangers for events like birthdays, weddings, or seasonal celebrations:
Birthdays
Create a colorful door hanger with the birthday person’s age and favorite colors.
Weddings
Design a beautiful door hanger decorated with flowers and the couple’s names.
4. Fun Messages
Consider humorous messages for a lighthearted touch, such as “Beware of Dog” or “Come Back Later, I’m Napping!”

Step-by-Step Guide to Creating Your Own Door Hanger
Step 1: Choose Your Base Material
The first step is to select your base material. Cardboard is a lightweight option, while wood provides durability. Plastic is versatile and often weather-resistant.

Step 2: Cut to Size
Decide on the size and shape of your door hanger. Typically, a classic design is about 5-8 inches wide and 10-12 inches long. Use a craft knife or scissors to cut it out.
Step 3: Decorate
Now comes the fun part! Use paint, markers, or other embellishments to bring your design to life. Don’t forget to let it dry if you’re using paint!

Step 4: Add Message
Incorporate any messages or phrases that suit your design. Use stencils for neat lettering or freehand it for a more personal touch.
Step 5: Finishing Touches
Once your design is complete, consider applying a protective sealant to ensure it lasts longer, especially if it’s exposed to outdoor elements.
Step 6: Attach Hanging Mechanism
Finally, add your ribbon or string at the top for hanging. Make sure it’s securely attached so your door hanger hangs perfectly!
Tips for Successful Door Hanger Decoration
Here are some tips that I’ve learned through experience:
- Plan Your Design: Sketch your ideas beforehand to avoid mistakes.
- Choose Weather-Resistant Materials: If hanging outdoors, opt for materials that can withstand the elements.
- Keep it Simple: Sometimes less is more; don’t overcrowd your design.
Comparison of Materials for Door Hangers
| Material | Durability | Cost | Ease of Use |
|---|---|---|---|
| Cardboard | Low | Low | Easy |
| Wood | High | Medium | Moderate |
| Plastic | High | Medium | Easy |
Pros and Cons of DIY Door Hangers
Pros
- Cost-effective.
- Highly customizable.
- Great for developing crafting skills.
- Can be a fun activity for families or friends.
Cons
- Time-consuming depending on the design.
- Potential for errors if not careful.
- Requires some tools and crafting supplies.
FAQs about Door Hanger Decoration
What are some popular themes for door hangers?
Popular themes include seasonal designs, family names, special occasions, and fun humorous messages. You can choose themes based on the time of year or events happening in your life.
Can I use recycled materials for making door hangers?
Absolutely! Using recycled materials is a great way to be environmentally friendly while personalizing your door hangers. Old cardboard boxes or scrap wood can make excellent bases.
How long does it take to decorate a door hanger?
The time it takes can vary greatly depending on the complexity of your design. Simple designs may take just an hour, while more elaborate projects can take several hours to complete.
Where can I find inspiration for door hanger designs?
You can find inspiration from websites like Pinterest, craft blogs, or even local craft stores. Crafting communities often share their projects for added ideas!
In conclusion, decorating door hangers is a joyful and creative project that can brighten up your home and showcase your personality. Whether you’re celebrating a special occasion, adding seasonal flair, or just making a fun statement, the possibilities are endless. I hope this guide inspires you to create your unique door hangers!