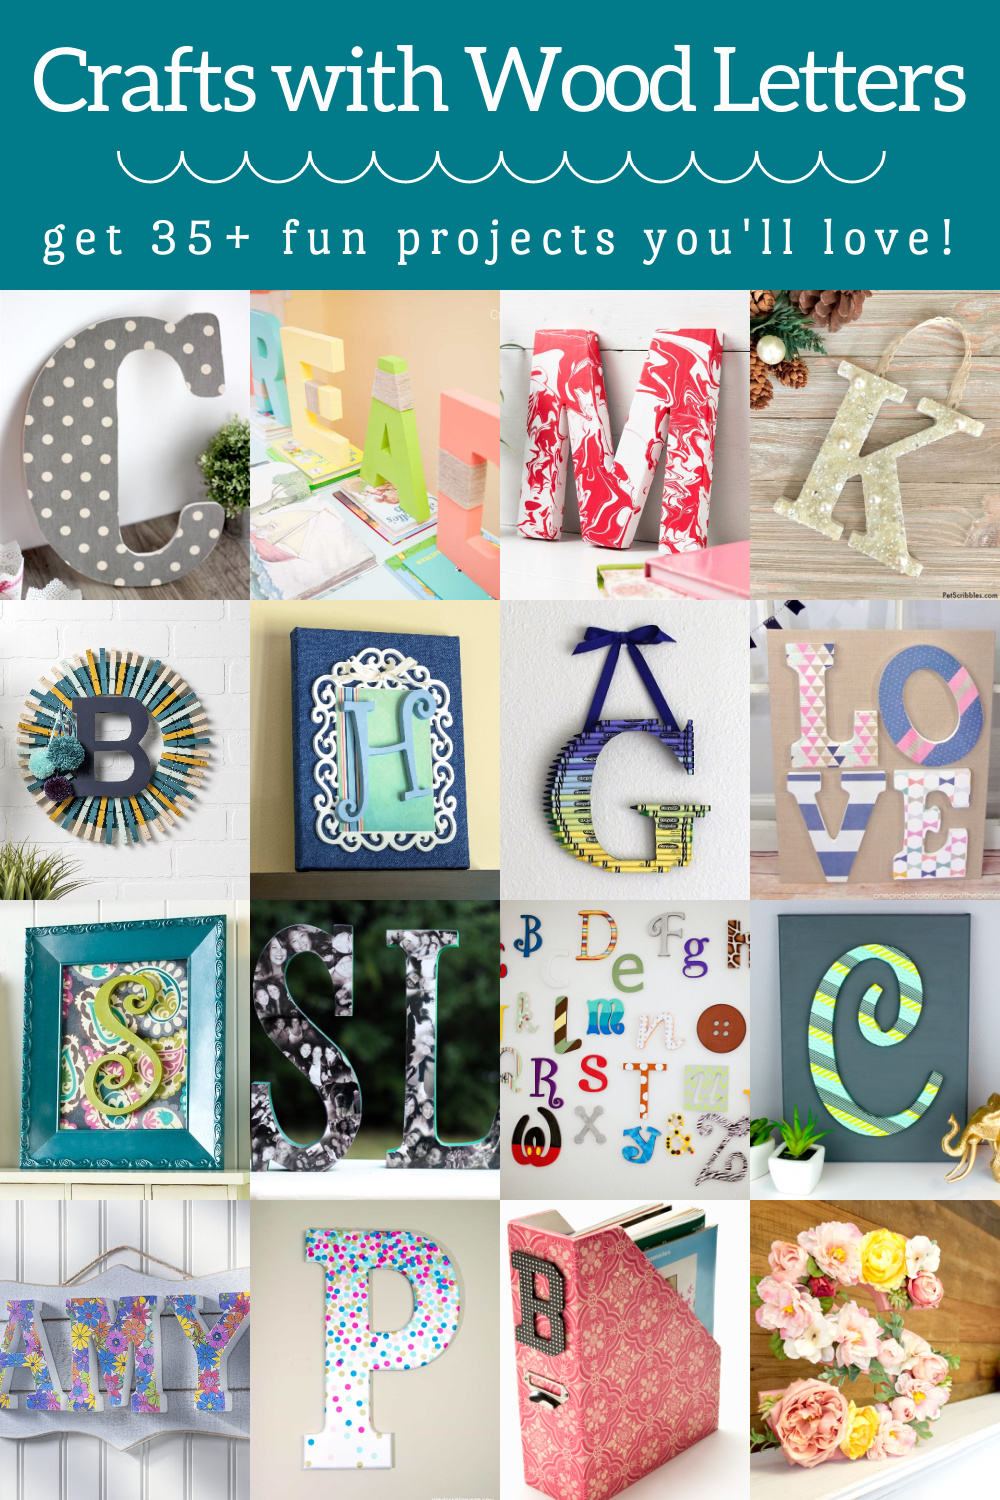
Decorating wood letters has become increasingly popular in home decor, children’s rooms, and special events. These versatile creations allow everyone to express their creativity and personalize their spaces. With my personal journey in crafting wood letters, I’m excited to share insights, techniques, and a wealth of ideas to help you get started on your own project!
Why Decorate Wood Letters?
Wood letters are more than just a decorative item; they can be symbolic and meaningful. Here are a few reasons why they are popular:
- Personalization: Transform any space while reflecting your unique style.
- Versatility: Suitable for all occasions – from nursery decor to wedding events.
- Affordability: A cost-effective way to create stunning decor.
Materials Needed for Decorating Wood Letters

Before diving into the creative process, gather your supplies. Depending on your technique, you may need:
- Wood letters (available at craft stores or online)
- Sandpaper
- Paint (acrylic, spray paint, or chalk paint)
- Brushes or sponges
- Glue (for embellishments)
- Embellishments (faux flowers, beads, ribbon)
- Sealant (to protect your finished work)

Popular Techniques to Decorate Wood Letters
With the right materials in hand, let’s explore some popular techniques. Each technique offers a unique look, making it easy to create something special.
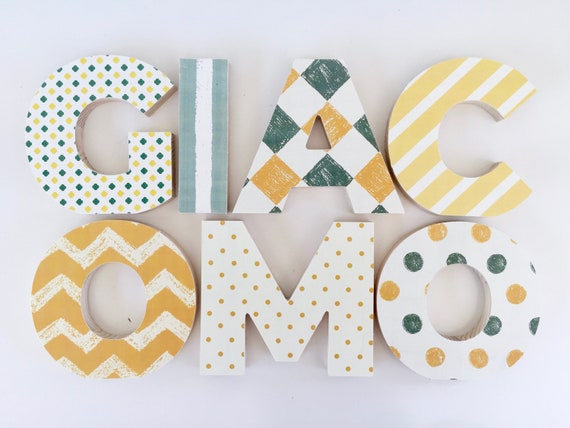
1. Painting Wood Letters
Painting is one of the simplest and most effective ways to decorate wood letters. You can choose any color to match your decor.

Steps to Paint Wood Letters:
- Sand the wood surface to ensure the paint adheres properly.
- Apply a base coat if needed (especially if the wood is dark).
- Use a brush or sponge to paint the letters.
- Apply a second coat for thorough coverage.
- Let it dry completely and finish with a sealant.
Pros and Cons of Painting Wood Letters
| Pros | Cons |
|---|---|
| Wide range of colors available | Can take longer to dry |
| Easy to customize | Requires multiple coats for darker colors |
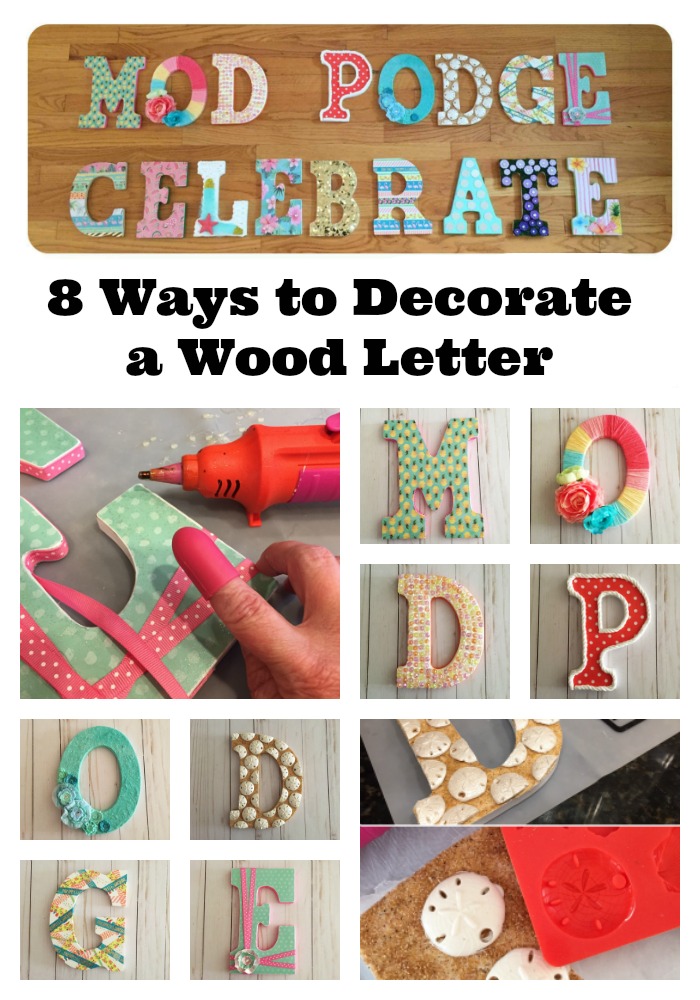
2. Decoupage Wood Letters
Decoupage is a creative way to apply paper designs to wood letters for a more artistic look.
Steps for Decoupaging Wood Letters:
- Select paper items (e.g., scrapbook paper, napkins).
- Cut the paper into small pieces to fit the letters.
- Using decoupage glue, apply the paper pieces to the wood.
- Seal the letters with a final layer of decoupage glue.
Pros and Cons of Decoupage Wood Letters
| Pros | Cons |
|---|---|
| Create intricate designs easily | Can be more time-consuming |
| Unique and personal touch | May require practice to perfect |

3. Adding Embellishments
Elevate your wood letters by adding embellishments like flowers, ribbon, or beads.
Ideas for Embellishments:
- Faux flowers wrapped around the letter.
- Beaded borders for a touch of elegance.
- Ribbons for a playful and festive feel.
Pros and Cons of Adding Embellishments
| Pros | Cons |
|---|---|
| Creates a unique visual impact | Can become cluttered if overdone |
| Allows for mixed materials | May require additional tools |
4. Stenciling Designs
Using stencils to create patterns or letters adds a professional touch.
Steps to Stencil Wood Letters:
- Select a stencil design and secure it to the letter.
- Use a sponge brush to dab paint over the stencil.
- Carefully lift the stencil to reveal your design.
Pros and Cons of Stenciling
| Pros | Cons |
|---|---|
| Perfect for symmetrical designs | Requires steady hand for precision |
| Quick and easy to do | Limited to stencil patterns available |
5. Using Vinyl Cutouts
Vinyl cutouts can add another dimension to your wood letters, creating clean and modern designs.
Steps for Applying Vinyl Cutouts:
- Design your cutouts using a vinyl cutter.
- Weed out the excess vinyl.
- Apply transfer tape and position it on the letter.
- Press firmly to adhere and remove the transfer tape.
Pros and Cons of Vinyl Cutouts
| Pros | Cons |
|---|---|
| Crisp and modern look | Requires cutting equipment |
| Durable and easy to clean | Limited to available vinyl colors and styles |
Personal Touch: My DIY Experience
In my own journey, I started by painting simple wood letters for my children’s playroom. Initially, I thought I could just grab a couple of colors and call it a day. However, I soon realized the magic of embellishments and stenciling brought the letters to life. I added their names and shapes that represented their favorite animals. It was a hit! Watching my kids light up when they saw their personalized space was priceless. Don’t be afraid to experiment – every project teaches you something new!
Tips for a Successful DIY Project
Here are some valuable tips to enhance your crafting experience:
- Plan Your Design: Sketch your ideas before starting to visualize how everything will look.
- Use Quality Materials: Invest in good quality paint and embellishments for the best results.
- Take Your Time: Rushing can lead to mistakes; enjoy the process as much as the outcome!
- Incorporate Personal Styles: Don’t hesitate to add elements that reflect your personality.
Where to Display Your Decorated Wood Letters
Once you’ve completed your wood letters, the next step is deciding where to showcase them:
- Nurseries and Children’s Rooms: Perfect for naming or themed decor.
- Living Rooms: Create focal points on shelves or mantels.
- Special Events: Use them as table centerpieces or backdrops for celebrations.
FAQs About Decorating Wood Letters
1. What type of wood is best for making letters?
Plywood is commonly used for its lightweight and ease of cutting. MDF is another good option as it provides a smooth surface for painting.
2. Can I decorate wood letters for outdoor use?
Yes, but ensure to use outdoor-safe paint and sealants to avoid weather damage. Consider materials that resist moisture and fading.
3. How do I ensure my paint doesn’t chip off?
Priming the wood surface before painting and applying a quality sealant can help protect your finish. Avoid using water-soluble paints for outdoor letters.
4. Are there any eco-friendly options for decorating wood letters?
Yes! Look for non-toxic paints and natural embellishments, like dried flowers or twine, to keep your project environmentally friendly.
5. Can I personalize wood letters with names or initials?
Absolutely! Personalizing with names or initials is a great way to create unique gifts or memorable decor. Stenciling and vinyl are excellent methods for this.
Conclusion
Decorating wood letters offers endless possibilities to express creativity and personalize spaces. From painting and decoupage to incorporating embellishments, each technique allows you to create a style uniquely yours. I encourage you to gather your materials, let your imagination run wild, and start crafting your own personalized wood letters today!