Introduction
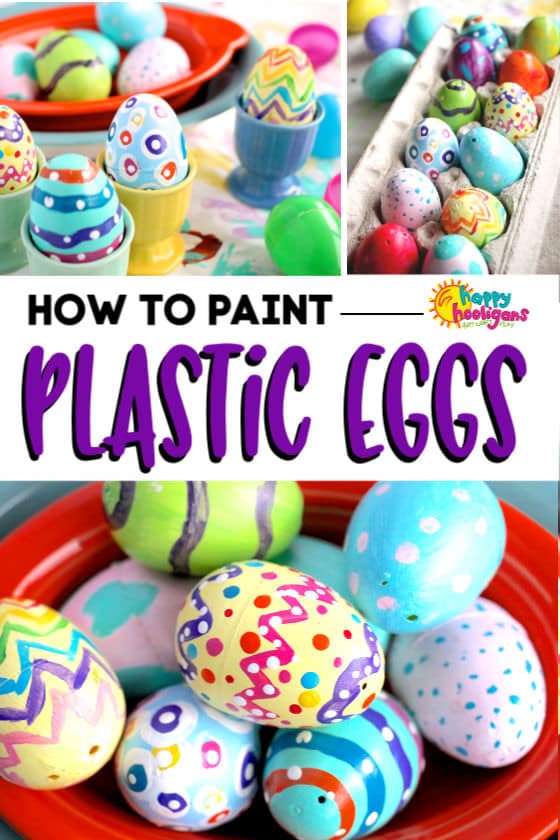
Decorating plastic eggs is not just an Easter tradition; it can be a fun, creative activity that brings families and friends together. Having decorated plastic eggs in various ways over the years, I can attest to the joy it brings, especially when you see the little ones’ faces light up. Whether it’s for an Easter egg hunt, a festive gathering, or simply for home decoration, the possibilities are endless. In this article, I’ll share practical tips, creative ideas, and step-by-step instructions to help you craft stunning plastic eggs.
Why Choose Plastic Eggs?
Plastic eggs have become increasingly popular for several reasons:
- Durability: Unlike real eggs, plastic ones can withstand rough handling.
- Reusability: They can be decorated each season, making them eco-friendly.
- Variety: Available in various shapes, sizes, and colors, they allow for endless creativity.
Essential Supplies for Decorating Plastic Eggs
Before diving into the fun, you’ll want to gather your supplies. Here’s a list of essential materials you may need:
- Plastic eggs (different sizes)
- Acrylic paints
- Markers
- Glue (hot glue or craft glue)
- Glitter
- Decoupage materials (tissue paper, fabric scraps)
- Ribbons and bows
- Stickers
- Brushes and sponges for painting
- Clear sealant spray (optional)
Creative Techniques for Decorating Plastic Eggs
1. Painting
Painting is the most straightforward method to give your plastic eggs a fresh look. Here’s how to get started:
Materials Needed:
- Acrylic paints
- Brushes
- Water cups for rinsing
- Paper towels
Steps:
- Choose your colors and pour a small amount onto a palette or paper plate.
- Use a brush to apply paint to the egg, doing one color at a time.
- Allow the base color to dry before adding designs or patterns.
- Once dry, seal with a clear spray to protect your artwork.
2. Glitter and Glam
Add some sparkle to your eggs with glitter! This method is particularly appealing for kids.
Materials Needed:
- Glue
- Glitter (various colors)
- Small containers for glitter
Steps:
- Apply glue to the desired areas of the plastic egg.
- Sprinkle glitter over the glued surface.
- Let it dry completely before shaking off excess glitter.

3. Decoupage
For a more sophisticated look, consider decoupage techniques which involve gluing decorative papers or fabric to your eggs.
Materials Needed:
- Tissue paper or fabric scraps
- Mod Podge or craft glue
- Scissors
- Brushes for spreading glue
Steps:
- Cut the paper or fabric into small pieces.
- Apply a layer of glue to the egg’s surface.
- Place the cut pieces on the glued area and seal with another layer of glue.
- Allow it to dry completely.
4. Using Stickers
This technique is perfect for younger children who may find painting and glueing tricky.
Materials Needed:
- Stickers (variety of designs)
Steps:
- Choose stickers that fit your theme (Easter, spring, etc.).
- Simply stick them onto the plastic eggs in a fun and creative way.
- Consider adding a layer of sealant for longevity.
Advanced Techniques for the Crafty Decorator
If you’re looking to elevate your decorating skills, try out these advanced techniques:
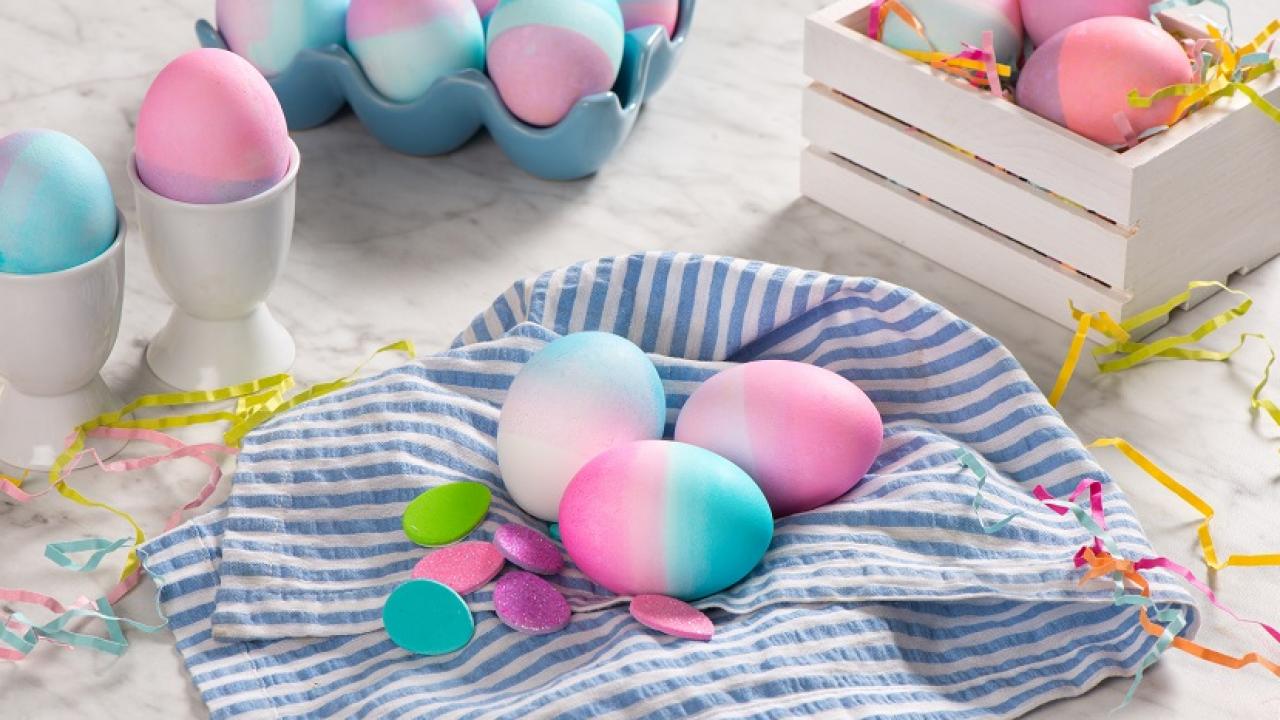
1. Ombre Effect
This trendy technique involves blending colors for a beautiful gradient effect.
Materials Needed:
- Acrylic paints in two or more shades
- Sponges for blending
Steps:
- Start by painting the bottom part of the egg with your lightest shade.
- Gradually blend in the darker shade using a sponge as you move upwards.
- Allow it to dry and seal if desired.
2. Fabric-Wrapped Eggs
If you prefer a more rustic aesthetic, fabric-wrapped eggs can add a unique touch.
Materials Needed:
- Fabric scraps
- Glue
- Scissors
Steps:
- Cut the fabric into strips or shapes.
- Apply a thin layer of glue on the plastic egg and wrap the fabric around it.
- Secure edges with a bit more glue and allow it to dry.

3. Natural Elements
Integrating natural materials such as leaves, twigs, or flowers can create a stunning design.
Materials Needed:
- Natural elements (pressed flowers, leaves)
- Decoupage glue
Steps:
- Arrange your natural elements on the egg as desired.
- Apply decoupage glue over the elements to secure them.
- Allow it to dry completely.
Comparison Table of Decorating Techniques
| Technique | Difficulty Level | Time Required | Materials Needed |
|---|---|---|---|
| Painting | Easy | 30 minutes | Acrylic paints, brushes |
| Glitter | Easy | 15 minutes | Glue, glitter |
| Decoupage | Medium | 1 hour | Tissue paper, glue |
| Stickering | Very Easy | 10 minutes | Stickers |
| Ombre Effect | Medium | 45 minutes | Acrylic paints, sponges |
| Fabric-Wrapped | Medium | 1 hour | Fabric, glue |
| Natural Elements | Medium | 1 hour | Natural elements, glue |

Pros and Cons of Decorating Plastic Eggs
Pros
- Durable and reusable.
- Safe for children.
- Easy to handle and decorate.
- Versatile designs for different occasions.
Cons
- May not have the same charm as real eggs.
- Can be less eco-friendly if not reused.
- Some methods may require additional skill or practice.
FAQs About Decorating Plastic Eggs
What type of paint is best for plastic eggs?
Acrylic paints are recommended as they adhere well to plastic and dry quickly.
Can I put real eggs inside plastic eggs?
Yes, many people use plastic eggs as containers for real eggs, especially for hunts. Just ensure they are sealed properly.
How do I store decorated plastic eggs?
Store them in a cool, dry place, preferably in a padded box to avoid scratches and breakage.

Can I use spray paint on plastic eggs?
Yes, spray paint can work well, just make sure to use a paint suitable for plastic surfaces.
What’s the best way to seal decorated eggs?
A clear spray sealant is ideal, as it provides a protective finish without altering the appearance of your design.