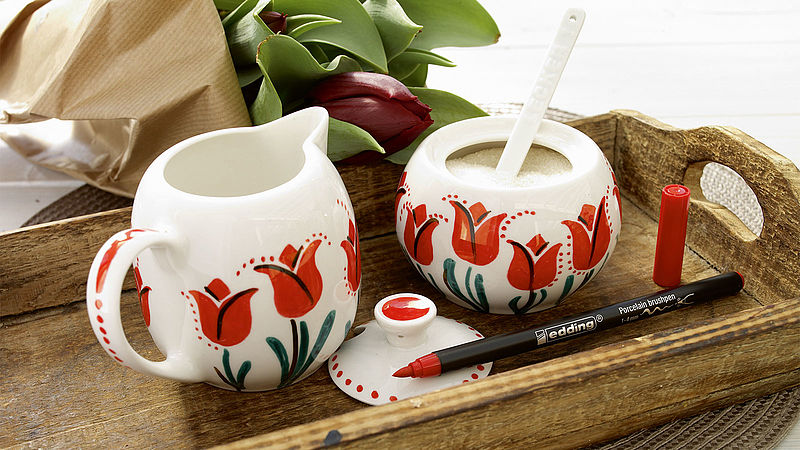
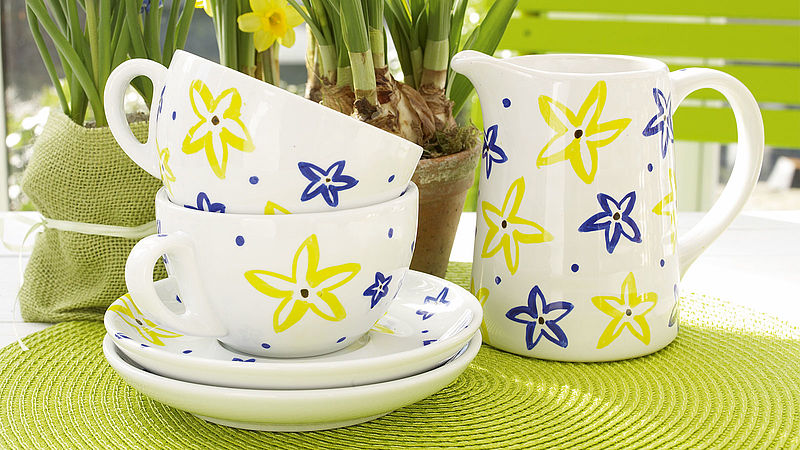
Welcome to the captivating world of tea cup decoration! Tea drinking is more than just a ritual; it’s an experience that can be enhanced with beautifully decorated cups. Whether you’re hosting a tea party, gifting a friend, or simply indulging in a little creative expression, decorating tea cups can bring a personal touch to your experience. In this article, we’ll explore a variety of methods, tips, and tricks to create stunning tea cups that reflect your unique style. With over 2700 words packed with insights, you’re in for a treat!
Why Decorate Tea Cups?
Tea cups are not just vessels for your favorite brew; they can be a canvas for creativity. Here are a few reasons why decorating your tea cups is worthwhile:
- Personal Expression: Your tea cup can showcase your personality, tastes, and style.
- Thoughtful Gifts: A decorated tea cup makes for a unique and sentimental gift.
- Memorable Experiences: Beautiful tea cups can elevate any gathering, making it more memorable.
Choosing the Right Materials
Before diving into the decoration process, it’s essential to choose the right materials. Here are some options:
1. Types of Tea Cups
Different types of tea cups offer different decoration possibilities:
- Porcelain: Smooth surface ideal for painting and decals.
- Stoneware: Textured, great for rustic designs.
- Glass: Perfect for etching and engraving.
- Bone China: Delicate and elegant, often decorated with intricate designs.
2. Decorating Supplies
Here are some supplies you might need:
- Non-toxic ceramic paint
- Paintbrushes of various sizes
- Sealer or glaze
- Stickers and decals
- Artistic tools like stencils and sponges

Methods for Decorating Tea Cups
Let’s explore some creative methods to decorate your tea cups!
1. Hand-Painted Designs
Hand painting is a classic method that allows for personal creativity. Here’s how to do it:
Steps to Hand-Paint a Tea Cup
- Clean your tea cup thoroughly to remove grease and dirt.
- Select your paint colors and brushes.
- Sketch your design lightly with a pencil.
- Begin painting with a steady hand, allowing each color to dry before applying the next.
- Once finished, let the cup dry completely and apply a food-safe sealer.

Pros and Cons of Hand-Painted Tea Cups
| Pros | Cons |
|---|---|
| Unique designs that reflect personal style | Time-consuming process |
| Perfect for gifts | Requires artistic skill |
| Allows for vibrant, custom colors | May not be dishwasher safe unless sealed |
2. Using Stickers and Decals
If you’re not confident in your painting skills, stickers and decals can create a polished look without the mess. Here’s how:
Steps to Apply Stickers and Decals
- Choose your stickers or decals that match your theme.
- Clean and dry your tea cup.
- Peel off the backing of the sticker/decal and press it firmly onto the cup.
- Allow it to set according to the manufacturer’s instructions.
- Optional: Apply a clear coat over the design for durability.

Pros and Cons of Stickers and Decals
| Pros | Cons |
|---|---|
| Quick and easy to apply | Designs may be less personalized |
| Mess-free compared to painting | May not withstand heavy use |
| Wide variety of designs available | Can peel off over time |
3. Decoupage Technique
Decoupage involves gluing decorative paper onto your tea cup for a layered effect. Here’s how you can do it:
Steps for Decoupage
- Cut out your desired images or patterns from decorative paper.
- Apply a thin layer of decoupage glue to the cup.
- Place the cutouts on the cup and smooth them down.
- Apply another layer of glue over the top to seal in your design.
- Allow it to dry completely before using.

Pros and Cons of Decoupage
| Pros | Cons |
|---|---|
| Offers a layered and textured look | Can be tricky to master |
| Great for upcycling old cups | Requires drying time |
| Can use a variety of materials | May not be dishwasher safe |
Tea Cup Decoration Themes
Now that we’ve covered various methods of decoration, let’s explore some popular themes to inspire your creativity.

1. Floral Designs
Floral patterns are timeless and can be achieved through all the decorating methods discussed. Consider using pastel colors for a soft, vintage feel.
2. Seasonal Themes
Decorate your tea cups to match the seasons. Use vibrant colors and motifs like leaves in Autumn or snowflakes in Winter.

3. Personalized Initials
Add a personal touch by painting or applying decals with initials or names. This is great for gifts or special occasions.
4. Geometric Patterns
For a modern look, consider using geometric patterns. These can be easily achieved through stenciling or using tape to create sharp lines.
Maintenance Tips for Decorated Tea Cups
Once you’ve created your masterpiece, it’s important to keep it looking great. Here are some maintenance tips:
- Avoid using harsh chemicals when cleaning.
- Wash by hand rather than in a dishwasher if you used paint.
- Store in a cool, dry place to prevent chipping.
Conclusion
Decorating tea cups is a wonderful way to express your creativity and personalize your tea experience. Whether you choose to paint, use stickers, or try decoupage, the possibilities are endless. Each decorated cup tells a story, making every sip a delightful experience. So gather your materials, unleash your creativity, and pour yourself a cup of inspiration!
FAQs about Decorating Tea Cups
What type of paint should I use for decorating tea cups?
Use non-toxic ceramic paint that is safe for food surfaces. Look for paints specifically designed for ceramics, as they will withstand washing and regular use.
Can I put decorated tea cups in the dishwasher?
No, if you have used paint or decals that are not labeled as dishwasher safe, it’s best to wash them by hand to preserve the design.
How do I seal my decorated tea cups?
After your paint or design has fully dried, apply a food-safe sealer that is designed for ceramics. This will help protect your design from scratches and wear.
Are there any tips for beginners?
Start with simple designs and practice on inexpensive cups before moving on to more intricate work. Don’t be afraid to experiment with colors and patterns!
Can I use markers for decorating tea cups?
Yes, you can use oil-based paint markers for detailing, but ensure they are non-toxic and suitable for use on ceramics for the best results.