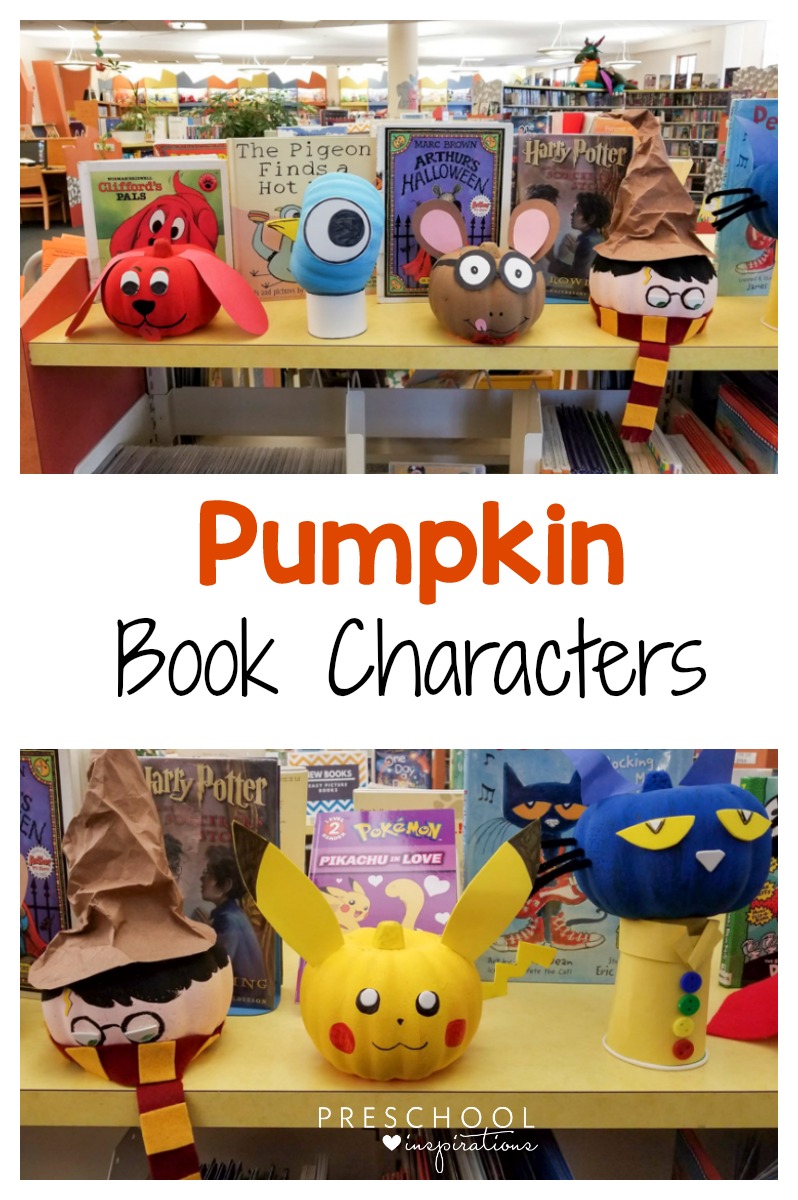
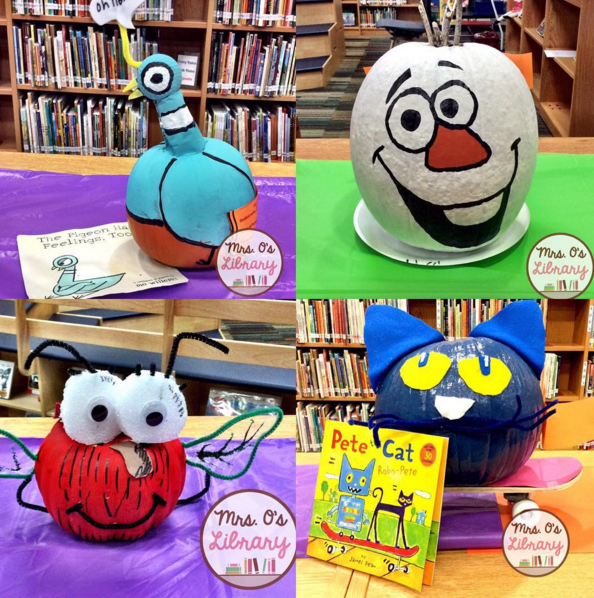
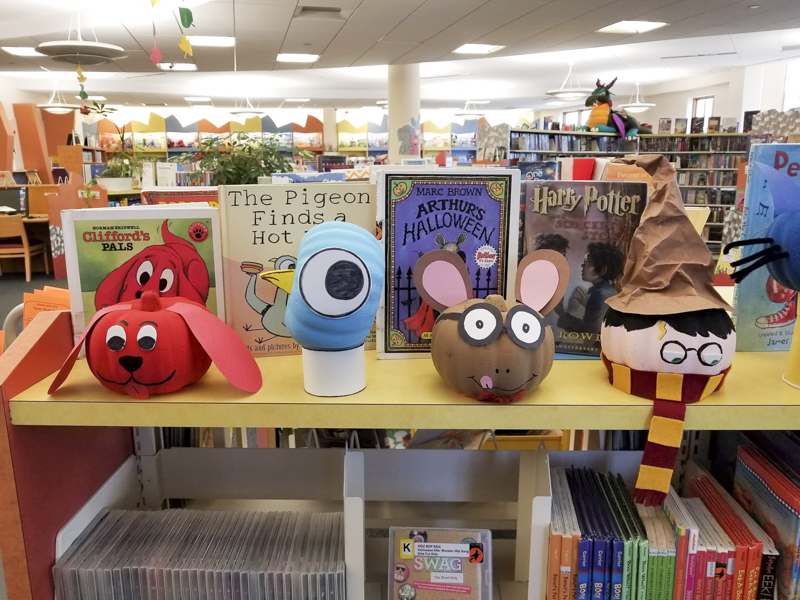
As the leaves turn and the air gets crisp, nothing says fall quite like a beautifully decorated pumpkin. While classic jack-o’-lanterns have their charm, decorating pumpkins to resemble beloved book characters takes creativity and fun to a whole new level. This guide will take you through the steps of bringing your favorite literary icons to life with pumpkins, sharing personal experiences, tips, and much more!
Why Decorate Pumpkins Like Book Characters?
Incorporating book characters into pumpkin decorating can elevate your Halloween decor while celebrating the stories that inspire us. Whether you’re a teacher looking for classroom activities, a parent wanting to bond with your child, or simply a crafty individual with a love for literature, this activity allows for personalization and creativity. Plus, each pumpkin tells a story of its own!
Benefits of Pumpkin Decorating
- Encourages creativity and self-expression
- Creates a fun family activity
- Enhances your Halloween decorations
- Promotes reading and discussion of books

Choosing the Right Book Character
Before we dive into the decorating process, the first step is selecting the book character you’d like to represent. This decision can be influenced by various factors including personal favorites, children’s preferences, or even current bestsellers.

Suggestions for Popular Book Characters
| Character | Book Title | Recommended Design |
|---|---|---|
| Harry Potter | Harry Potter Series | Round glasses, lightning bolt scar |
| Winnie the Pooh | The Adventures of Winnie the Pooh | Yellow pumpkin with red shirt |
| The Cat in the Hat | The Cat in the Hat | Striped hat and bowtie |
| Mad Hatter | Alice’s Adventures in Wonderland | Colorful hat and whimsical designs |
| Charlotte | Charlotte’s Web | Spider web with a little spider on top |

Supplies Needed for Pumpkin Decorating
Once you’ve chosen your character, it’s time to gather your supplies. The materials you’ll need depend largely on your design, but here’s a basic list to get you started:

Basic Supplies
- Fresh pumpkin (any size)
- Paint (acrylic or spray paint)
- Brushes (various sizes)
- Markers (permanent and washable)
- Craft supplies (fabric, glitter, googly eyes, etc.)
- Hot glue gun and glue sticks
- Carving tools (if necessary)
- Sealer (optional)

Tips for Selecting the Right Pumpkin
Consider the shape, size, and color of your pumpkin. For characters like Winnie the Pooh, a round, smooth pumpkin can work wonders, while a taller pumpkin might be perfect for something like The Cat in the Hat.

Step-by-Step Guide to Decorating Your Pumpkin
1. Plan Your Design

Before you start applying any materials, sketch out a rough design on paper. This helps visualize how your character will look on the pumpkin’s surface. Don’t worry about perfection—this is all about having fun!
2. Prepare Your Pumpkin
Clean your pumpkin with soap and water, and dry it thoroughly. If you plan to carve it, use a carving kit to create holes for eyes and features. Otherwise, just painting and gluing should suffice.
3. Base Coat
If your character requires a base color (like yellow for Winnie the Pooh), apply this first using paint. Allow it to dry completely before moving on to details.
Personal Experience:
Last Halloween, I decided to create a Harry Potter pumpkin. I painted the pumpkin a vibrant orange to mimic Gryffindor colors, and it was a hit with my kids!
4. Add Details
Now it’s time to add the finer details. Use markers, fabric, or paper to create facial features, clothing, and props. For example, glitter can work well for a magical effect!
Pro Tip:
If you’re using glue, be patient and allow each layer to dry completely before adding more layers.
5. Finishing Touches
Once you’re satisfied with your pumpkin, consider sealing it with a clear spray sealer to protect it from the elements.
Comparison: Carving vs. Painting Pumpkins
Choosing between carving and painting can affect the final look and durability of your pumpkin. Here’s a quick comparison:
| Method | Pros | Cons |
|---|---|---|
| Carving | More intricate designs; traditional look | Can weaken pumpkin; shorter lifespan |
| Painting | Durable; more creative options | Potential for mess; less “classic” feel |
FAQs about Decorating Pumpkins Like Book Characters
Q1: Can I use any pumpkin for decorating?
A: Yes! While traditional orange pumpkins are popular, white pumpkins and even gourds can work beautifully, depending on your character.
Q2: What if I don’t have painting supplies?
A: Consider using markers or craft paper. Many characters can be represented using simple cutouts and decorations.
Q3: Are there specific techniques for children to decorate pumpkins?
A: Definitely! Use stickers, paint pens, or even crayons. Keep it simple and fun to encourage creativity without frustration.
Q4: How can I make my pumpkin character last longer?
A: Use a sealer to protect the paint and try storing it in a cool, dry place. Avoid placing them in direct sunlight or moisture.
Q5: Can I decorate pumpkins that are not orange?
A: Absolutely! White pumpkins can represent ghostly characters, while green or blue pumpkins can bring unique characters to life.
Conclusion: Unleash Your Creativity This Halloween!
Decorating pumpkins like book characters is not just a festive activity—it’s a wonderful opportunity to share your love of literature with friends and family. Whether you’re going for a classic character or exploring new literary worlds, the joy of crafting and creativity awaits!
So gather your supplies, invite some friends over, and start creating your pumpkin masterpieces. Happy decorating!