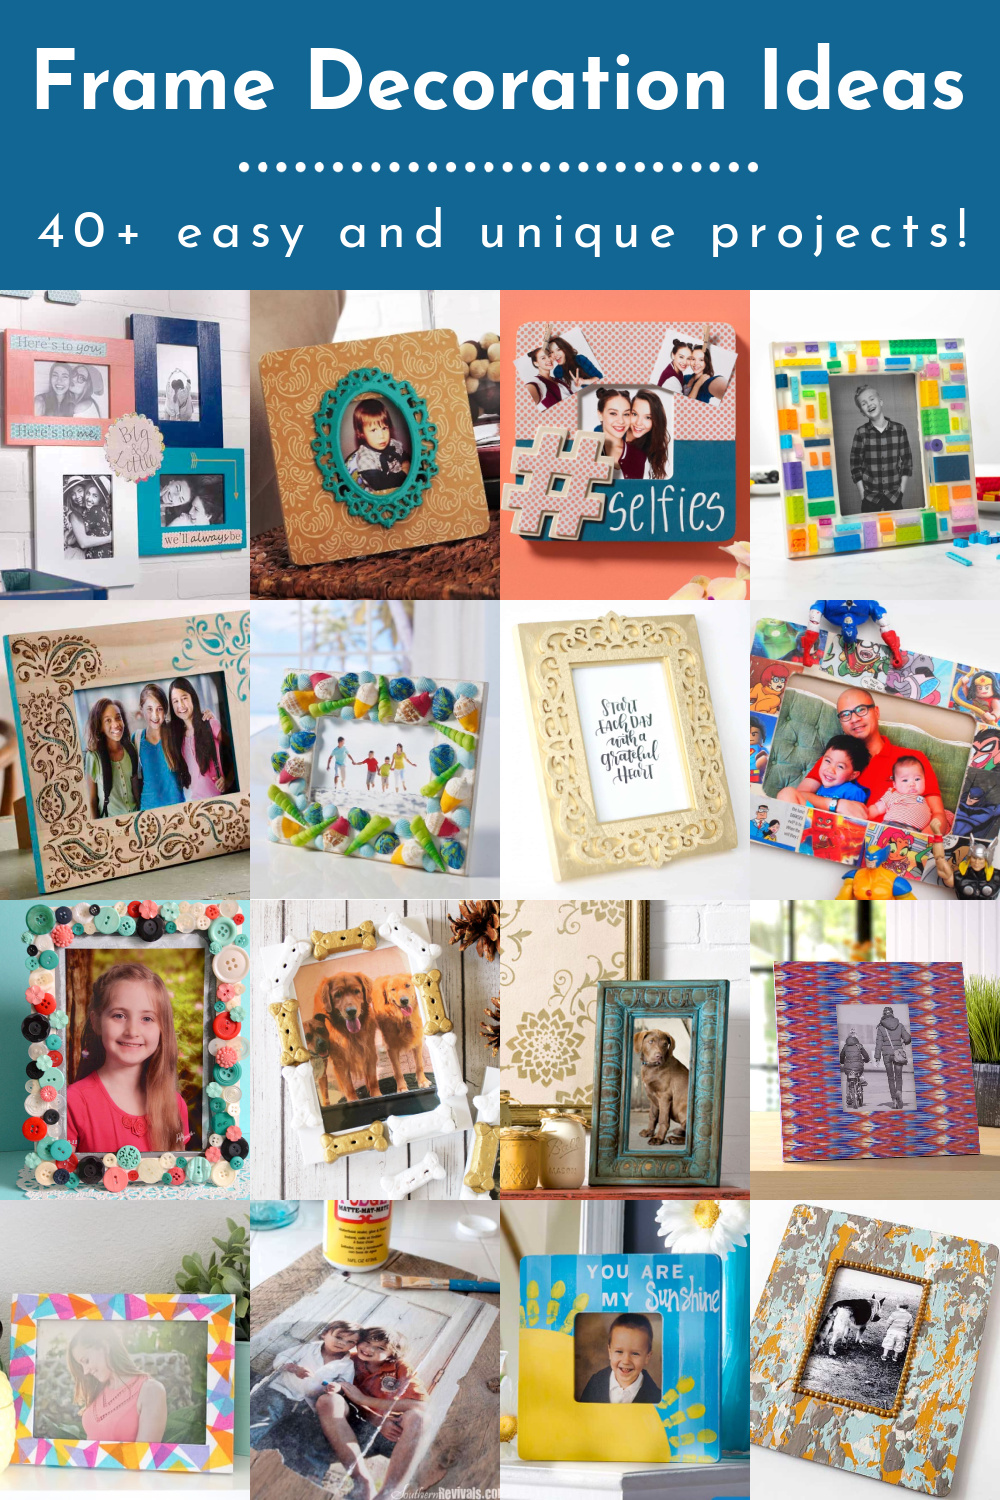
Decorating your own photo frame is not just a fun activity; it’s a chance to express your creativity and personalize your space. Whether it’s to gift to someone special or beautify your home, custom frames are a delightful addition to any setting. Having decorated many photo frames myself, I’ve gathered some tips, tricks, and inspiring experiences to help you along the way. Let’s dive into this artistic journey together!
Why Decorate Your Own Photo Frame?
Customizing your photo frames allows for a unique way to showcase special memories. Here are several reasons to take the plunge:
- Personal Touch: Add a piece of yourself to your décor.
- Customization: Create frames that match your home’s color scheme and theme.
- Gift Ideas: Handmade frames make thoughtful, personalized gifts.
- Cost-Effective: Transform inexpensive frames into something special.
Materials You’ll Need
Before you get started, gather the following materials:
- Basic photo frame (wood, metal, or plastic)
- Acrylic or oil paints
- Paintbrushes (various sizes)
- Adhesives ( glue gun, craft glue)
- Decorative elements (ribbons, beads, shells, etc.)
- Mod Podge or sealer (optional)
- Paper towels or wet wipes for cleaning
Choosing Your Style
There are numerous styles to choose from when decorating your photo frame:
Rustic Charm
Use natural materials, like twine or wood slices, to give your frame a cozy, rustic feel.
Modern Minimalism
Opt for sleek lines, monochrome colors, and simple embellishments.

Floral Fantasy
Incorporate faux flowers, leaves, or botanical prints for a fresh look.
Whimsical Touches
Use bright colors, playful shapes, and quirky accessories to create a fun atmosphere.

Step-by-Step Guide to Decorating Your Frame
Step 1: Prepare Your Workspace
Clear a flat surface and gather all your materials. It’s best to lay down a protective covering to avoid mess.
Step 2: Clean the Frame
If you’re repurposing an old frame, make sure to clean it thoroughly. Dust and grime can affect paint adherence.

Step 3: Paint the Base
Select a base color for your frame. A basic white or black often works well for contrast, but feel free to choose any color that suits your aesthetic.
Apply one to two coats of paint, allowing it to dry completely between applications.
Step 4: Add Decorative Elements
This is where your creativity shines! Here are some ideas:
- Ribbons: Wrap them around the frame corners for elegance.
- Beads: Glue them along edges for sparkle.
- Shells: For a beachy vibe, glue shells to the frame.
- Photos and Quotes: Use scrapbook paper to create a collage on the frame.

Step 5: Seal Your Work
Once everything is in place and dried, apply a coat of Mod Podge or sealer to protect your decorations.
Step 6: Insert Your Photo
Carefully insert the photo of your choice. Ensure it’s appropriately sized for your frame.

Tips for a Successful Project
- Experiment: Don’t be afraid to try different techniques or materials.
- Take your time: Rushing can lead to mistakes or unsatisfactory results.
- Have fun: Enjoy the creative process; it should be relaxing!
Common Mistakes to Avoid
Overloading with Decorations
While it’s tempting to add numerous embellishments, too many can make your frame look cluttered.

Neglecting to Let Layers Dry
Ensure each layer dries before moving on. This will help in achieving a neat finish.
Ignoring Color Theory
Consider how colors work together. Using a color wheel can help you choose complementary shades.

Pros and Cons of DIY Photo Frames
| Pros | Cons |
|---|---|
| Fully personalized to your taste | Time-consuming |
| Cost-effective compared to store-bought | Skill level may affect the outcome |
| Great for gifts | Requires materials and tools |
| Fun and therapeutic activity | Potential for mess if not careful |
Personal Experience: My Favorite Frame
One of my favorite projects was a rustic-themed frame I made for my grandmother. Using twine and natural wood pieces, I crafted a beautiful display for her favorite family photo. Not only did she love it, but the process brought back many cherished memories as we reminisced about past family gatherings. That frame still hangs proudly in her living room, and it serves as a reminder of both creativity and family bond.
Frequently Asked Questions (FAQs)
What materials can I use to decorate my photo frame?
You can use various materials including paints, beads, ribbons, fabric, faux flowers, shells, and more!
How can I make my decorated photo frame last longer?
Applying a protective sealant like Mod Podge can help keep your frame looking fresh. Additionally, keep it away from direct sunlight to prevent fading.
Can I decorate a metal frame?
Absolutely! You can use spray paints designed for metal surfaces, as well as stickers, magnets, and adhesive decorations.
Is decorating a photo frame suitable for kids?
Yes, it’s a fantastic activity for children! Just ensure that they use child-safe adhesives and materials.
Conclusion
Decorating your own photo frame is an enjoyable and rewarding experience that can lead to beautiful results. It’s a great way to show your personal style and creativity while making lasting memories with the process. So grab your materials, unleash your creativity, and get started on your photo frame journey today!