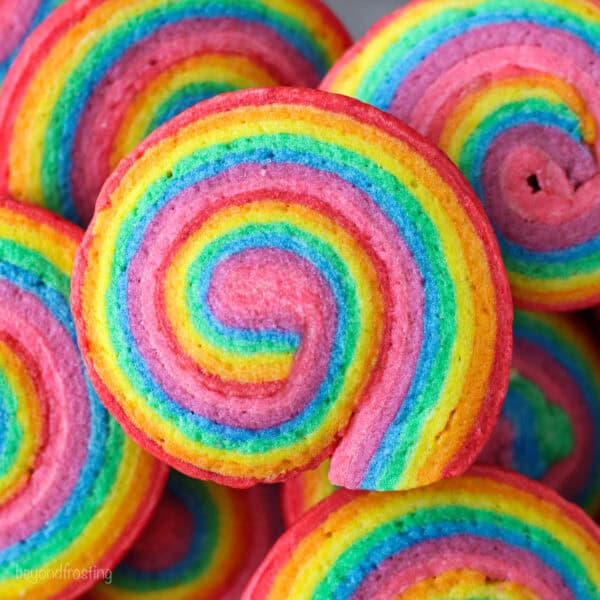
When it comes to festive treats, few things can brighten up a gathering like decorated rainbow cookies. With their vibrant colors and delightful flavor, these cookies are not just a feast for the eyes, but also a celebration for the palate. In this article, we’ll delve into everything you need to know about these iconic cookies, from their history and recipe variations to tips for decorating and serving them.
Table of Contents
- The History of Rainbow Cookies
- Basic Rainbow Cookie Recipe
- Creative Decorating Ideas
- Baking Tips for Perfect Rainbow Cookies
- Storage and Shelf Life
- Rainbow Cookies vs. Other Holiday Cookies
- FAQs about Rainbow Cookies
The History of Rainbow Cookies
Rainbow cookies, sometimes referred to as Italian rainbow cookies, hold a significant place in many culinary traditions. They are especially popular in Italian-American communities, symbolizing celebrations and joyous occasions. Originating as a layered almond cake known as “Tri-Color Cake” in Italy, it evolved into the cookie form we know today, often decorated for holidays and special events.
Personal Experience
I’ll never forget the first time I made rainbow cookies with my grandmother. The kitchen was filled with the sweet aroma of almond extract, and as we layered the colorful batter, I learned not just about baking but also about family traditions and the joy of sharing treats with loved ones.
Basic Rainbow Cookie Recipe
Here’s a simple recipe for making your own delicious rainbow cookies. You’ll need a few basic ingredients, which you may already have in your kitchen.
Ingredients
- 1 cup unsalted butter, softened
- 1 cup granulated sugar
- 4 large eggs
- 1 teaspoon almond extract
- 2 cups all-purpose flour
- 1 teaspoon baking powder
- 1/2 teaspoon salt
- Food coloring (red, yellow, green)
- 1 cup chocolate chips (optional)

Instructions
- Preheat your oven to 350°F (175°C).
- In a large bowl, cream the softened butter and sugar until light and fluffy.
- Add in the eggs, one at a time, mixing well after each addition.
- Stir in the almond extract.
- In a separate bowl, combine the flour, baking powder, and salt.
- Gradually add the dry ingredients to the wet mixture until just combined.
- Divide the dough into three equal parts. Color each part with food coloring: one red, one yellow, and one green.
- In a greased baking pan, layer the colored doughs one on top of the other.
- Bake for 25-30 minutes or until a toothpick comes out clean.
- Let cool, then cut into squares and decorate as desired.
Creative Decorating Ideas
Decorating your rainbow cookies can be just as fun as baking them. Here are some creative ideas to make your cookies truly stand out.

Frosting and Icing
Using royal icing or buttercream is a classic way to add a decorative touch. You can pipe designs, write messages, or simply cover the top in a solid layer of icing.
Sprinkles and Edible Glitter
Adding colorful sprinkles or edible glitter can give your cookies a festive flair. Consider matching your sprinkles to the colors of your cookies for an extra pop!

Chocolate Dipping
For chocolate lovers, dipping the bottom of your cookies in melted chocolate can add a rich flavor and beautiful finish. You could also drizzle chocolate over the top for added decoration.
Baking Tips for Perfect Rainbow Cookies
To ensure your rainbow cookies turn out perfectly every time, consider these tips:

- Use Room Temperature Ingredients: Make sure your butter and eggs are at room temperature for better mixing.
- Don’t Overmix: Mix until just combined to keep your cookies tender.
- Align Your Colors: Use the same amount of dough for each color layer for even baking.
- Chill the Dough: If the dough becomes too sticky, chill it for a few minutes before layering.
Storage and Shelf Life
Storing your decorated rainbow cookies properly ensures they remain fresh and tasty. Here are some guidelines:

Room Temperature Storage
Cookies can be kept in an airtight container at room temperature for up to a week. Make sure they are completely cooled before storing to prevent moisture buildup.
Freezing Cookies
If you’d like to make cookies in advance, consider freezing them. Wrap each cookie in plastic wrap and place them in a freezer-safe bag. They can last for up to three months in the freezer. Just let them thaw at room temperature when you’re ready to enjoy them!

Rainbow Cookies vs. Other Holiday Cookies
| Feature | Rainbow Cookies | Chocolate Chip Cookies | Sugar Cookies |
|---|---|---|---|
| Flavor | Sweet, Nutty | Sweet, Buttery | Sweet, Vanilla |
| Texture | Soft, Chewy | Crispy Edges, Soft Center | Crispy or Chewy |
| Color | Multi-colored | Brown | Usually White or Decorated |
| Occasions | Holidays, Celebrations | Anytime Treat | Decorative Events |
FAQs about Rainbow Cookies
What are the main ingredients in rainbow cookies?
The primary ingredients include butter, sugar, eggs, flour, almond extract, and food coloring.
Can I make rainbow cookies without almond extract?
Yes, you can substitute almond extract with vanilla extract or leave it out completely for a different flavor profile.
How do I make rainbow cookies gluten-free?
To make gluten-free rainbow cookies, simply replace the all-purpose flour with a gluten-free flour blend. Ensure that your other ingredients are also gluten-free.
What occasions are rainbow cookies suitable for?
Rainbow cookies are perfect for birthdays, holidays, celebrations, and any event where you want to add a splash of color and joy!
Can I use other colors for my rainbow cookies?
Absolutely! Feel free to experiment with different colors to match your themes, such as pastel colors for spring or bold colors for parties.
Conclusion
Decorated rainbow cookies are a delightful addition to any dessert table, bringing color, flavor, and joy. With a little practice and creativity, you can create beautiful cookies that will be a hit at any celebration. Whether you follow traditional recipes or add your own twist, the important thing is to enjoy the process and share your creations with loved ones.
So grab your mixing bowls, invite your friends or family to join in, and make some vibrant rainbow cookies today. You’ll not only fill your home with sweet scents but also create lasting memories that you’ll cherish for years to come!