Welcome to the underwater world of baking, where we dive deep into the ocean of creativity with delicious fish cookies decorated in an array of colors and styles! As someone who’s spent countless hours in the kitchen, experimenting with various cookie shapes and designs, I can assure you that fish cookies are not only fun to make but are also a delightful treat for any occasion, particularly for beach-themed parties, birthdays, or even simple gatherings. In this article, we’ll explore the journey of crafting these adorable treats, complete with tips, recipes, and my very own baking experiences.
Why Choose Fish Cookies?
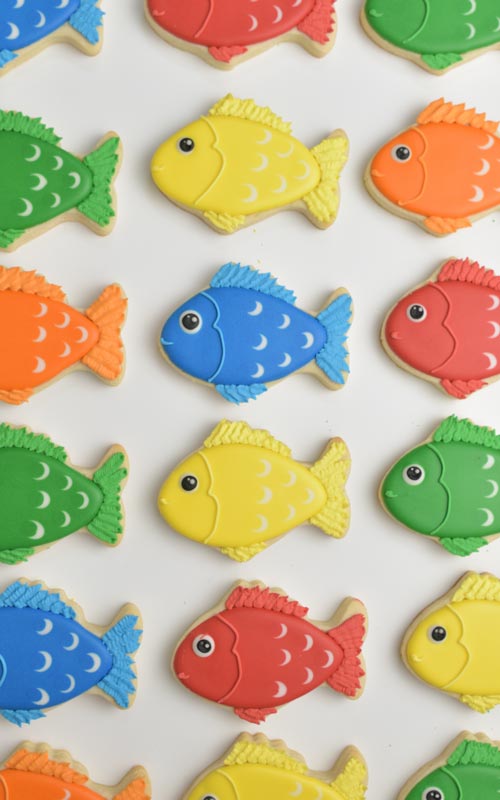
Fish cookies are a unique and whimsical addition to any dessert table. They captivate the hearts of both children and adults alike. Here are some reasons why you should consider adding them to your baking repertoire:
- Fun and Creative: Decorating fish cookies allows for endless creativity with colors, designs, and toppings.
- Versatile: They can be tailored for various occasions, from birthday parties to beach-themed gatherings.
- Delicious: Made with flavorful cookie dough, they are a treat that’s both beautiful and tasty!
The Ingredients You’ll Need
Basic Cookie Dough Ingredients
Before we start decorating, let’s gather our ingredients for the fish cookies base:
- 2 ¾ cups all-purpose flour
- 1 teaspoon baking powder
- ½ teaspoon salt
- 1 cup unsalted butter, softened
- 1 ½ cups sugar
- 1 egg
- 1 teaspoon vanilla extract
- Food coloring (various colors for decorating)
Decorating Supplies
To make your fish cookies truly shine, you’ll need a few decorating supplies:
- Royal icing (for intricate designs)
- Candy eyes
- Edible glitter or sprinkles
- Piping bags with various tips
- Food-safe brushes (for painting details)
Baking the Perfect Fish Cookies
With ingredients in hand, let’s dive into the steps of creating the perfect fish cookies. Follow along, and don’t forget to enjoy the process!
Step-by-Step Instructions
Step 1: Prepare Your Dough
Start by whisking together flour, baking powder, and salt in a bowl. In another bowl, cream together the softened butter and sugar until light and fluffy. Beat in the egg and vanilla, then gradually incorporate the dry ingredients until a smooth dough forms.
Step 2: Chill the Dough
Wrap the dough in plastic wrap and refrigerate it for at least 1 hour. Chilling the dough helps maintain the shapes during baking.
Step 3: Roll and Cut
Once chilled, roll the dough out on a floured surface to about ¼-inch thickness. Use a fish-shaped cookie cutter to cut out cookies, and place them on a parchment-lined baking sheet.

Step 4: Bake
Bake your cookies in a preheated oven at 350°F (175°C) for 8-10 minutes or until the edges are lightly golden. Allow them to cool completely on a wire rack before decorating.
Decorating Your Fish Cookies
Now comes the fun part—decorating these delightful fish cookies! Here’s how you can create stunning designs:

Using Royal Icing
Royal icing is a versatile and popular choice for cookie decoration. Here’s a simple recipe to make royal icing:
- 2 egg whites
- 3 cups powdered sugar
- 1 teaspoon lemon juice
Beat the egg whites until frothy, then gradually add the powdered sugar and lemon juice until you achieve a smooth, thick consistency. Divide the icing into bowls and tint with food coloring.
Techniques for Decorating
Here are some creative decorating techniques to enhance your fish cookies:
- Flooding: Use a thicker icing to outline your cookie and a thinner icing to flood the interior. This technique creates a smooth, even surface.
- Piping: Use a fine tip to pipe details like scales, fins, or even outlines.
- Painting: Use food-safe brushes and edible food colors to hand-paint details once your icing has dried.

Tips for Successful Decorating
Plan Your Designs
Before you start decorating, sketch out your designs. This will help you visualize your cookies and streamline the decorating process.
Patience is Key
Allow each layer of icing or paint to dry completely before adding more. This will prevent colors from bleeding into one another and maintain the integrity of your designs.

Experiment and Enjoy!
Don’t be afraid to experiment with different colors and techniques. The more you practice, the better you’ll get!
Comparison: Fish Cookies vs. Other Themed Cookies
| Feature | Fish Cookies | Animal-Shaped Cookies | Seasonal Cookies |
|---|---|---|---|
| Creativity | High | Medium | High |
| Occasions | Beach Parties, Birthdays | Children’s Parties | Holidays (Christmas, Halloween) |
| Decorating Complexity | Varies from Simple to Intricate | Simple (Most designs) | Varies, but often Simple |
| Taste | Deliciously Sweet | Deliciously Sweet | Deliciously Sweet |

Personal Experience: My Favorite Fish Cookies
One of my most memorable baking experiences was creating fish cookies for a beach-themed birthday party. I decided to decorate them like various ocean creatures, using vibrant colors and lots of sprinkles. Watching the children’s eyes light up when they saw the cookies was truly heartwarming. They loved picking their favorites, and it brought so much joy to the party. It reminded me that baking is not just about the end product; it’s about the joy and memories created along the way.
Pros and Cons of Baking Fish Cookies
Pros
- Highly customizable with colors and designs.
- Great for enhancing creativity.
- Can be made in large batches for parties.
- Fun activity for kids and adults alike.
Cons
- Can be time-consuming, especially for intricate designs.
- Requires multiple ingredients and tools for decorating.
- May require practice to master decorating techniques.
Frequently Asked Questions (FAQs)
1. How can I make my fish cookies more colorful?
To achieve vibrant colors, use gel food coloring instead of liquid food coloring. Gel colors provide bolder hues without altering the texture of your icing.
2. Can I freeze fish cookies?
Yes! You can freeze baked cookies before decorating. Wrap them tightly in plastic wrap and store them in an airtight container. They can be frozen for up to 3 months.
3. What’s the best way to store decorated cookies?
Store decorated cookies in a cool, dry place. Use an airtight container to keep them fresh. Avoid stacking them directly on top of each other to prevent smudging.
4. Can I use cookie cutters of different shapes?
Absolutely! While fish-shaped cookies are fun, you can use any shape that fits your theme, such as starfish, shells, or other ocean creatures. The decorating possibilities are endless!
Final Thoughts
Crafting and decorating fish cookies is more than just baking; it’s a unique way to express creativity, make delightful memories, and share joy with others. Whether it’s for a special event or just for fun, these cookies are sure to impress. So gather your ingredients, unleash your creativity, and dive into the fantastic world of baking fish cookies! Your journey of deliciousness and creativity begins now!