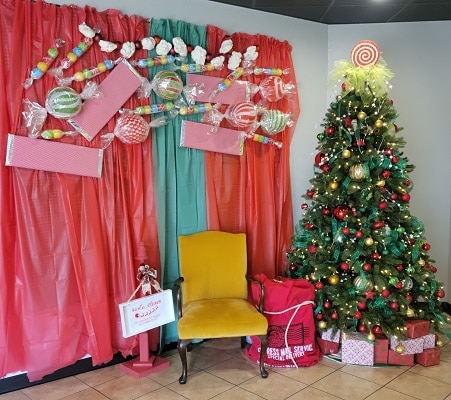
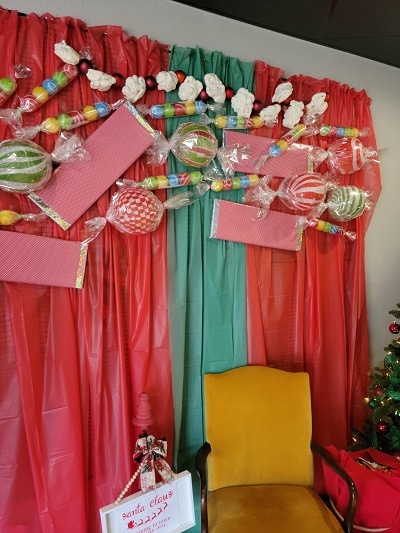
Christmas is a magical time of year, and what better way to celebrate than by transforming your home into a delightful Candyland? With vibrant colors and whimsical decorations, a Candyland theme adds a unique touch to your holiday decor. In this comprehensive guide, I’ll share my personal experiences, creative ideas, and step-by-step instructions to help you craft your very own Candyland Christmas decorations.
What is a Candyland Theme?
The Candyland theme is inspired by the classic board game known for its vibrant colors and candy-inspired landscape. Think sugary sweets, bright hues, and a whimsical vibe that delights children and adults alike. It’s about creating an inviting atmosphere that sparkles with joy and imagination, perfect for the holiday season.
Getting Started with DIY Candyland Decorations
Before diving into the decorations, gather all your materials and plan your ideas. Here’s a simple checklist you might find helpful:
- Cardboard or foam boards
- Colorful craft paper or poster boards
- Glue guns and crafting glue
- Scissors
- Markers and paint
- Fairy lights
- Artificial snow (optional)
- Candy-shaped ornaments (store-bought or homemade)
Step-by-Step Guide to Creating Your Candyland Christmas Decorations
1. Candyland Inspired Christmas Tree
What’s a Christmas celebration without a Christmas tree? Let’s infuse your tree with the Candyland spirit!

Materials Needed:
- Artificial tree or a live tree
- Colorful ornaments (handmade or bought)
- Edible decorations (like candy canes and gumdrops)
- Bright ribbons and tinsel
Instructions:
- Start with a base of colorful lights, wrapping them around from the bottom to the top.
- Add your handmade ornaments, using vibrant colors that reflect the Candyland theme.
- Incorporate edible decorations like candy canes and gumdrops. Use fishing line to hang them for a fun effect.
- Finish with bright ribbons cascading down the tree, along with a sprinkle of tinsel to add extra sparkle.

2. DIY Candyland Garland
A garland adds a charming accent to your holiday decor. Here’s how to make a candy-inspired garland.
Materials Needed:
- Colored construction paper
- Scissors
- Glitter
- Twine or string
- Glue

Instructions:
- Cut out shapes of candy (like lollipops, gumdrops, and candy canes) from the colored paper.
- Add glitter for a sparkling effect.
- Attach the candy shapes to the twine or string using glue.
- Hang the garland across your mantel, on door frames, or anywhere you like!
3. Sweet Candyland Centerpiece
Every festive table needs a unique centerpiece. Let’s craft one that’s eye-catching and tasty!

Materials Needed:
- A large glass vase or bowl
- Colorful candies (jellybeans, gummies, etc.)
- Fake snow or cotton balls (for a snowy effect)
- Holiday-themed figurines (optional)
Instructions:
- Fill the vase with a layer of fake snow at the bottom.
- Add a vibrant mix of candies on top of the snow.
- Place holiday-themed figurines within the candy, creating a whimsical scene.

Incorporating DIY Candyland Decorations Outdoor
Don’t forget the outside of your home! Here are some ideas to bring a Candyland vibe to your outdoor space:
1. Candyland Lawn Decorations
Brighten up your yard with oversized candy decorations.

Materials Needed:
- Wooden stakes or PVC pipes
- Colored plastic tablecloths
- Foam or cardboard for candy shapes
- Weatherproof sealant (if using cardboard)
Instructions:
- Create large candy shapes out of foam or cardboard and decorate them with bright colors.
- Attach them to the wooden stakes or PVC pipes for support.
- Place them around your yard to make a Candyland pathway.

2. Decorative Candy Lights
Light up your yard with colorful lights shaped like candies!
Materials Needed:
- Battery-operated fairy lights
- Plastic candy-shaped ornaments
Instructions:
- String the fairy lights around your porch or trees.
- Attach the candy-shaped ornaments along the string to create a sweet glow.
Comparison: DIY vs. Store-Bought Candyland Decorations
| Feature | DIY Decorations | Store-Bought Decorations |
|---|---|---|
| Cost | Generally lower, depending on materials | Often higher, especially for themed items |
| Personalization | Highly customizable to your style | Limited options, may not fit your vision |
| Time | Requires time for crafting and assembly | Instantly ready to display |
| Fun Factor | Creative and enjoyable to make with family | Less engaging, often just purchase and go |
Pros and Cons of DIY Candyland Decorations
Pros
- Creative outlet for personal expression
- Cost-effective compared to buying ready-made items
- Fun activity to complete with family and friends
- Gives a unique custom touch that store-bought items can’t replicate
Cons
- Can be time-consuming depending on the complexity of projects
- Requires some crafting skills and tools
- Materials can add up in cost if not planned well
- Potential for mess during crafting process
Frequently Asked Questions (FAQs)
What materials can I use for DIY Candyland decorations?
You can use a variety of materials including cardboard, colored paper, foam, artificial snow, fairy lights, and real or artificial candies. Be creative with what you have at home!
How can I make Candyland decorations that are safe for kids?
Ensure that any edible decorations are child-friendly. Use non-toxic materials for crafting and avoid small parts that could pose a choking hazard.
Are DIY Candyland decorations appropriate for outdoor use?
Yes! Just be sure to use weatherproof materials or seal your decorations to protect them from the elements.
Can I incorporate a Candyland theme into my holiday parties?
Absolutely! DIY Candyland decorations create a whimsical atmosphere that will delight guests and make your party memorable!
Final Thoughts
Creating DIY Candyland Christmas decorations is not just about beautifying your home; it’s about making memories with loved ones and celebrating the festive spirit in a unique way. I hope this guide inspires you to embrace your creativity and bring the candy-coated joy of Candyland into your holiday season. Happy decorating!