As the holiday season approaches, there’s an undeniable magic in the air, a warmth that encourages us to celebrate and to create. One of my favorite ways to embrace this spirit and transform my home into a winter wonderland is through DIY Christmas decorations, especially those made from wood. Not only does working with wood allow for a rustic charm, but it also provides a wonderful opportunity for personalization and creativity. In this article, we will explore various DIY wooden Christmas decorations, share personal experiences, and help you bring your festive visions to life!
The Allure of Wood in Holiday Decor
Wood has a unique quality that resonates with the coziness of the holiday season. From the gentle scent of pine to the beautiful grains of hardwood, wooden decorations can create an inviting atmosphere. Here are some reasons why wood is a fantastic material for Christmas decor:
- Durability: Wooden decorations can last for many seasons, making them a worthwhile investment.
- Versatility: Wood can be painted, stained, or left in its natural state, allowing for endless customization.
- Eco-Friendly: Utilizing reclaimed or sustainably sourced wood is an environmentally conscious choice.
- Sentimental Value: Handmade wooden items often hold more sentimental value, making them cherished heirlooms.
Getting Started: Tools and Materials
Before diving into your DIY Christmas decorations, let’s gather our tools and materials. Below is a handy checklist:
Essential Tools
- Wood saw (hand saw or jigsaw)
- Drill with bits
- Sandpaper or sanding block
- Paintbrushes
- Clamps (to secure pieces while working)
- Hot glue gun and glue sticks
- Wood glue

Materials
- Different types of wood (plywood, cedar, pine, etc.)
- Acrylic paints and stains
- Twine, ribbons, and other embellishments
- Battery-operated fairy lights
- Wooden ornaments or cutouts
With your tools and materials ready, let’s dive into some exciting DIY projects!
Top DIY Wooden Christmas Decoration Ideas
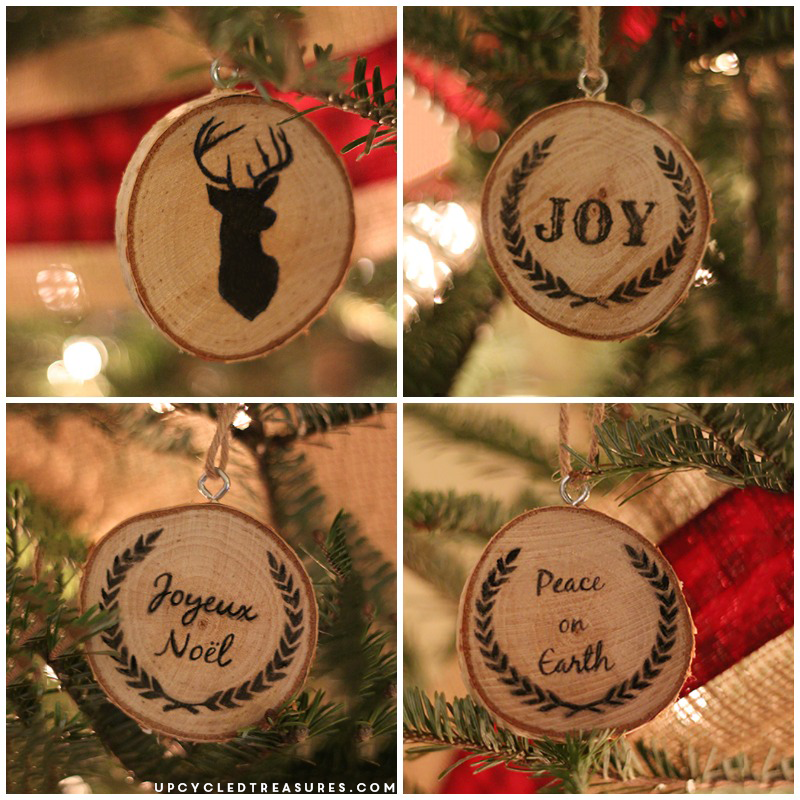
1. Rustic Wooden Ornaments
Creating your own wooden ornaments is a fantastic way to add a personal touch to your Christmas tree. Here’s how you can make them:

Materials Required
- Thin slices of wood (about 1/2 inch thick)
- Acrylic paints
- Twine for hanging
- Pencil for sketching designs
Steps to Create Wooden Ornaments
- Cut wooden slices into desired shapes (stars, hearts, etc.) using your saw.
- Sand the edges for a smooth finish.
- Sketch your design on the wood using a pencil.
- Paint the ornaments in festive colors, letting each layer dry before adding details.
- Drill a small hole at the top, thread with twine, and hang on your tree.
Pros and Cons
| Pros | Cons |
|---|---|
| Highly customizable | Requires some woodworking skills |
| Durable and long-lasting | Messy painting process |
2. Wooden Christmas Centerpiece
Add a rustic flair to your holiday table with a stunning wooden centerpiece. Here’s a simple guide to create one:

Materials Required
- Wooden box or crate
- Assorted faux or real greenery
- Pinecones, ornaments, and other decorative items
- Battery-operated fairy lights
Steps to Create a Wooden Christmas Centerpiece
- Start with a clean wooden box or crate; you can paint it or leave it natural.
- Fill the box with a base of greenery.
- Add in pinecones and ornaments for texture and color.
- Weave fairy lights throughout the arrangement for a glowing effect.
Pros and Cons
| Pros | Cons |
|---|---|
| Easy to assemble | Can be heavy to move |
| Visually striking | Requires maintenance (if using real greenery) |
3. Advent Calendar from Wood
Count down to Christmas with a unique wooden Advent calendar, a project that is both fun and functional.
Materials Required
- Plywood or a wooden board
- Small wooden boxes or drawers
- Acrylic paint
- Craft numbers (1-24)
Steps to Create Your Advent Calendar
- Cut the plywood into a large rectangle or desired shape.
- Attach the small boxes/drawers to the board, leaving space for decoration.
- Paint and number each box from 1 to 24.
- Fill each box with treats or messages for each day leading up to Christmas.
Pros and Cons
| Pros | Cons |
|---|---|
| A fun tradition to start | Time-consuming to make |
| Reusable year after year | Requires some woodworking skills |
4. Wooden Christmas Tree Signs
Wooden signs make great decor pieces and can be personalized with family names or festive greetings.
Materials Required
- Wooden board (various sizes)
- Stencils or transfer paper
- Acrylic paint
- Sealer (optional)
Steps to Create Your Wooden Signs
- Select a wooden board of your preferred size.
- Use stencils or transfer paper to apply your design.
- Paint the design and allow it to dry.
- If desired, apply a sealer to protect your sign.
Pros and Cons
| Pros | Cons |
|---|---|
| Customizable messages | Requires drying time |
| Can be used indoors or outdoors | May require special painting techniques for details |
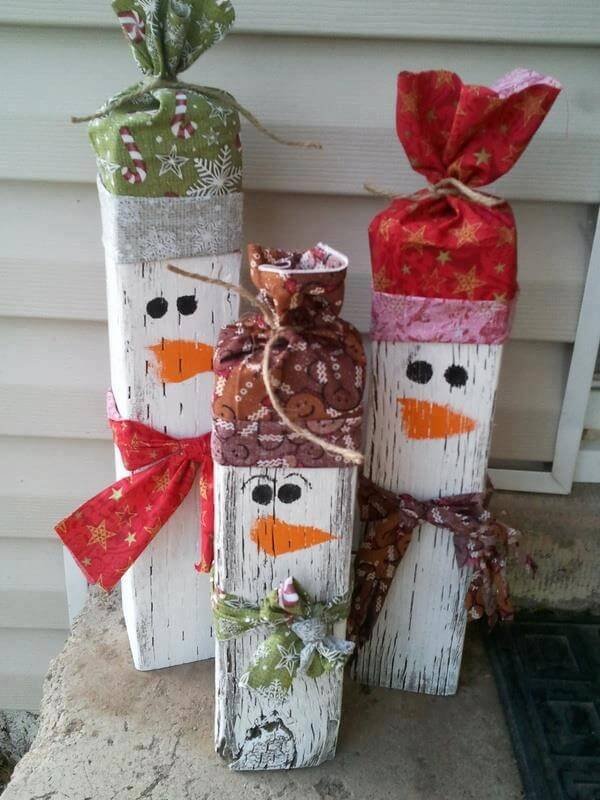
5. Wooden Reindeer Decorations
Bring some festive cheer with adorable wooden reindeer figures that can stand as decorations or be used for gifts.
Materials Required
- Cuts of wood (various sizes for body parts)
- Wood glue
- Acrylic paint
- Craft eyes and embellishments
Steps to Create Reindeer Figures
- Cut out shapes for the reindeer’s body, head, antlers, and legs.
- Assemble the pieces using wood glue, allowing time to dry.
- Paint the reindeer; add eyes and embellishments as desired.
Pros and Cons
| Pros | Cons |
|---|---|
| Adorable and festive | Requires precise cutting for stability |
| Fun activity for the family | Paint may chip if not sealed |
Tips for Successful DIY Wooden Christmas Decorations
Now that you have some ideas to get started, here are some tips to ensure your projects go smoothly:
- Plan Ahead: Sketch your designs and list materials before starting.
- Safety First: Always wear protective gear when using power tools.
- Practice Patience: Allow time for paint and glue to dry properly.
- Involve Family: Get family members involved for a fun, collaborative experience.
Maintaining Your Wooden Decorations
To keep your wooden Christmas decorations looking their best, consider the following maintenance tips:
- Store them in a cool, dry place during the off-season to prevent warping.
- Dust regularly and use a wood conditioner to maintain shine.
- Inspect for damage after each season and repair as necessary.
FAQs about DIY Wooden Christmas Decorations
What types of wood are best for DIY Christmas decorations?
Pine, cedar, and plywood are great options due to their accessibility and workability. Reclaimed wood also adds character and eco-friendliness.
Do I need special tools for woodworking projects?
Basic tools like a saw, drill, and sandpaper will suffice for many projects. However, specialized tools can help achieve more intricate designs.
Can I paint wooden decorations?
Absolutely! Use acrylic paints for vibrant colors and consider sealing them with a clear coat for added protection.
How can I personalize my wooden decorations?
Incorporate names, dates, or meaningful phrases through painting, stenciling, or wood burning techniques to make your decor unique.
Are DIY wooden decorations safe for children?
Yes, but ensure that any small parts are kept away from younger children to prevent choking hazards. Supervision is recommended during crafting.
Conclusion: Your Festive Journey Awaits
DIY wooden Christmas decorations not only beautify your home but also provide a fulfilling creative outlet during the bustling holiday season. With the right materials, tools, and a sprinkle of your imagination, you can craft pieces that will not only charm your guests but also become treasured family heirlooms. I hope this article inspires you to embark on your festive woodworking journey, creating memories along the way!