Introduction to DIY Decorated Wooden Letters
Decorating with wooden letters has become a popular trend in home decor. Not only are they versatile and customizable, but they also add a personal touch to any space. Whether you’re looking to spell out a name, a meaningful word, or simply add some artistic flair, DIY decorated wooden letters offer an excellent opportunity for creative expression. In this article, I will share my own experiences, tips, and ideas for making beautiful wooden letter decorations.
Why Choose DIY Decorated Wooden Letters?
There are many reasons to consider creating your own decorated wooden letters:
- Personalization: You can customize colors, patterns, and styles to match your decor.
- Cost-Effective: DIY projects can be more affordable than purchasing ready-made decorations.
- Fun and Rewarding: Engaging in a creative project can be therapeutic and fulfilling.
Materials Needed for DIY Wooden Letters
Essential Supplies
Your DIY project will require some basic materials:
- Wooden letters (available at craft stores or online)
- Paint or wood stains
- Brushes or sponges for application
- Adhesive (like Mod Podge or craft glue)
- Decorative items (glitter, washi tape, fabric, etc.)
- Sandpaper (if you want to smooth rough edges)
Optional Tools
Depending on your design, consider these tools to make your project easier:
- Stencil cutters
- Hot glue gun
- Ruler and pencil for measurements
- Sealant to protect the finish
Choosing the Right Wooden Letters
Types of Wooden Letters
Wooden letters come in various styles and sizes. Here are a few options:
| Type | Description | Pros | Cons |
|---|---|---|---|
| Flat Letters | Thin, lightweight letters typically used for wall hanging. | Easy to paint, hang, and store. | Less dimensional, may not stand out as much. |
| 3D Letters | Thicker letters that can stand on their own or be hung. | Add depth and visual interest. | Heavier and may require more effort to hang. |
| Custom Cut Letters | Letters made to specific designs or fonts. | Completely unique; can match any theme. | Usually more expensive and may have longer lead times. |

Creative Ideas for Decorating Wooden Letters
Now that you have your materials and understand the types of letters available, it’s time to get creative! Here are several fun ideas to personalize your wooden letters:
1. Painted Letters
One of the simplest yet most effective ways to decorate wooden letters is with paint. Choose a color that complements your decor or go for bright, bold hues to make a statement.
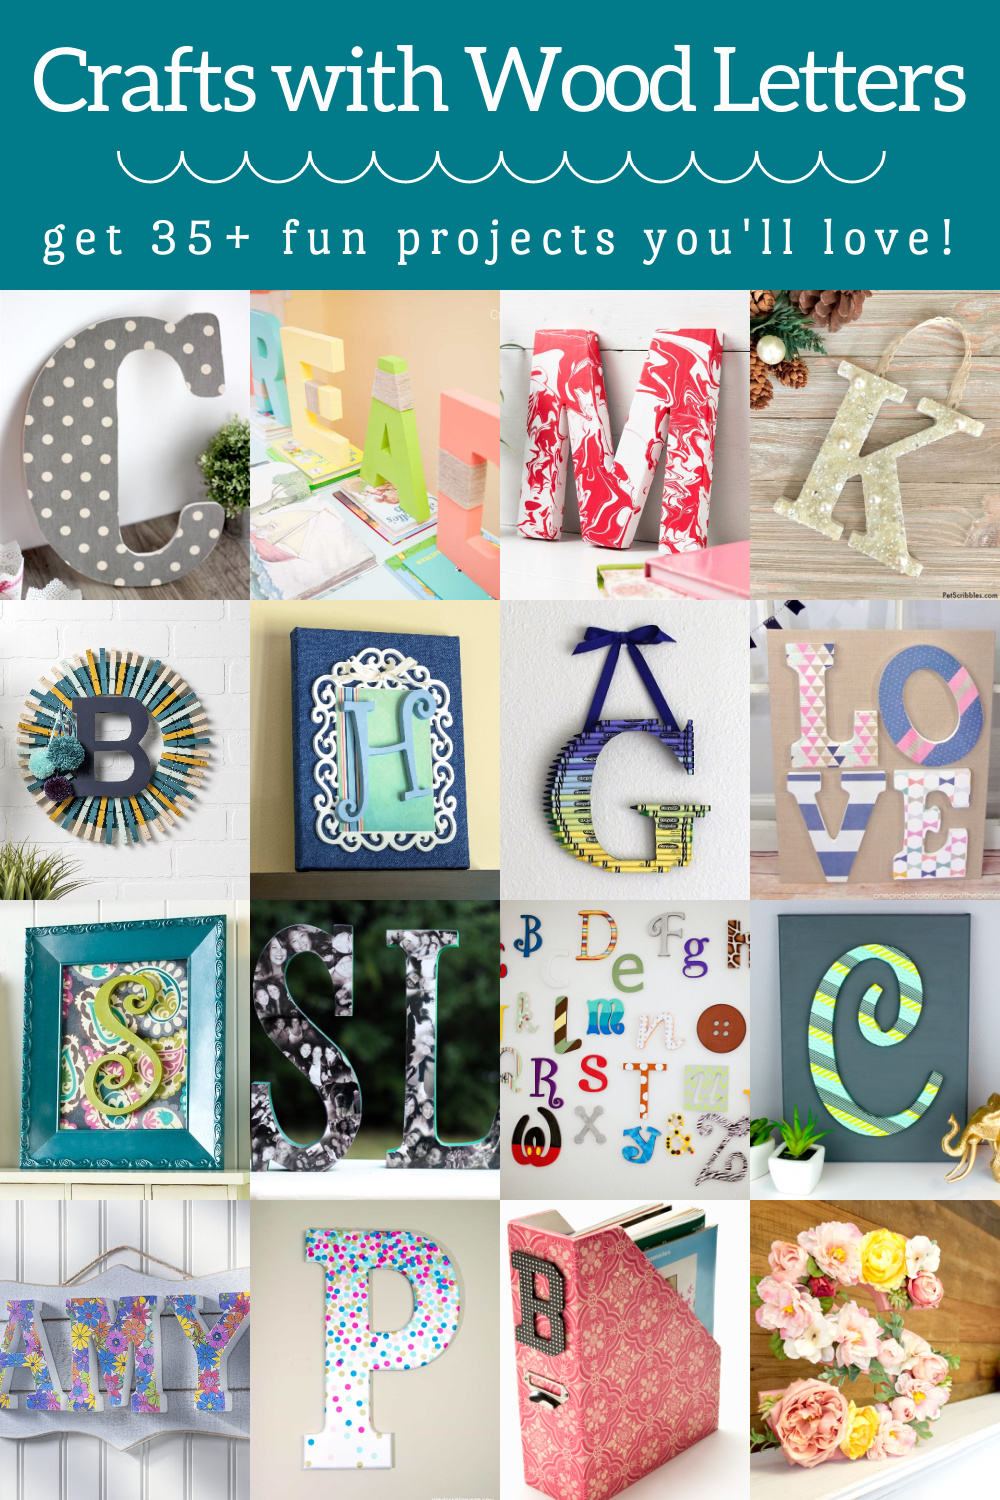
2. Stenciled Patterns
If you’re looking for a more intricate design, consider using stencils. Create patterns like chevron, polka dots, or florals using a sponge brush for a clean finish.
3. Fabric Covered Letters
Wrap your wooden letters in fabric for a soft, textured look. Use a hot glue gun to secure the fabric, and choose prints that resonate with your style.

4. Glitter and Glam
Add some sparkle by applying glue to your wooden letters and sprinkling glitter on top. A sealed finish will help keep the glitter intact and make them shine.
5. Mixed Media
Combine various materials such as beads, flowers, or small photos to create a layered effect that tells a story or reflects a theme.

Steps to Create Your Own DIY Decorated Wooden Letters
Step-by-Step Instructions
- Select Your Wooden Letters: Choose the letters you want to decorate.
- Prepare the Surface: If needed, sand the edges to make them smooth.
- Choose Your Design: Plan out how you want to decorate each letter.
- Apply Base Coat (Optional): If painting, you may want to apply a base coat first.
- Decorate! Use your chosen method(s) to decorate the letters.
- Seal the Finish: Once everything is dry, apply a sealant for protection.
- Display: Find the perfect place to showcase your beautiful creations!
Tips for Perfecting Your DIY Wooden Letter Project
Common Mistakes to Avoid
As with any craft project, there are some common missteps you should watch out for:
- Skipping the preparation phase can lead to a messy finish.
- Ignoring drying times may ruin your design.
- Choosing colors that clash can detract from your overall aesthetic.

Helpful Tips
To ensure your DIY project goes smoothly, consider these tips:
- Work in a well-ventilated area, especially if using spray paints or sealants.
- Test your colors and techniques on a scrap piece of wood before committing.
- Have fun and don’t be afraid to experiment – it’s all about creativity!
Where to Display Your Decorated Wooden Letters
Once you’ve completed your project, think about where to place your wooden letters for the biggest impact:
- Wall Art: Hang them in a playroom, nursery, or living area.
- Entryway: Personalize your front door or entryway table.
- Party Decor: Use them as part of a themed party or special event.
- Gifts: Decorated letters make thoughtful gifts for friends and family.

Pros and Cons of DIY Decorated Wooden Letters
Pros
- Fully customizable to your taste.
- Great bonding activity for family or friends.
- Affordable compared to store-bought items.
- A wonderful way to express creativity.
Cons
- Time-consuming, especially for intricate designs.
- Results may vary based on skill level and materials.
- Requires some initial investment in materials.

Frequently Asked Questions (FAQs)
1. What kind of wood should I use for my letters?
The best woods to use are lightweight and easy to work with, like plywood or MDF. They are readily available and can be cut into any shape or size you desire.
2. Can I use paper instead of paint for my decorated letters?
Absolutely! Scrapbook paper or decorative tissue paper can be glued onto wood letters to create a unique and colorful design.
3. How do I attach my wooden letters to the wall?
You can use small nails, adhesive strips, or even craft glue, depending on the weight of the letters and the surface you are attaching them to.
4. What is the best way to seal my decorated wooden letters?
Using a clear acrylic sealant or Mod Podge will protect your letters from dust and damage while giving them a polished look.
5. How do I fix mistakes while decorating?
If you make a mistake, wait for the paint or glue to dry before sanding it down lightly and repainting or reapplying the decorative item.