Introduction
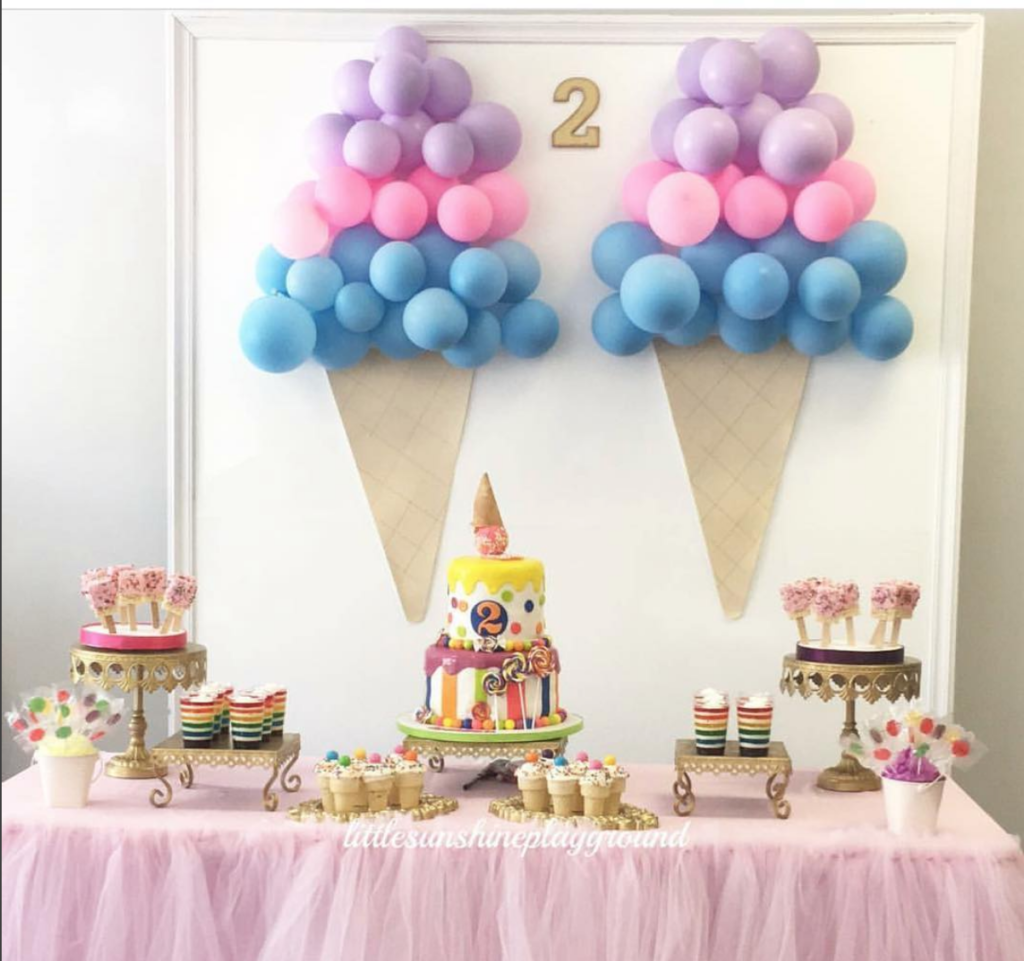
There’s something about ice cream that instantly brings joy, don’t you think? Whether it’s a hot summer day, a birthday party, or just a fun get-together with friends, an ice cream party can elevate the spirits of both kids and adults. Having recently organized an ice cream-themed bash for my niece’s birthday, I found that the decorations play a crucial role in setting a festive mood. In this article, I’ll share my tips and personal experiences on how to create fabulous DIY ice cream party decorations that will impress your guests and create lasting memories!
Why Choose an Ice Cream Party?
Ice cream parties are fabulous for many reasons:
- They are versatile for all ages.
- Offers opportunities for creativity in decoration and presentation.
- Can be themed around various occasions—birthdays, summer hangouts, or simply a gathering with friends.
In essence, an ice cream party can be as casual or as fancy as you want it to be, making it ideal for any occasion!
Essential Supplies for Your Ice Cream Party Decorations
Before diving into the DIY projects, let’s take a look at what supplies you’ll need:
- Colorful paper (cardstock, crepe paper, etc.)
- Scissors and craft glue
- Balloon in various colors
- Tableware (plates, napkins, cups) themed around ice cream
- String lights (optional for evening parties)
- White or pastel tablecloth
- Ice cream cones (decorative, not for eating)
DIY Ice Cream Decorations Ideas
1. Ice Cream Cone Garlands
Creating garlands is an easy yet impactful way to decorate your party space. Here’s how you can make them:
Materials Needed:
- Cardstock in various colors
- Twine or string
- Scissors
- Pencil
Steps:
- Draw and cut out ice cream cones and scoops from the cardstock.
- Use a hole punch to create holes at the top of each ice cream scoop.
- Thread the scoops onto the twine, alternating colors for visual appeal.
- Hang the garlands in your desired location.
Pro Tip: Use glitter cardstock to add some sparkle!

2. DIY Ice Cream Centerpieces
Centerpieces add a beautiful touch to your tables. Here’s a simple idea:
Materials Needed:
- Clear glass jars
- Colored sand or decorative stones
- Plastic ice cream cones
- Small flowers (real or artificial)
Steps:
- Fill the jars with colored sand or stones.
- Place the plastic ice cream cones upside down in the jar.
- Add flowers around the base of the cone for an extra touch.
This creates a whimsical centerpiece that will be the talk of your party!
3. Ice Cream Themed Table Settings
Creating a cohesive look with your table settings is key:
Tips:
- Use pastel-colored plates and cups.
- Opt for ice cream-themed napkins.
- Add small ice cream cone holders for utensils.

4. Sweet Treat Signage
Labeling the different flavors can not only inform but also add to the decor:
Materials Needed:
- Chalkboard signs or paper
- Chalk or markers
- Small easels or stands
Steps:
- Create signs for each flavor you’re serving.
- Write the flavor names in fun typography.
- Place them next to each flavor station.
5. Fun Photo Booth Backdrop
A photo booth is a great way to capture memories. Here’s how to create a simple backdrop:
Materials Needed:
- Streamers in ice cream colors
- Large cardboard cutouts of ice cream cones and sundaes
- Balloon garlands for a fun pop.
Steps:
- Hang the streamers as a backdrop.
- Attach the cardboard cutouts at varying heights.
- Add balloons throughout to enhance the look.

6. Ice Cream Balloons
Balloons are a must at any celebration! Here’s a fun twist:
Materials Needed:
- Balloons in pastel colors
- Balloon sticks (optional)
Steps:
- Inflate balloons and tie them off.
- Attach them to sticks or let them float.
- Group them in clusters for visual interest.
Creating an Ice Cream Bar
No ice cream party is complete without an ice cream bar! Here’s how to set one up:
What You’ll Need:
- Ice cream flavors (at least three!)
- Variety of toppings (sprinkles, nuts, fruits, sauces)
- Cups or cones for serving
- Utensils for scooping
Tips for Success:
- Keep ice cream in a cooler to maintain its temperature.
- Label each topping for guest convenience.
- Consider having a fun mix-in station where guests can create their own unique sundae.

Pros and Cons of Hosting an Ice Cream Party
Pros
- Fun and engaging for guests of all ages.
- Offers a wide range of customization options.
- Relatively inexpensive to set up with DIY decorations.
- Easy cleanup after enjoying sweet treats!
Cons
- Can become messy, especially with kids.
- Requires planning to ensure ice cream stays frozen.
- Limited to warmer weather unless indoors.

FAQs About DIY Ice Cream Party Decorations
What are some creative themes for an ice cream party?
Consider themes like “Sundae Funday,” “Ice Cream Social,” or “Frozen Treat Fiesta” to inspire your decorations and activities.
How can I make my ice cream party more eco-friendly?
Use reusable tableware, biodegradable balloons, and paper straws to create a fun atmosphere while being kind to the planet!

Can I host an ice cream party during winter?
Absolutely! You can create a cozy indoor setting and serve delicious hot toppings like fudge and caramel, turning the party into a warm treat celebration.
Conclusion
Hosting an ice cream party with DIY decorations is a fun way to create a lively atmosphere and bring people together. With a little creativity and planning, you can transform your space into a delightful ice cream wonderland that will be remembered for years to come! Remember, the key is to have fun and enjoy every scoop of the celebration!