If you’re a fan of Tim Burton’s classic film, “The Nightmare Before Christmas,” you likely find joy in celebrating Halloween and Christmas in a unique way. Why not bring the magic of Halloween Town to your yard with some fantastic DIY decorations? In this article, I’ll share my personal experiences and comprehensive guide to crafting your very own Nightmare Before Christmas yard decorations. Let’s get started!
Why Choose Nightmare Before Christmas Decorations?
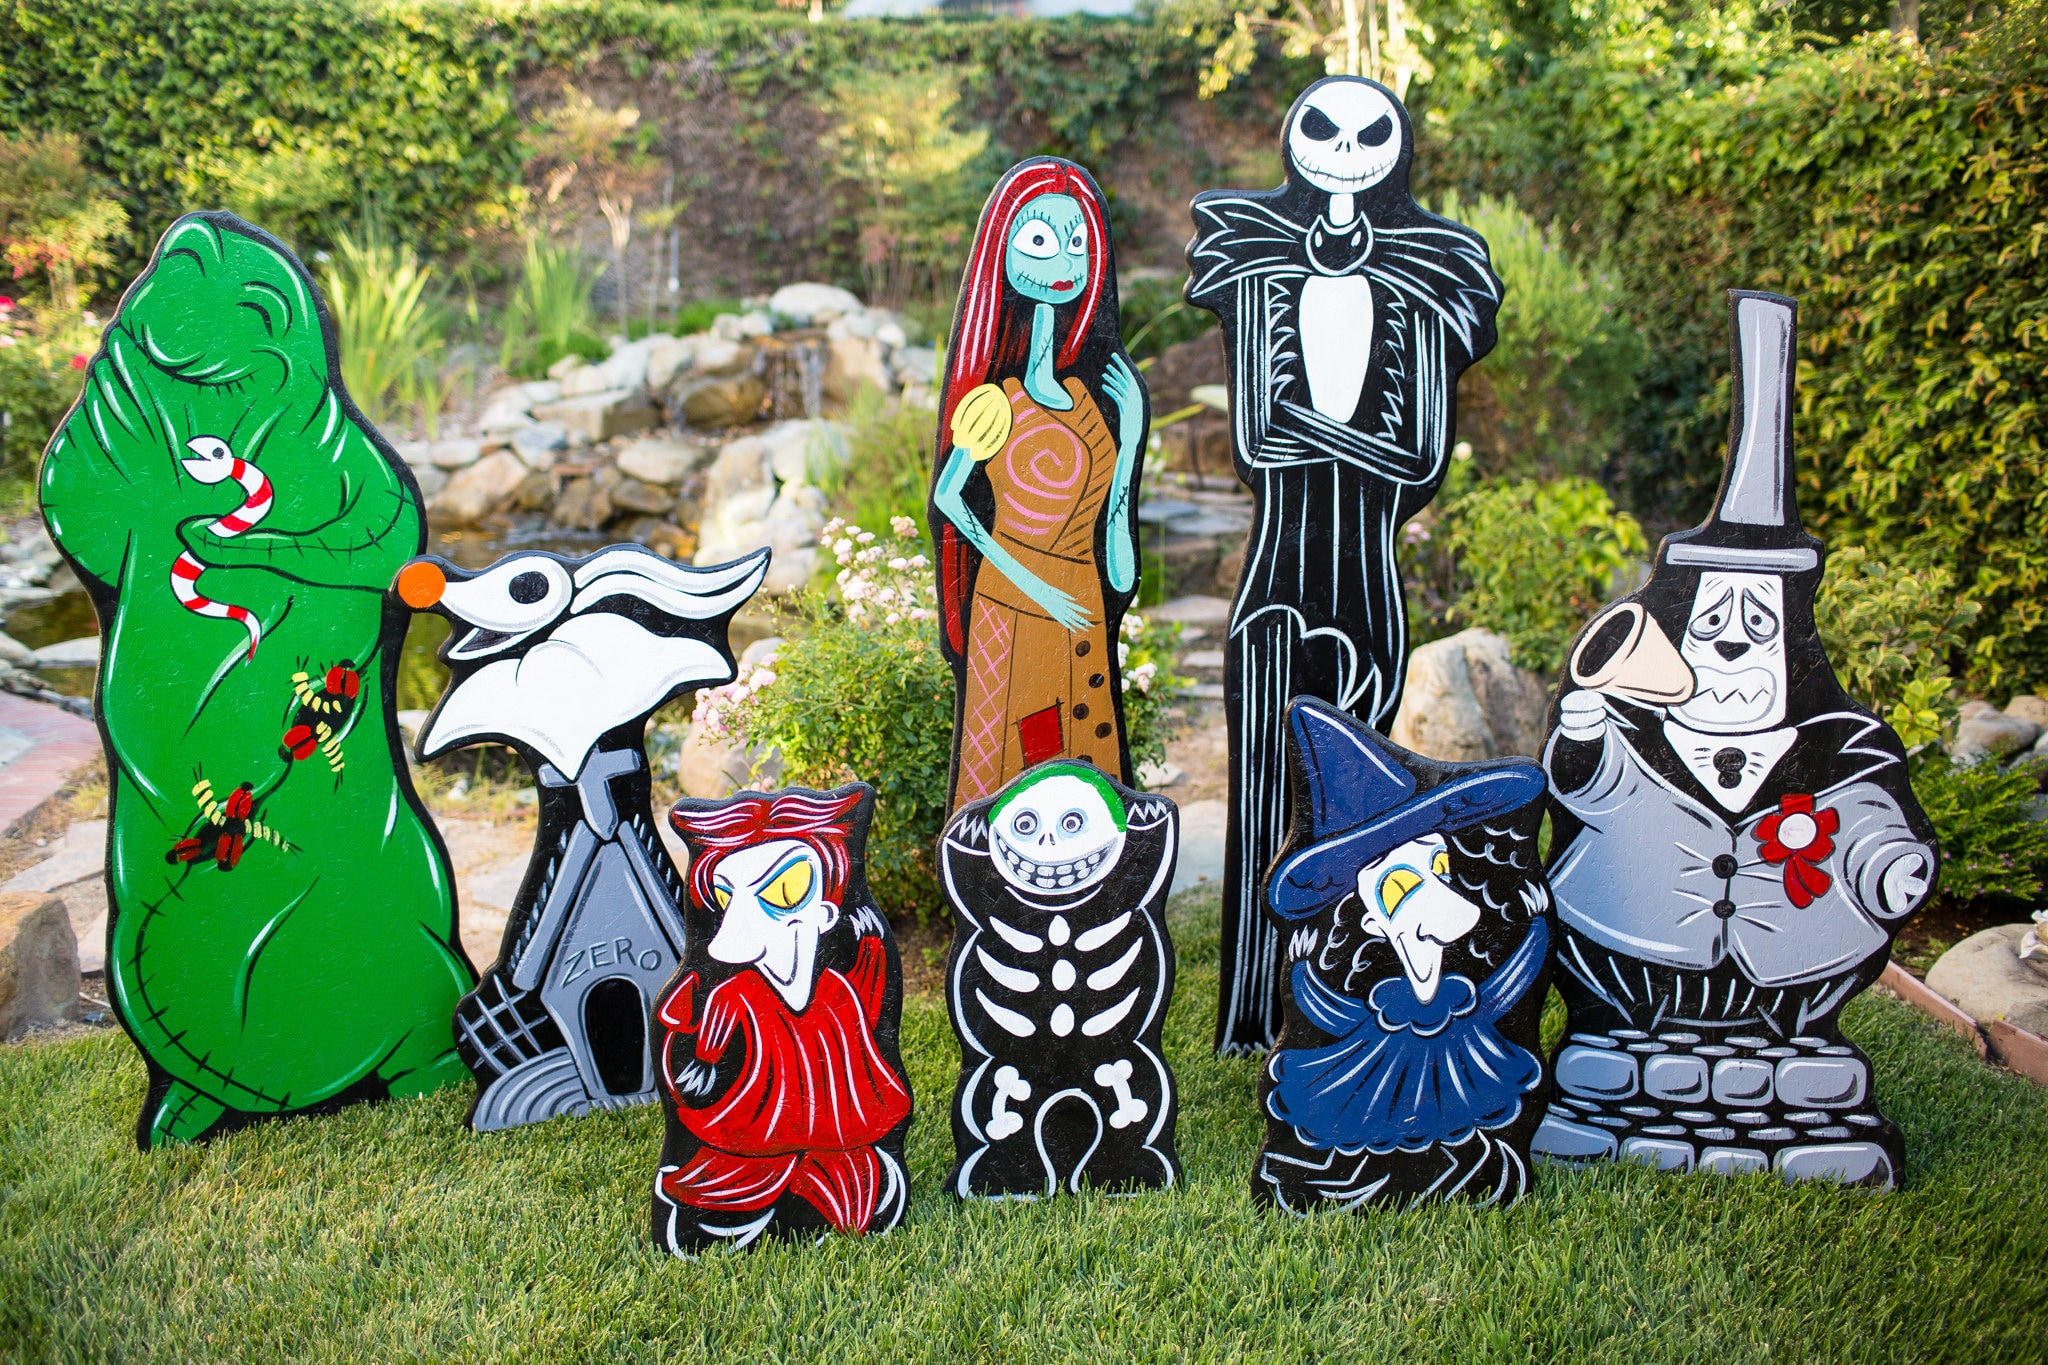
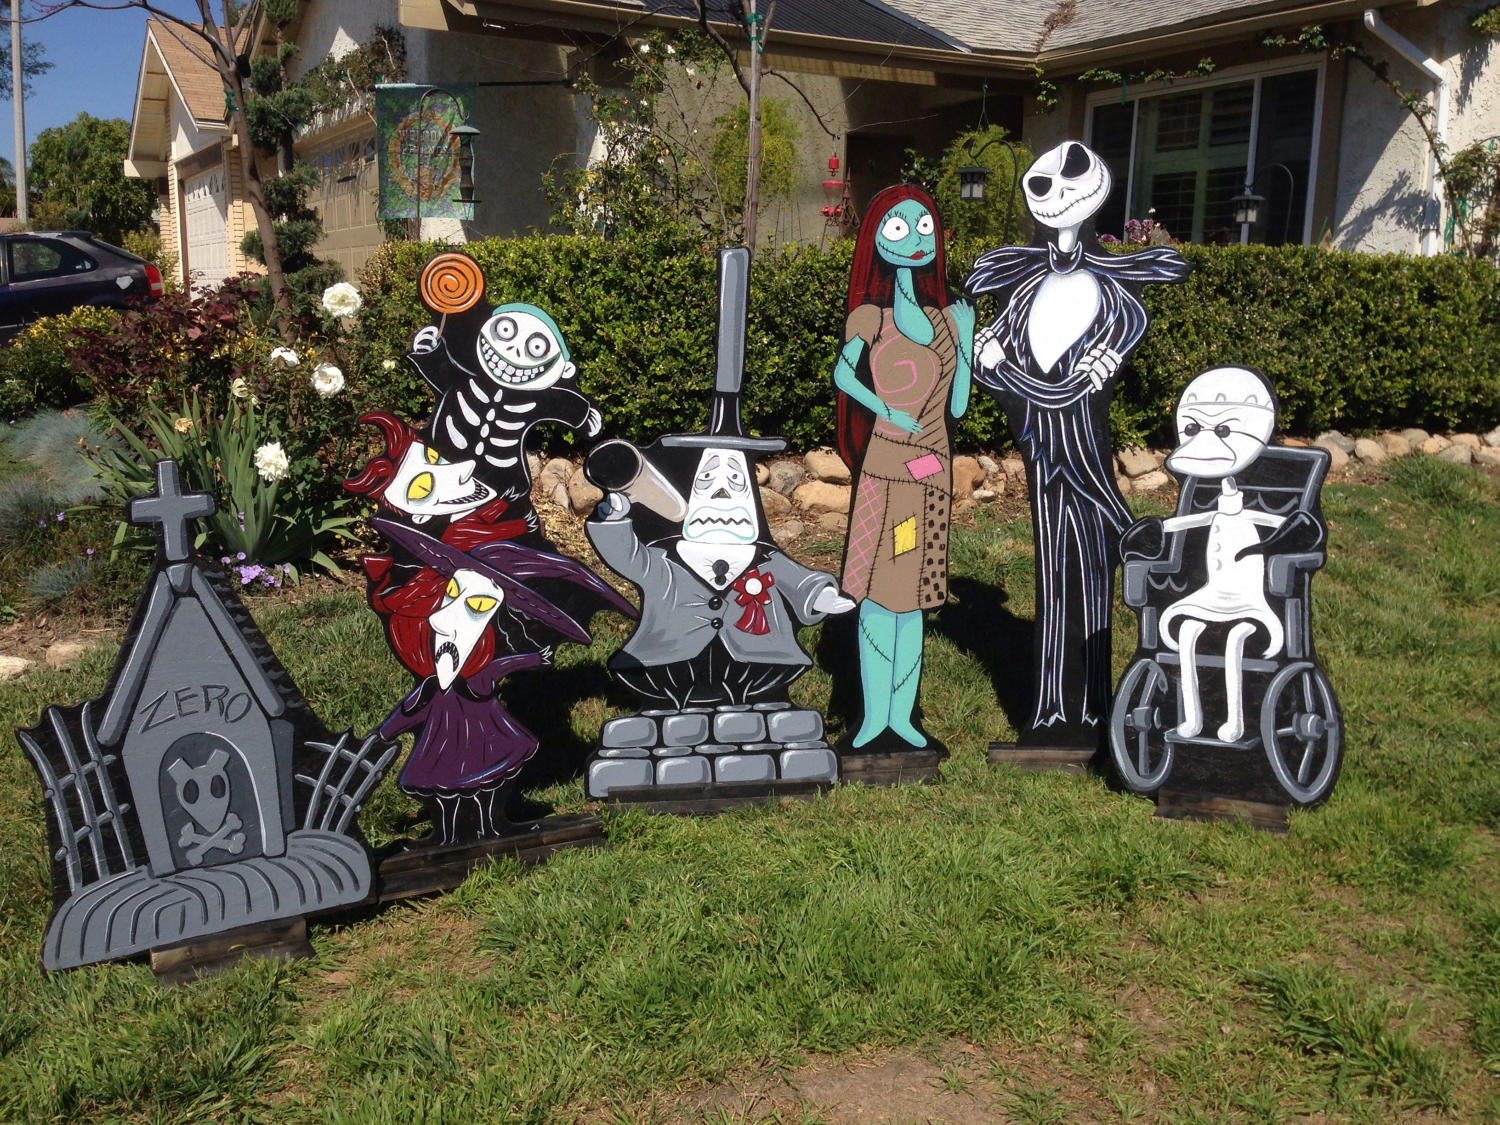
The Nightmare Before Christmas offers a whimsical mix of Halloween and Christmas themes, making it perfect for year-round decorations. Whether you’re celebrating Halloween, Christmas, or both, these decorations will bring joy and creativity to your yard.
Benefits of DIY Yard Decorations
- Cost-Effective: Creating your decorations can save you money compared to purchasing pre-made items.
- Customization: You have the freedom to decorate according to your personal style.
- Family Bonding: Engaging in DIY projects can be a fun family activity.
- Unique Touch: Handmade decorations ensure no one else has a yard that looks quite like yours!
Essential Supplies for DIY Nightmare Before Christmas Decorations
Before diving into the projects, gather the necessary supplies. Here’s a comprehensive checklist:
Basic Supplies
- Wooden boards or foam sheets
- Paint (black, white, purple, green, and orange)
- Paintbrushes and sponges
- Utility knife or scissors
- Hot glue gun and glue sticks
- LED lights (for night-time illumination)
- Yard stakes or poles
- Optional: PVC pipes for structuring larger pieces
Safety Gear
Don’t forget to wear safety goggles and gloves, especially when cutting materials. Your safety is paramount!
Top 5 DIY Nightmare Before Christmas Yard Decoration Ideas
Now that you’re equipped with your supplies, let’s explore some engaging projects you can create.
1. Jack Skellington Face
Jack Skellington’s face is iconic and a perfect centerpiece for your decorations.
Materials Needed:
- Large round foam or wooden disc
- White paint
- Black paint
- Paintbrushes
Steps:
- Paint the disc white and let it dry completely.
- Use black paint to create Jack’s eyes and mouth, ensuring it captures his mischievous grin.
- Attach the disc to a wooden stake for easy display.
2. Oogie Boogie Burlap Bag Decoration
Crafting Oogie Boogie adds a fun element to your outdoor display.
Materials Needed:
- Burlap sack (or green fabric)
- Stuffing materials (old clothes or plastic bags)
- Black felt for eyes
- Green paint (optional for detailing)
Steps:
- Stuff the burlap sack to create a rounded figure.
- Cut out eye shapes from black felt and glue them onto the sack.
- Paint or use fabric to give it a more detailed look.
- Set it in a corner of your yard to greet visitors!

3. Sally’s Patchwork Dress Decoration
Bring Sally to life in your yard with this colorful DIY project.
Materials Needed:
- Various colored fabric pieces
- Wireframe (or large cardboard cutout)
- Hot glue gun
Steps:
- Create a wireframe silhouette of Sally’s body.
- Glue the fabric pieces onto the frame, resembling her patchwork dress.
- Secure the decoration to a stake and display it proudly!
4. Zero the Ghost Dog
Zero is a beloved character and an excellent addition to your yard scene.
Materials Needed:
- White fabric or large white garbage bags
- LED lights or battery-operated lantern
- Pole or wire for structure
Steps:
- Fashion a ghost-like structure using the pole and drape the fabric over it.
- Attach the LED lights underneath for a magical glow at night.
- Don’t forget to create Zero’s nose using an orange balloon or painted fabric!

5. The Spiral Hill Scene
Create a stunning focal point in your yard with the Spiral Hill from the film.
Materials Needed:
- Cardboard or plywood
- Black and white paint
- Wood stakes or poles for support
Steps:
- Cut out a spiral shape from the cardboard.
- Paint it black and add white stripes to mimic the hill.
- Secure it into your yard using the wooden stakes.
Tips for Displaying Your Decorations
Once your decorations are ready, it’s important to arrange them effectively to create a cohesive look.

Layering and Composition
Position larger figures like Jack or Sally at the back and smaller ones like Zero in the front for a layered effect. This creates depth and visual interest in your display.
Lighting
Incorporate LED lights or spotlights to illuminate your decorations at night. This not only enhances visibility but also adds a magical quality to your display.

Seasonal Changes
Feel free to modify your decorations for both Halloween and Christmas. For example, you can add Christmas lights to Jack or place a Santa hat on him!
Comparison Table: DIY vs. Store-Bought Decorations
| Feature | DIY Decorations | Store-Bought Decorations |
|---|---|---|
| Cost | Generally lower | Higher |
| Customization | High | Limited |
| Uniqueness | Very unique | Mass-produced |
| Time Investment | Variable | None |
| Quality Control | Depends on materials | Consistent |

Pros and Cons of DIY Nightmare Before Christmas Decorations
Pros
- Affordable and budget-friendly
- Creative outlet for self-expression
- Memorable family bonding experiences
- Can be tailored to fit any yard size
Cons
- Time-consuming
- Requires some crafting skills
- Weather can affect durability
- May involve trial and error
Frequently Asked Questions (FAQs)
1. What materials are best for outdoor DIY decorations?
Using weather-resistant materials like treated wood, outdoor fabric, or plastic ensures durability against the elements. Paints should also be outdoor-rated to prevent fading.
2. How can I make my decorations last longer?
Protect your outdoor decorations with a clear sealant. Store them indoors during harsh weather and consider using detachable components that can be easily replaced when needed.
3. Can I use these decorations for both Halloween and Christmas?
Absolutely! Many of the elements can be adapted with minor tweaks. For example, adding Christmas lights or festive garland can transition your scary display to a cheerful holiday theme.
4. How do I store my DIY decorations after the season ends?
Once the season is over, clean and dry your decorations thoroughly. Store them in a cool, dry place in labeled bins to keep everything organized for next year.
Conclusion: Embrace the Spirit of DIY
Creating your own Nightmare Before Christmas yard decorations can be a rewarding experience. With a little imagination, creativity, and effort, you can transform your yard into a whimsical homage to this beloved film. Whether crafting alone or with family, you’ll find joy in bringing a piece of Halloween Town to your home. So grab your supplies, roll up your sleeves, and let your creativity shine!