Introduction
The holiday season brings a certain magic, but who says you need to break the bank to create a stunning display in your yard? That’s where DIY plywood Christmas yard decorations come in! Having crafted several festive pieces for my own home, I’m excited to share tips, designs, and all the crafty goodness you’ll need to bring your vision to life.
Why Choose Plywood for Your Christmas Decorations?
Plywood is a versatile material that offers a range of benefits for outdoor decorations. Let’s explore some reasons why it’s a favorite among DIY enthusiasts.
- Durability: Plywood can withstand the elements better than many other materials.
- Ease of Use: It’s easy to cut, shape, and paint, making it ideal for personalized decorations.
- Cost-Effective: Compared to other materials, plywood is relatively inexpensive and widely available.
Essential Tools and Materials
Before diving into your project, gather the necessary tools and materials:
- Plywood sheets (typically 1/2″ thick)
- Jigsaw or circular saw
- Sandpaper (medium and fine grit)
- Paint (exterior-rated for durability)
- Paintbrushes and rollers
- Outdoor sealant
- Wood screws or outdoor adhesive
- Hinges (if you plan on creating movable decorations)
Popular DIY Plywood Christmas Yard Decoration Ideas
Here are some delightful designs you can create using plywood:
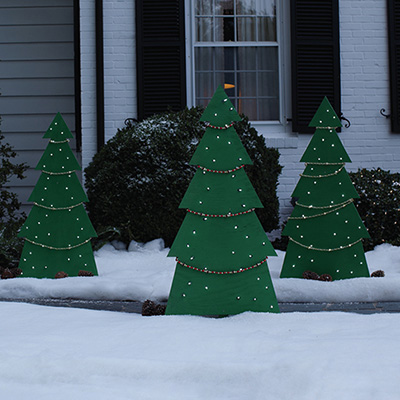
1. Christmas Trees
Simple yet impactful, plywood Christmas trees can be created in various sizes.
Steps to Create Your Plywood Christmas Tree:
- Draw a tree shape on the plywood and cut it out with a jigsaw.
- Sand the edges for a smooth finish.
- Paint the tree in your desired color, then add decorations like ornaments or glitter.
- Seal it with an outdoor sealant for protection.
Pros and Cons
| Pros | Cons |
|---|---|
| Easy to make | Can be heavy depending on size |
| Customizable | Requires storage space |
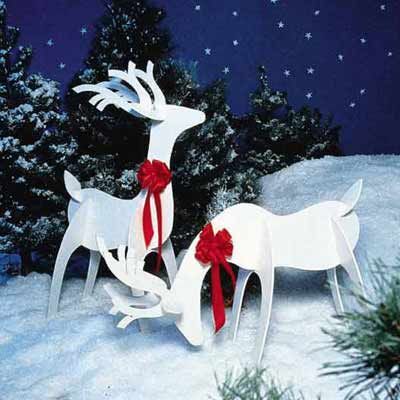
2. Santa and His Sleigh
Bring Santa to your front yard with a charming sleigh and reindeer decoration!
Steps to Create Santa’s Sleigh:
- Sketch the sleigh shape and reindeer outlines on the plywood.
- Cut the shapes out and sand the edges.
- Paint with vibrant colors – red for the sleigh and brown for reindeer.
- Add details like a cotton ball beard for Santa and glow lights around for an enchanting touch.

Pros and Cons
| Pros | Cons |
|---|---|
| Highly decorative | Requires more time to detail |
| Great for family bonding | Potential for wear and tear |
3. Snowmen
A classic symbol of winter, plywood snowmen are easy and fun to create!
Steps to Create a Plywood Snowman:
- Cut circles out of plywood to form the snowman’s body.
- Paint white, and add details like a hat, eyes, and buttons.
- Consider using a scarf made of fabric for added texture.
Pros and Cons
| Pros | Cons |
|---|---|
| Fun for all ages | Limited color durability against weather |
| Encourages creativity | Can be toppled easily if not secured |
Preparing Your Plywood for Decoration
Before you start painting and decorating, it’s crucial to prepare the plywood properly:
- Cut and Sand: Cut your plywood into desired shapes and sand the edges and surfaces to remove splinters.
- Prime: Use a wood primer to create a uniform surface and enhance color vibrancy.
- Seal: After painting, apply a sealant to protect against moisture and UV rays.

Painting Techniques for Your Plywood Decorations
To make your decorations pop, consider these painting techniques:
Acrylic Paint vs. Spray Paint
Acrylic paint is thicker and allows for more detail, while spray paint provides an even coat over larger areas. Here’s a comparison:
| Feature | Acrylic Paint | Spray Paint |
|---|---|---|
| Application | Brush and roller | Spray can |
| Finish | Rich and detailed | Glossy and even |
| Durability | Good with sealant | Excellent when fully cured |
Lighting Your Plywood Decorations
Lighting can truly enhance your decorations and create a magical atmosphere. Here are some tips:
- Use solar-powered lights to illuminate your decorations without added electricity costs.
- Consider string lights or fairy lights, which can wrap around your decorations for added charm.
- LED spotlights can be effective for highlighting larger pieces.

Maintenance Tips for Outdoor Christmas Decorations
To keep your plywood decorations looking their best throughout the holiday season, consider these maintenance tips:
- Check for wear and tear after storms.
- Clean off dirt or snow buildup to prevent damage.
- Reapply sealant as needed to ensure protection against moisture.
Storing Your Plywood Decorations
After the season ends, proper storage can extend the life of your decorations:
- Clean all decorations to remove dirt and debris.
- Store in a cool, dry place away from direct sunlight.
- Consider using bubble wrap or cloth to prevent scratches during storage.

Conclusion: Your Turn to Decorate!
Now that you have the tools, ideas, and tips, it’s time to unleash your creativity and make some unforgettable DIY plywood Christmas yard decorations! Remember to enjoy the process and let your personality shine through in your designs. Your neighbors will surely appreciate the festive spirit you bring to the community!
FAQs about DIY Plywood Christmas Yard Decorations
1. What type of plywood is best for outdoor decorations?
Marine-grade plywood or exterior-grade plywood is best as it is designed to withstand moisture.
2. How can I ensure my plywood decorations last for several seasons?
Use outdoor sealants and store them properly after the season ends to protect against the elements.
3. Can I use leftover plywood for projects other than Christmas decorations?
Absolutely! Leftover plywood can be used for a variety of craft projects throughout the year.
4. How do I make my plywood decorations kid-friendly?
Use non-toxic paints and avoid sharp edges by sanding down all surfaces thoroughly.
5. What are some simple decoration ideas for beginners?
Start with basic shapes like stars and trees, which requires minimal cutting and decorating.