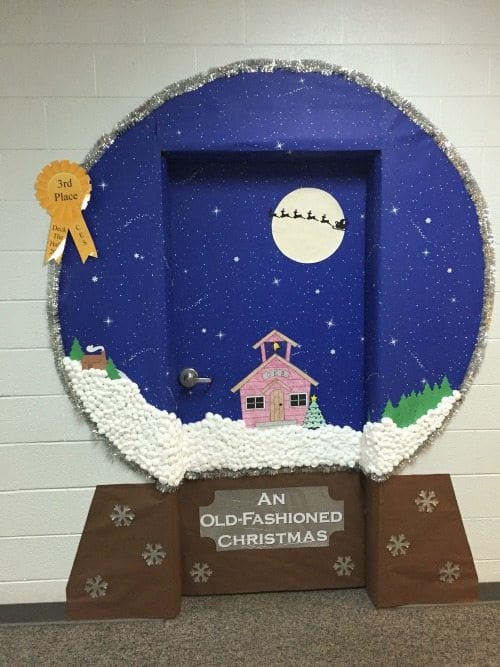
As the holiday season approaches, there’s nothing quite like the joy of decorating your home to reflect the festive spirit. One of my favorite DIY projects is creating a snow globe door decoration. Not only does it add a whimsical touch to your entryway, but it’s also a personal statement of creativity and warmth. In this guide, I’ll take you through everything you need to know about making your own DIY snow globe door decoration, including materials, step-by-step instructions, pros and cons, and more!
Table of Contents
- Materials Needed
- Step-by-Step Guide
- Pros and Cons
- Different Types of DIY Snow Globes
- FAQs
- Conclusion
Materials Needed for Your DIY Snow Globe Door Decoration
Creating a beautiful snow globe door decoration requires a few simple materials. Here’s a comprehensive list of what you’ll need:
- Glass jar or clear plastic container
- Decorative elements (miniature figurines, trees, etc.)
- Fake snow or glitter
- Hot glue gun and glue sticks
- Water
- Glycerin (optional, for better snow effect)
- Ribbon or other embellishments for hanging
- Paint or markers for additional decoration (optional)
Understanding Each Material
Each of these materials plays a crucial role in creating your snow globe. For instance, the type of jar you choose can significantly impact the final look. Glass jars provide a classic feel, while plastic containers may be more durable for outdoor use. Additionally, the decorative elements should resonate with your personal style—think about the themes you love!
Step-by-Step Guide to Creating Your Snow Globe Door Decoration
Now, let’s dive into the fun part—making your snow globe! Follow these simple steps:
Step 1: Prepare Your Base
Start by cleaning your jar or container thoroughly. Any dust or residue can interfere with the water’s clarity and the overall appearance of your globe.

Step 2: Secure the Decorative Elements
Using a hot glue gun, attach your decorative elements to the inside of the jar lid. Allow the glue to dry completely before moving on to the next step.
Step 3: Fill the Jar with Water
Carefully pour water into the jar, filling it about three-quarters full. If you’re using glycerin, mix it in at this stage; about one tablespoon per cup of water will make the “snow” float slower.

Step 4: Add the Snow
Sprinkle fake snow or glitter into the water. This is where your snow globe starts to come to life! Be careful not to overload it; a little goes a long way.
Step 5: Seal the Globe
Apply a strong layer of glue around the edges of the jar lid before screwing it onto the jar. This helps to prevent leaks and keep everything secure.

Step 6: Add Final Touches
Now is the time to decorate the outside of your jar. You can paint it, add ribbons, or even attach a festive message. Make it uniquely yours!
Pros and Cons of DIY Snow Globe Door Decoration

Pros
- Customizable to your style and preferences
- Cost-effective compared to store-bought decorations
- Fun and engaging activity for families or groups
- Great conversation starter for guests
- Can be reused or repurposed each year
Cons
- Time-consuming if you’re making multiple globes
- Potential for messiness during the crafting process
- Can be fragile if using glass materials
- Requires some basic crafting skills

Different Types of DIY Snow Globes
While the basic snow globe is a classic, there are many variations that can suit different tastes and occasions. Here’s a comparison of some popular types:

| Type of Snow Globe | Description | Best For | Difficulty Level |
|---|---|---|---|
| Traditional Snow Globe | Classic design with water and snow. | General holiday decor | Easy |
| Snow Globe Ornament | Smaller version for hanging on trees. | Christmas trees and mantels | Medium |
| Themed Snow Globe | Features specific themes like winter wonderland or festive towns. | Personalized gifts | Medium to Difficult |
| DIY Snow Globe Centerpiece | A large snow globe used as a table centerpiece. | Holiday parties | Difficult |
Frequently Asked Questions (FAQs)
How long does it take to make a DIY snow globe door decoration?
Generally, it takes about 30 minutes to an hour to create one, depending on your crafting speed and the complexity of your design.
Can I use real snow in my snow globe?
While real snow may seem tempting, it’s not practical as it will melt and create a mess. Stick to artificial snow or glitter for best results!
What can I use as a base for my DIY snow globe?
Common bases for snow globes include wooden blocks, ceramic dishes, or even festive trays. Make sure it’s sturdy enough to support the jar.
Is it possible to reuse my snow globe from last year?
Absolutely! Just disassemble it carefully, clean the jar and decorations, and you can create a brand-new design!
Can I make snow globes with kids?
Yes! This is a great activity for kids under supervision. Just be mindful of using hot glue safely.
Conclusion
Creating a DIY snow globe door decoration is not only a fun activity but also a fantastic way to express your creativity and spread holiday cheer. With a few simple materials and some imagination, you can craft a beautiful piece that will delight your family and guests for years to come. So gather your supplies, get crafting, and let the magic of winter transform your home!
Happy crafting!