Welcome to the colorful world of cookie decorating! If you’re looking for ways to take your cookie game to the next level, airbrushing may just be your new best friend. In this comprehensive guide, we’ll dive deep into airbrush techniques, tools, and tips to elevate your cookies’ visual appeal and taste. Let’s get started!
What is Airbrushing in Cookie Decorating?
Airbrushing is a technique that uses a spray tool to apply color quickly and evenly to cookies. This method allows for intricate designs and smooth finishes that are hard to achieve with traditional icing techniques. As someone who has spent years perfecting my cookie decorating skills, I can attest to the magic of an airbrush machine. It opens up a whole new world of creativity!
Benefits of Using an Airbrush for Cookie Decorating
- Precision: Achieve fine details that icing may not allow.
- Speed: Cover larger areas quickly compared to hand-piping.
- Versatility: Use it for various designs and color gradients.
Types of Airbrushes for Cookie Decorating
When it comes to choosing an airbrush, you’ll come across two main types:
1. Single-Action Airbrush
This type is easier for beginners, as it operates with a single control for both air and paint flow. However, it offers less control over fine details.
2. Dual-Action Airbrush
A dual-action airbrush allows you to control air and paint flow separately, providing greater versatility and precision. This is my go-to option for more complex designs.
Essential Tools for Airbrushing Cookies
| Tool | Purpose |
|---|---|
| Airbrush Machine | The primary tool for applying color. |
| Air Compressor | Provides the necessary pressure for the airbrush. |
| Food-Grade Airbrush Colors | Special colors designed for edible use. |
| Cleaning Supplies | Keep the airbrush clean for optimal performance. |
How to Choose the Right Airbrush for Your Needs
Consider the following factors when choosing an airbrush:
1. Experience Level
Beginners may prefer a single-action airbrush for its simplicity, whereas experienced decorators might prefer the control offered by a dual-action model.
2. Budget
Airbrushes can range from budget-friendly to professional-grade. It’s essential to find one that fits both your needs and your wallet.
3. Intended Use
If you plan to use your airbrush for more than just cookies, consider a versatile model that works on various surfaces like cakes and cupcakes.
Step-by-Step Guide to Airbrushing Cookies
Here’s a step-by-step guide based on my experience to help you get started:
Step 1: Prepare Your Workspace
Ensure you have a clean, well-ventilated area to work in. Lay down newspapers or a plastic sheet to protect your surfaces from overspray.
Step 2: Prepare Your Cookies
Ensure your cookies are completely cooled and fully decorated with a base layer of royal icing or glaze.
Step 3: Mix Your Colors
Use food-grade airbrush colors and thin them with distilled water if necessary. Test on a paper towel to ensure the color is right.
Step 4: Adjust Air Pressure
Set your compressor to the appropriate PSI (usually between 15-30 PSI works well). Lower pressure offers more control, while higher pressure provides quicker coverage.
Step 5: Start Airbrushing
Hold the airbrush about 6-12 inches away from the cookie and move in a sweeping motion. Start with light layers and build up to the desired intensity.
Step 6: Clean Your Airbrush
After use, clean your airbrush thoroughly to prevent clogs. Run water or a cleaning solution through it, and disassemble it for a deep clean if necessary.
Common Challenges and Solutions
Problem 1: Uneven Coloring
Solution: Ensure consistent distance from the cookie and move the airbrush back and forth evenly.
Problem 2: Clogs in the Airbrush
Solution: Clean your airbrush regularly and use properly thinned colors to avoid clogging.
Problem 3: Over-Spraying
Solution: Practice on a scrap cookie or paper before moving to your decorated cookies.
Pros and Cons of Airbrushing for Cookie Decorating
Pros:
- Delicate details and smooth finishes.
- Faster application of color on larger cookies.
- Ability to blend colors for stunning effects.
Cons:
- Initial investment can be high.
- Learning curve for beginners.
- Requires regular maintenance and cleaning.
Airbrush Brands to Consider
Here are some reputable airbrush brands that I’ve personally used and recommend:
- Iwata: Known for high-quality airbrushes, great for detailed work.
- Badger: Offers a range of airbrushes suitable for all levels.
- Paasche: Affordable options that don’t compromise quality.
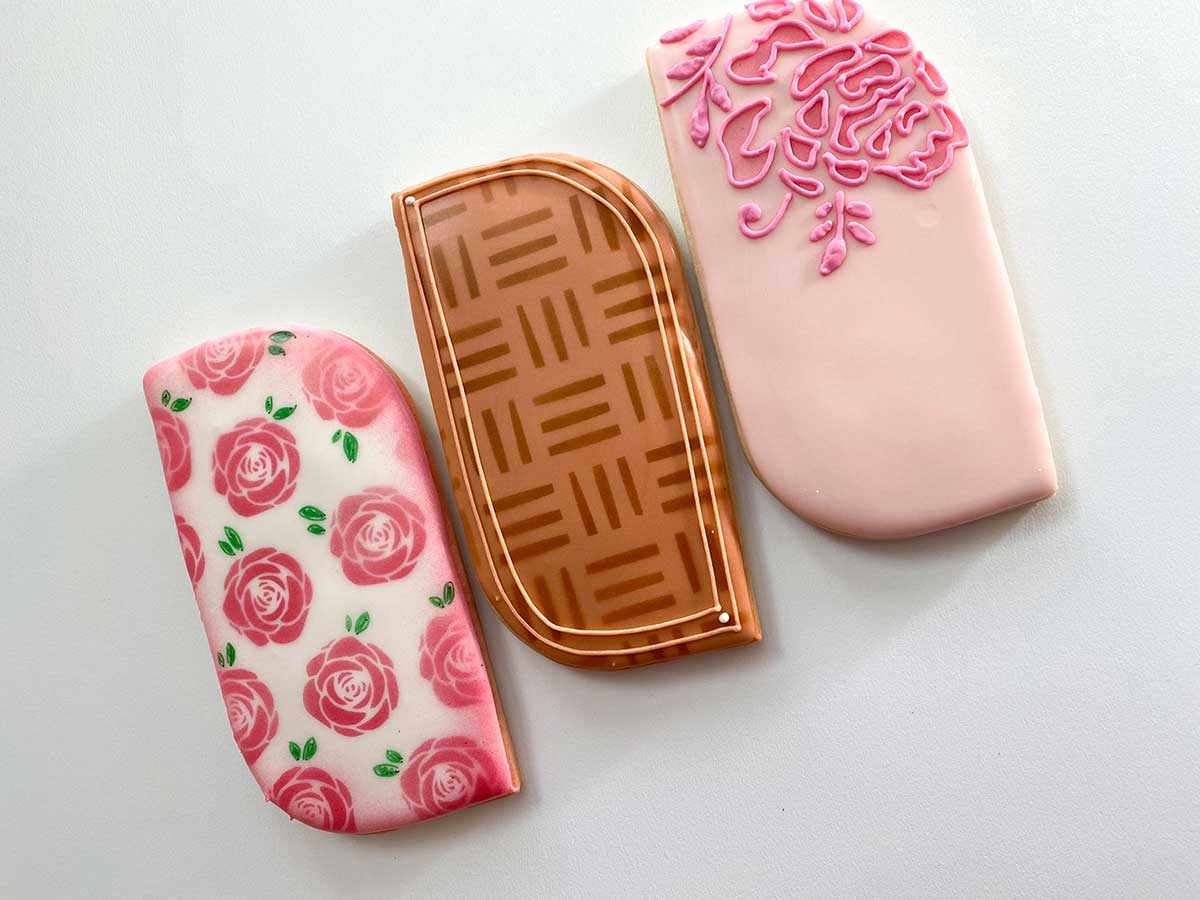
Creative Airbrush Techniques for Cookie Decorators
Here are a few creative techniques I’ve found effective:
1. Ombre Effect
Mix two similar colors and gradually apply to create a beautiful gradient.
2. Stenciling
Use stencils to create intricate designs; just hold the stencil in place and spray over it.
3. Shadowing
Apply a darker shade around the edges after the base color has dried for depth.

FAQs About Airbrushing for Cookie Decorating
What type of paint is best for airbrushing cookies?
Always use food-grade airbrush colors that are specifically designed for edible applications.
Can I use a regular spray paint airbrush?
No, regular spray paint is not safe for food. Only use airbrush paints labeled as edible.
How do I clean my airbrush?
Clean the airbrush with warm water and a mild dish detergent or dedicated airbrush cleaner immediately after use.