When it comes to home décor, few elements have the ability to transform a space quite like decorative trim moulding. Among the many options available, flexible decorative trim moulding stands out for its versatility and ease of installation. In this comprehensive guide, we will explore everything you need to know about flexible decorative trim moulding, including its benefits, applications, and tips for installation, all while sharing a few personal experiences to make the journey more relatable.
What is Flexible Decorative Trim Moulding?
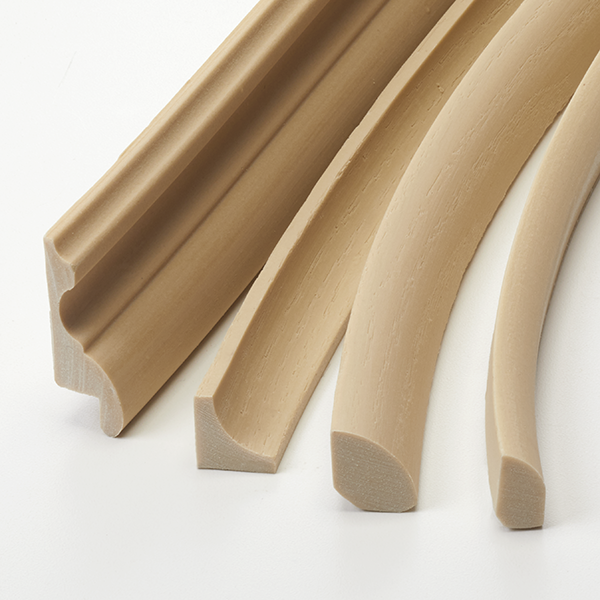
Flexible decorative trim moulding is a type of moulding made from materials that can bend and curve, allowing you to apply decorative elements to curved surfaces or areas that require adaptability. Unlike traditional rigid moulding, flexible moulding provides the advantage of seamless integration with non-linear architectural features, such as arches, rounded walls, or irregular ceilings.
Benefits of Using Flexible Decorative Trim Moulding
Incorporating flexible decorative trim moulding into your design can offer several advantages, such as:
- Versatility: Perfect for a variety of applications, including ceilings, walls, and furniture.
- Ease of Installation: Light-weight materials mean less strain during installation and can be cut down to size easily.
- Aesthetic Appeal: Elevates the overall look of your space, adding depth and character.
- Cost-effectiveness: Often more affordable than custom moulding solutions.
Common Types of Flexible Decorative Trim Moulding
There are several types of flexible decorative trim moulding, each serving different needs and styles. Let’s look at some of the most popular options:
- Flexible Crown Moulding: Ideal for curved ceilings, offers a sophisticated finish.
- Flexible Baseboards: Perfect for irregular floors or walls, providing a seamless look.
- Flexible Chair Rails: Adds a decorative touch while protecting walls from furniture damage.
Materials Used in Flexible Decorative Trim Moulding
The materials used in flexible decorative trim moulding can significantly impact its appearance and functionality. Here are some commonly used materials:
| Material | Pros | Cons |
|---|---|---|
| Polyurethane | Durable, lightweight, resistant to moisture | Can be more expensive |
| PVC | Cost-effective, waterproof, and easy to clean | Less natural look compared to wood |
| Wood | Natural aesthetic, can be painted or stained | Prone to warping and moisture damage |
Where to Use Flexible Decorative Trim Moulding
Flexible moulding can be used in a variety of settings. Here are some areas where it can be especially effective:

1. Residential Spaces
Flexible decorative trim is perfect for homes with unique architectural features. Whether you are renovating a vintage home or updating a modern space, it adds character and charm.
2. Commercial Spaces
Retail environments often feature circular walls, arches, or unique displays that can benefit from flexible moulding, allowing business owners to maintain their brand image through cohesive design elements.

3. Custom Furniture
Adding flexible trim to furniture pieces like coffee tables or cabinets can create a unique look, enhancing the overall design and feel of the room.
Installation Tips for Flexible Decorative Trim Moulding
While the installation of flexible decorative trim moulding can be straightforward, here are some handy tips to ensure a successful finish:

Preparation
Before starting the installation, prepare the area by cleaning and measuring the surfaces where the moulding will be attached. Make sure to select the right adhesive for the material.
Cutting and Fitting
Use a sharp utility knife for cutting the moulding. Always test fit pieces before glueing them in place to ensure accuracy.
Securing the Moulding
Depending on the adhesive used, make sure to hold the moulding in place for a sufficient amount of time, as recommended by the manufacturer, to ensure a strong bond.
Finishing Touches
After installation, consider painting or finishing the moulding to match your décor. This can enhance the moulding’s visual appeal and help it blend seamlessly with your space.

Maintenance and Care
Keeping your flexible decorative trim moulding looking great doesn’t require much effort. Regular dusting and occasional cleaning with a damp cloth can keep it in prime condition. If painted, touching up areas as needed will prolong its life and maintain its appearance.
Pros and Cons of Flexible Decorative Trim Moulding
Like any product, flexible moulding comes with its set of pros and cons:
| Pros | Cons |
|---|---|
| Highly adaptable for various shapes | Can be susceptible to damage if not handled properly |
| Enhances aesthetic appeal | Installation may require specific tools |
| Cost-effective alternative to custom moulding | Not all materials are suitable for every environment |

Personal Experience: A Project with Flexible Decorative Trim
Reflecting on my own experience, I recently renovated a space with a beautiful archway that posed a significant challenge regarding moulding. After much research, I decided to go with flexible decorative trim moulding, and it made all the difference. The installation was relatively simple, and the results were stunning! It added a touch of elegance and really completed the space.
Frequently Asked Questions (FAQs)
1. Is flexible decorative trim moulding suitable for outdoor use?
Flexible trim moulding made from PVC or certain synthetic materials can be suitable for outdoor use, but always check the manufacturer’s recommendations.
/product/01/508186/1.jpg)
2. Can I paint flexible moulding?
Yes, most flexible mouldings can be painted. It’s recommended to use a primer before painting to ensure better adhesion.
3. How do I remove flexible decorative trim moulding?
To remove flexible moulding, gently pry it away from the surface using a flat tool, being careful not to damage the underlying wall or surface.
4. What tools do I need for installation?
Basic tools include a utility knife, measuring tape, adhesive, and possibly a caulking gun, depending on the type of adhesive used.
5. How can I ensure the moulding adheres correctly?
Make sure both the wall and the back of the moulding are clean and free of dust. Use the appropriate adhesive and follow the manufacturer’s instructions for the best results.
Conclusion
Flexible decorative trim moulding is a fantastic way to enhance the aesthetics of your home or commercial space while accommodating a variety of design needs. With its myriad benefits, simple installation, and versatile applications, it’s no wonder that homeowners and designers alike are turning to this innovative product. Whether you’re looking to crown a curved ceiling or base a unique wall feature, flexible moulding could be just the solution you need. Dive into your next project with confidence, and enjoy the transformative power of flexible decorative trim moulding!