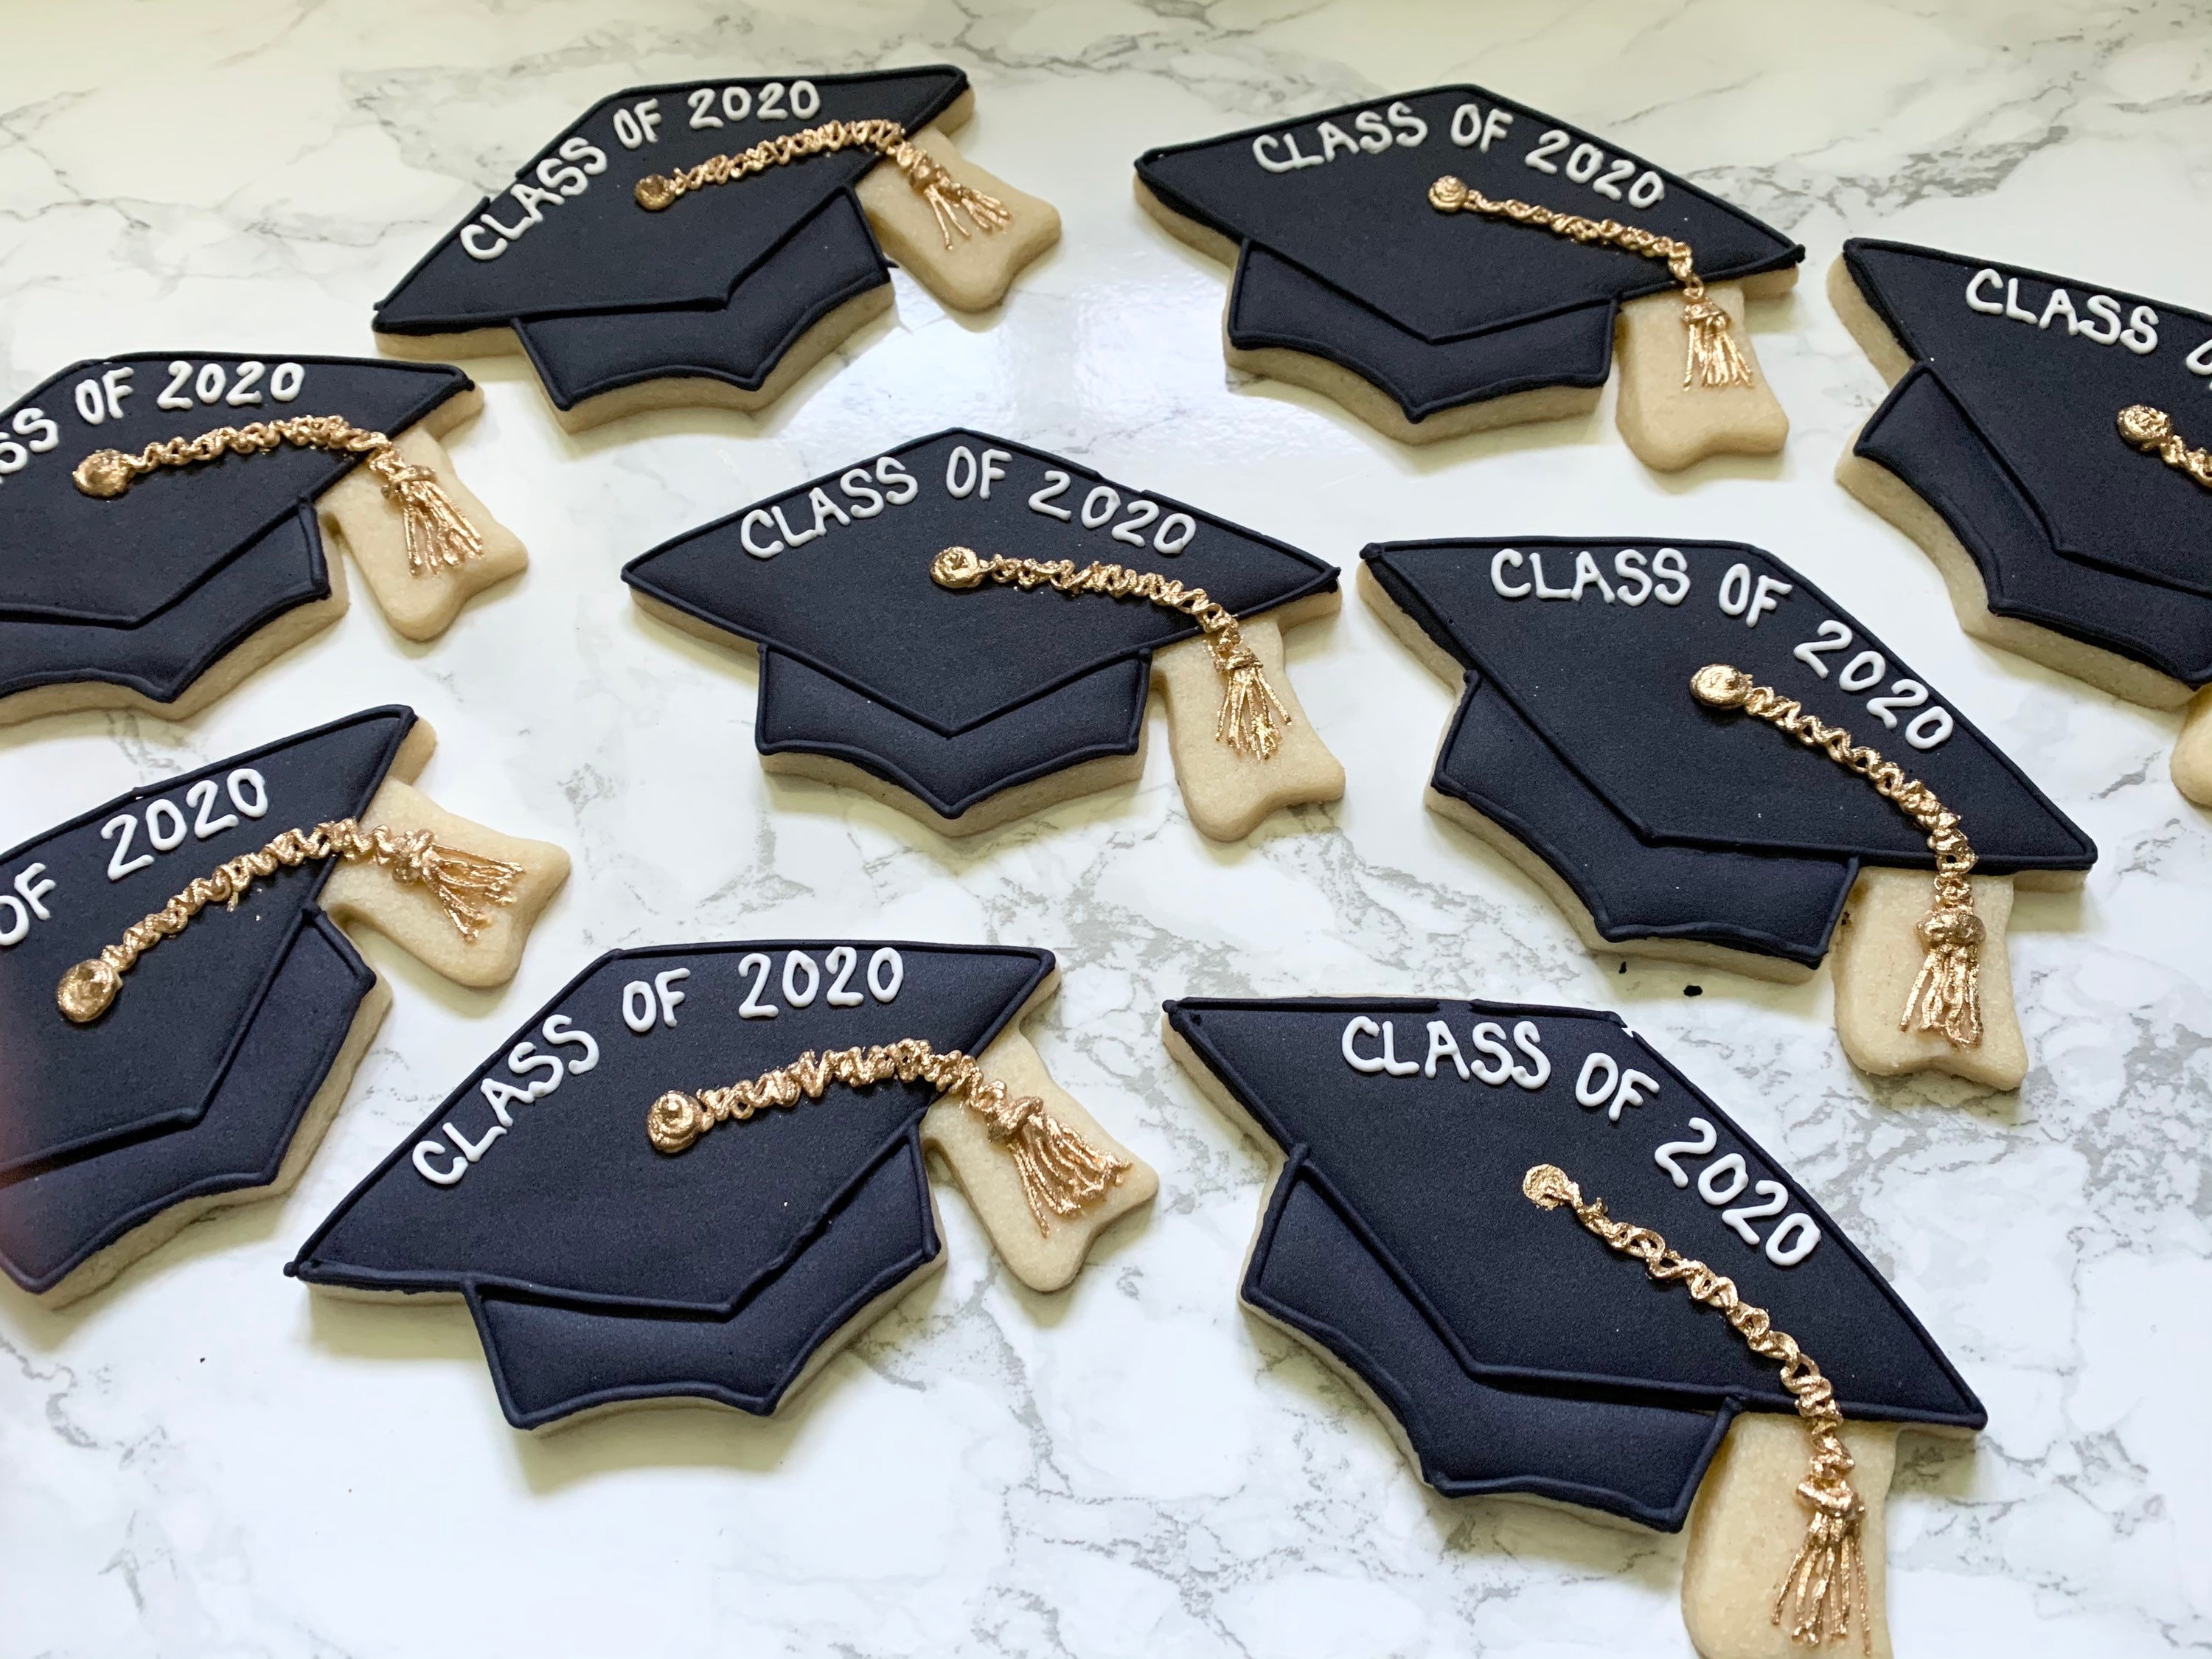
Graduation is a pivotal milestone that deserves a grand celebration, and what better way to commemorate this special day than with themed treats? Graduation cap cookies decorated in vibrant colors can add a personalized touch to any graduation party. Having baked these delicate treats for several years, I’ve honed my skills and discovered tips that can transform your baking into a delightful adventure. In this article, we’ll explore everything you need to know about making and decorating graduation cap cookies, ensuring your celebration is deliciously memorable!
Why Choose Graduation Cap Cookies?
Graduation cap cookies are not only visually appealing but are also easy to make and customize for any graduate. Here are a few reasons why you should consider adding these sweet treats to your graduation festivities:
- They’re Fun and Festive: Graduation cap cookies are a playful nod to this significant achievement.
- Customizable: You can tailor colors and designs to fit the graduate’s school colors.
- Easy to Share: Perfect for parties, they can be packaged for guests to take home.
- Engaging Activity: Baking and decorating cookies can be a fun activity with family and friends.
Gathering Your Supplies for Graduation Cap Cookies

Essential Ingredients
To start, you’ll need the following ingredients:

- 2 cups all-purpose flour
- 1/2 teaspoon baking powder
- 1/4 teaspoon baking soda
- 1/4 teaspoon salt
- 1 cup unsalted butter, softened
- 1 cup granulated sugar
- 1 large egg
- 2 teaspoons vanilla extract
Decorating Supplies

Decoration is where the magic happens! Here’s what you’ll need:
- Royal icing (in various colors)
- Food coloring gels
- Piping bags and tips
- Edible glitter or sprinkles
- Food-safe paintbrush

Step-by-Step Guide to Making Graduation Cap Cookies
Mixing the Dough

Start your baking adventure with the cookie dough:
- In a bowl, whisk together flour, baking powder, baking soda, and salt.
- In a large mixing bowl, cream butter and sugar until fluffy.
- Add in the egg and vanilla extract, mixing until well combined.
- Gradually add the dry ingredients to the wet mixture, mixing until a dough forms. Chill for about 30 minutes.

Shaping the Cookies
For graduation cap cookies, you can use a cap-shaped cookie cutter, or create your own template:

- Preheat oven to 350°F (175°C).
- Roll out the chilled dough to about 1/4-inch thick.
- Use a graduation cap cookie cutter to cut out shapes.
- Place the cookies on a baking sheet lined with parchment paper, leaving space between each cookie.
- Bake for 8-10 minutes or until the edges are golden brown.
Cooling and Preparing for Decoration
Once baked, remove the cookies from the oven and allow them to cool on a wire rack. This is crucial for successful decorating!
Decorating Your Graduation Cap Cookies
Preparing Royal Icing
Royal icing is the best choice for decorating cookies as it dries hard and provides a smooth finish. Here’s how to make it:
- 2 egg whites
- 4 cups powdered sugar
- 1 teaspoon lemon juice or vinegar
- Beat the egg whites until frothy, then gradually add powdered sugar.
- Continue mixing until the icing holds stiff peaks.
- Add lemon juice to achieve the desired consistency. Use thinner icing for flooding and thicker for piping.
Decoration Techniques
Here are some creative techniques to decorate your cookies:
- Flooding: Use a thinner royal icing to cover the entire cookie surface, using a toothpick to spread evenly.
- Piping: Use a thicker icing to outline the edges and add designs like tassels or the year of graduation.
- Adding Details: Sprinkle edible glitter or use food coloring to hand-paint details on your cookies.
Comparison Table: Royal Icing vs. Other Types of Icing
| Type of Icing | Texture | Drying Time | Best For |
|---|---|---|---|
| Royal Icing | Hard, smooth | 4-6 hours | Decorating, flooding |
| Buttercream | Soft, creamy | 1-2 hours | Frosting cakes, filling |
| Glaze | Thin, shiny | 30 minutes | Quick dipping, drizzling |
Storing Your Graduation Cap Cookies
Proper storage ensures your cookies stay fresh. Here’s how:
- Allow cookies to dry completely after decorating.
- Store in an airtight container at room temperature to maintain texture.
- For longer storage, freeze cookies after they have cooled completely.
Pros and Cons of Making Graduation Cap Cookies
Pros
- Fun and engaging activity for all ages.
- Customizable to match any school colors or theme.
- Great party favor that guests will appreciate.
Cons
- Can be time-consuming, especially for detailed designs.
- Requires practice to master decorating techniques.
- Ingredients and supplies may add up in cost.
Frequently Asked Questions (FAQs)
What type of flour is best for cookies?
All-purpose flour works well for most cookie recipes, providing the right balance of structure and tenderness.
How can I make my cookies softer?
To achieve softer cookies, try reducing the baking time slightly and ensure you don’t overmix the dough.
Can I use a different type of icing for decoration?
Yes, while royal icing is ideal for detailed designs, buttercream or fondant can also be used for a different texture and flavor.
How long do decorated cookies last?
Properly stored decorated cookies can last up to two weeks at room temperature or up to three months in the freezer.
Conclusion: Create Lasting Memories with Graduation Cap Cookies
Graduation cap cookies are more than just sweet treats; they’re an expression of pride, celebration, and creativity. With this comprehensive guide, you now have the tools to make your graduation celebration unforgettable. Whether you’re a seasoned baker or a novice, the joy of creating something beautiful for a special occasion transcends the kitchen. So, roll up your sleeves, gather your supplies, and let your baking skills shine as you celebrate achievements with tasty graduation cap cookies!