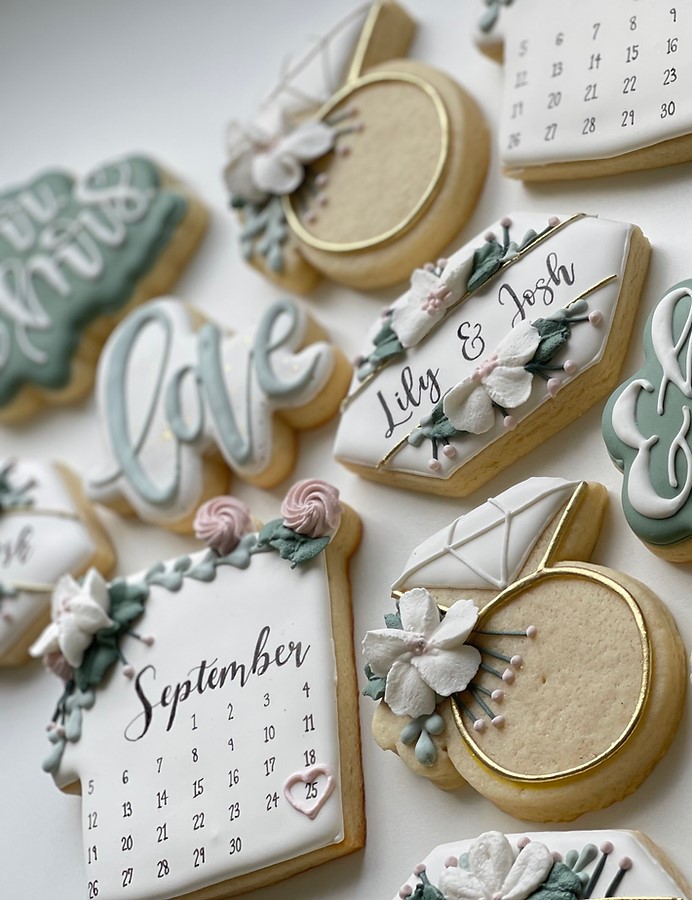
When it comes to culinary creativity, few things are as delightful as hand decorated cookies. These little works of art aren’t just a treat for the taste buds; they’re a feast for the eyes as well. I’ve spent countless hours experimenting with royal icing, sprinkles, and cookie designs, and every batch brings joy not only to those who eat them but also to the artist behind the cookie. In this extensive guide, we will dive into the world of hand decorated cookies, exploring techniques, tips, and tricks that will turn your baking into a cherished art form.
Understanding Hand Decorated Cookies
Before diving into the how-to, it’s essential to understand what hand decorated cookies are. These aren’t your average cookies. Each cookie is carefully prepared and artistically decorated, often using various techniques and materials that elevate them beyond mere snacks.
The Origins of Cookie Decorating
Cookie decorating has a rich history that dates back centuries. Initially, cookies were simple baked goods, but as culinary arts evolved, they transformed into decorative treats for special occasions. Today, they are a staple for celebrations such as birthdays, weddings, and holidays.
Types of Hand Decorated Cookies
There are several types of cookies you can choose to decorate. Here are some popular options:
| Type of Cookie | Description | Best For |
|---|---|---|
| Royal Icing Cookies | Cookies decorated with a smooth, glossy icing made from egg whites and powdered sugar. | Weddings, holidays, and events. |
| Fondant Cookies | Soft icing that can be rolled out and cut into shapes for a smooth finish. | Birthdays and themed parties. |
| Chocolate-Dipped Cookies | Cookies dipped in melted chocolate and often decorated with sprinkles or nuts. | Casual gatherings and gifts. |
| Painted Cookies | Cookies that are painted with edible food colors for intricate designs. | Artistic occasions and creative expressions. |
Getting Started: Ingredients and Tools
Essential Ingredients
Creating beautiful hand decorated cookies begins with the right ingredients. Here’s a list of essentials:

- Flour: All-purpose flour is the most common choice.
- Butter: Use unsalted butter for a rich flavor.
- Sugar: Granulated sugar and powdered sugar for icing.
- Eggs: Fresh eggs for cookie structure.
- Vanilla Extract: For flavoring.
- Baking Powder: Helps cookies rise and maintain shape.
- Royal Icing Ingredients: Egg whites or meringue powder, and powdered sugar.
Essential Tools
Having the right tools makes a huge difference in cookie decorating. Here’s what you’ll need:

- Baking Sheets: Ensure they are heavy-duty to avoid warping.
- Parchment Paper: For easy cookie removal and cleanup.
- Mixing Bowls: For combining ingredients.
- Stand Mixer or Hand Mixer: For mixing dough and icing.
- Piping Bags and Tips: For precise icing application.
- Cookie Cutters: In various shapes and sizes.
- Food Colors: Gel colors are preferable for vibrancy.
Cookie Dough: Crafting the Perfect Base

Basic Cookie Dough Recipe
To start, you need a sturdy dough that holds its shape during baking. Here’s a simple recipe:
            Ingredients:
            - 2 ¾ cups all-purpose flour
            - 1 teaspoon baking powder
            - ½ teaspoon salt
            - 1 cup unsalted butter, softened
            - 1 ½ cups granulated sugar
            - 1 egg
            - 1 teaspoon vanilla extract


            Instructions:
            1. Preheat your oven to 350°F (175°C).
            2. In a bowl, mix flour, baking powder, and salt.
            3. In a separate bowl, beat together butter and sugar until fluffy.
            4. Add egg and vanilla, mixing well.
            5. Gradually add the flour mixture until just combined.
            6. Roll out the dough, cut into shapes, and bake for 8-10 minutes.
Tips for Perfect Cookie Dough
Here are some pointers to ensure your cookie dough is just right:
- Chill the dough: Refrigerating it for at least an hour helps maintain the shape during baking.
- Don’t overmix: Overmixing can lead to tough cookies.
- Measure accurately: Use weighing scales for precise ingredient measurements.

Decorating Techniques: Elevating Your Cookies
Understanding Royal Icing
Royal icing is a go-to medium for cookie decorators due to its versatility and ability to harden. Here’s how to make it:
            Ingredients:
            - 2 egg whites or 2 tablespoons meringue powder
            - 4 cups powdered sugar
            - 1 teaspoon vanilla extract (optional)


            Instructions:
            1. Whip egg whites until frothy.
            2. Gradually add powdered sugar while mixing until smooth and glossy.
            3. Adjust consistency with water for piping or flooding.
Techniques to Master
Here are a few techniques to help you create stunning cookies:
Piping Techniques
Piping is essential for intricate designs. Practice the following:
- Outlining: Create a border on the cookie before filling.
- Flooding: Fill in the outlined area with a thinned royal icing.
- Detailing: Use a fine piping tip for small details.
Using Edible Paints
Edible paints can be used for achieving complex designs:
- Mix food color with clear alcohol or lemon extract.
- Use a fine brush to apply designs.
- Allow to dry completely before packaging.
Creative Ideas for Cookie Designs
Themed Cookie Sets
Creating themed sets can elevate your cookie game. Ideas include:
- Holidays: Christmas trees, Halloween ghosts, Thanksgiving turkeys.
- Birthdays: Customized names and ages.
- Special Occasions: Wedding bells, baby shower themes.
Seasonal Beauties
Celebrate the seasons with beautiful designs:
- Spring: Flowers and pastel colors.
- Summer: Bright fruits and beach themes.
- Fall: Leaves, pumpkins, and warm tones.
- Winter: Snowflakes and cozy themes.
Storing Hand Decorated Cookies
Best Practices for Storage
To keep your cookies fresh and beautiful:
- Store in airtight containers to prevent moisture.
- Separate layers with parchment paper to avoid sticking.
- Keep in a cool, dry place away from direct sunlight.
How Long Can Decorated Cookies Last?
Typically, decorated cookies can last up to two weeks if stored properly. However, they are best enjoyed fresh, especially if using fresher ingredients like egg whites in royal icing.
Pros and Cons of Hand Decorated Cookies
As with any craft, there are benefits and drawbacks:
Pros
- Highly customizable for any occasion.
- Great for personal expression and creativity.
- Can be a fun and engaging activity for families.
Cons
- Time-consuming process compared to regular cookies.
- Requires practice and skill development.
- Costs can add up with high-quality ingredients and tools.
Common FAQs about Hand Decorated Cookies
What is the best icing for decorated cookies?
The best icing for decorated cookies is royal icing due to its quick drying time and ability to hold detailed designs. However, you can also use fondant or buttercream for different effects.
How do you maintain the freshness of decorated cookies?
To maintain freshness, store cookies in airtight containers and keep them in a cool, dry place. Avoid refrigeration, as it can lead to condensation and spoil the decorations.
Can you freeze decorated cookies?
Yes, you can freeze decorated cookies. Ensure they are completely dry before placing them in an airtight container. They can last in the freezer for up to three months.
Do I need to use meringue powder for royal icing?
Meringue powder is not necessary but is recommended as it helps the icing hold its shape and reduces the risk of bacteria. Fresh egg whites can also be used but must be handled with care.
Final Thoughts: Your Cookie Journey Awaits!
Hand decorated cookies are more than just treats; they are creations that bring joy and delight to those who see and taste them. With practice and creativity, you can elevate your cookie-decorating skills and impress friends, family, and clients alike. Whether you’re baking for a special occasion or simply to indulge your creative side, I hope this guide inspires you to start your cookie journey!

