As Halloween approaches, many of us feel the excitement to get crafty and embrace the spooky season. One of the most iconic symbols of Halloween is the classic witch hat. Whether you’re planning a Halloween party, a themed event, or simply want to express your creativity, decorating witch hats can be a delightful endeavor. In this article, I will share my personal experiences, tips, and a variety of creative ideas to help you transform your witch hat into a unique masterpiece!
Understanding the Basics of Witch Hat Decoration
Before diving into the specific decorating techniques, it’s essential to understand the basics of witch hats. They come in various shapes, sizes, and materials, which influence how you can decorate them. Common materials include felt, straw, and satin, and knowing the material will help you choose the right decorating method.
Types of Witch Hats
| Type | Material | Best For |
|---|---|---|
| Classic Witch Hat | Felt | Traditional Halloween costumes |
| Pointed Straw Hat | Straw | Summery or beach-themed witches |
| Decorated Satin Hat | Satin | Glamorous witch looks |

Choosing Your Decoration Theme
Choosing a theme for your witch hat is a crucial step in the decorating process. Some popular themes include:

- Classic Halloween (orange and black)
- Gothic Elegance
- Whimsical Fairy Tale
- Nature-Inspired (flowers, leaves)
My Personal Experience: Finding the Right Theme

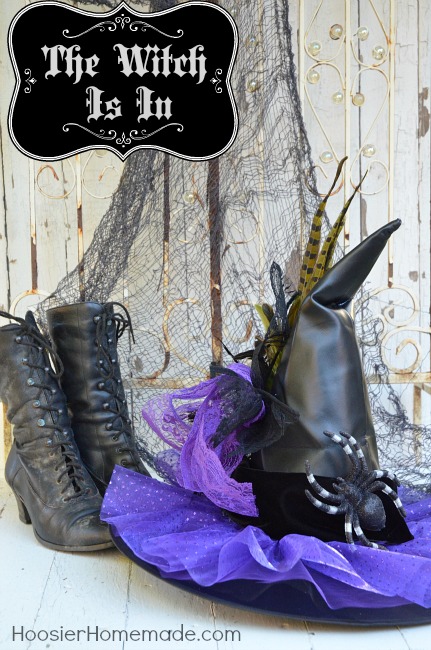
Last year, I decided to throw a Halloween bash and opted for a classic witch theme with a twist. I chose purple and black as my color palette, which turned out wonderfully when paired with glittery embellishments! Finding a theme can make the decorating process not only easier but also more enjoyable.
Essential Supplies for Decorating Witch Hats

Before you start your decorating project, gather your supplies. Here’s a list of essential items you might need:
- Basic witch hat
- Hot glue gun
- Assorted ribbons
- Decorative embellishments (feathers, jewels, flowers)
- Paint or fabric markers
- Craft scissors
- Stickers or stencils
- Optional: fairy lights for added flair

Creating a DIY Decor Kit
Consider creating a DIY decor kit with all your supplies organized. This can be a fun weekend project, and it saves time when you’re ready to decorate.

Step-by-Step Guide to Decorating Your Witch Hat
Step 1: Preparing Your Hat

Before getting creative, ensure your witch hat is clean and dry. If the hat is made from synthetic materials, you may consider lightly steaming it to remove any creases. This will give you a smooth canvas to work on.
Step 2: Base Decoration
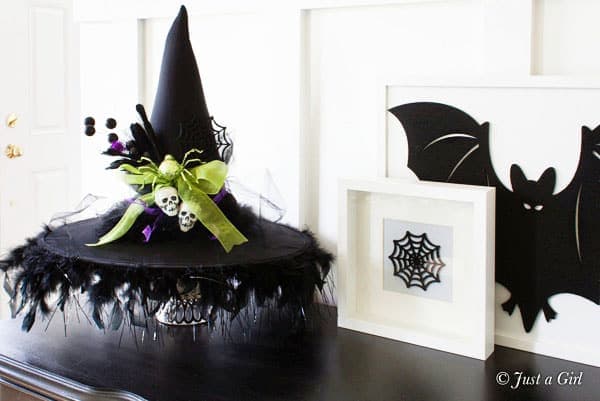
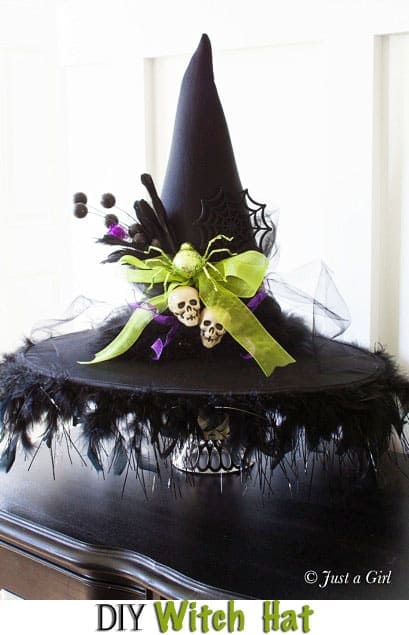
Start with the base of your hat. You can wrap it with ribbons or fabric strips for a more textured look. For my recent project, I used a wide, shimmering black ribbon that I glued at the base of the hat, giving it an elegant finish.
Step 3: Adding Embellishments
This is where the fun begins! Here are a few ideas for embellishments:
- Feathers: Attach feathers for a dramatic look. They can be glued or stitched onto the hat.
- Jewels: Use adhesive jewels to add sparkle.
- Flowers: Fake flowers or leaves give a whimsical touch.
- Stickers: Use Halloween-themed stickers for an easy decoration.
Step 4: Personal Touches
Make your hat unique! Hand-paint designs, add personal messages, or even decorative charms that mean something to you. During my decorating sessions, I often incorporate words like “Boo!” or “Witchy” in glittery letters.
Step 5: Final Touches
Inspect your decorated hat and make any adjustments. If you’re using fairy lights, now’s the time to weave them through the decorations to give a magical glow!
Decoration Ideas for Different Themes
1. Classic Halloween Theme
For a classic Halloween look, stick with the traditional black and orange colors. You can create a haunted scene with mini plastic spiders, bat decorations, and orange ribbons.
2. Gothic Elegance Theme
Opt for dark colors such as black, deep red, and silver. Use lace, antique brooches, and velvet ribbons to give the hat a sophisticated gothic feel.
3. Whimsical Fairy Tale Theme
Choose bright colors, sparkly decorations, and floral accents. Think of adding items like glittery butterflies and whimsical stars.
4. Nature-Inspired Theme
Incorporate leaves, small branches, and flowers. This can create a beautiful earthy vibe. Use natural colors and organic materials.
Pros and Cons of DIY Witch Hat Decoration
| Pros | Cons |
|---|---|
| Creative freedom and flexibility | Can be time-consuming |
| Cost-effective | Requires some crafting skill |
| Unique and personalized designs | Potential for mess |
Frequently Asked Questions
What materials are best for decorating a witch hat?
The best materials are ribbons, glitter, feathers, flowers, and fabric paint. It depends on your chosen theme!
Can I decorate a witch hat for a non-Halloween event?
Absolutely! Witch hats can be adapted for various themes, such as a fairy or fantasy theme.
How can I ensure my decorations stay on during wear?
Use a hot glue gun for secure attachments, and consider using a lightweight adhesive spray for additional security.
Are there any eco-friendly options for decorating witch hats?
Yes! Use natural materials such as dried flowers, leaves, and fabric scraps. This not only helps the environment but gives a rustic charm.
Can I use lights on my witch hat?
Definitely! Battery-operated fairy lights can add a magical touch. Be sure to attach them securely so they don’t fall off.
Conclusion: Unleash Your Creativity!
Decorating witch hats is a fun and imaginative way to express your personality and enhance your Halloween experience. With a little creativity and the right supplies, you can create stunning pieces that not only capture the spirit of Halloween but also showcase your unique style. I encourage you to try out these ideas, experiment with different themes, and most importantly, have fun!
Now that you have this comprehensive guide, what are you waiting for? Grab your supplies, unleash your creativity, and start decorating your witch hat today!