Introduction
When it comes to planning a children’s birthday party, the decorations play a crucial role in creating an enchanting atmosphere. One beloved theme that consistently captures the hearts of kids and parents alike is Masha and Bear. Based on the popular Russian animated series, this theme incorporates fun, friendship, and adventure—perfect ingredients for a memorable celebration.
In this guide, I will share my personal experiences, ideas, and tips for creating stunning Masha and Bear birthday decorations that will bring smiles to your little one and their friends. Let’s dive in!
Understanding the Masha and Bear Theme
Why Choose Masha and Bear?
Masha and Bear offers a vibrant and whimsical world that resonates with children. The colorful characters and engaging storylines provide endless opportunities for creativity in your party decorations. Here are some reasons to choose this theme:
- Appealing Characters: Masha’s mischievous nature and Bear’s gentle demeanor create a fun dynamic that kids adore.
- Versatile Color Palette: The bright colors of the show (pink, green, and yellow) can easily be incorporated into decorations.
- Educational Value: The show promotes friendship, problem-solving, and adventure, making it a great theme for parents who value educational entertainment.
Planning Your Masha and Bear Birthday Decorations
Step 1: Choose a Color Scheme
Choosing a color scheme is essential. For Masha and Bear, I recommend a mix of:
- Pink: Represents Masha and her playful spirit.
- Brown: Echoes Bear’s warm and friendly nature.
- Green: Adds a touch of the forest where the adventures take place.
- Yellow: Brings in a cheerful vibe.
Step 2: Selecting Your Decorations
There are plenty of decoration options to consider. Here are some of my personal favorites:
- Banners and Posters: Create a focal point by using large banners with Masha and Bear images.
- Tableware: Use themed plates, cups, and napkins to set the table. Look for items featuring Masha, Bear, and their friends.
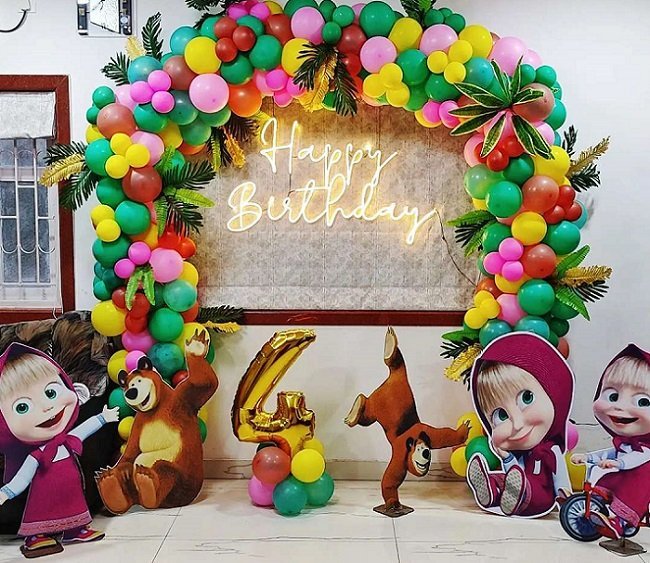
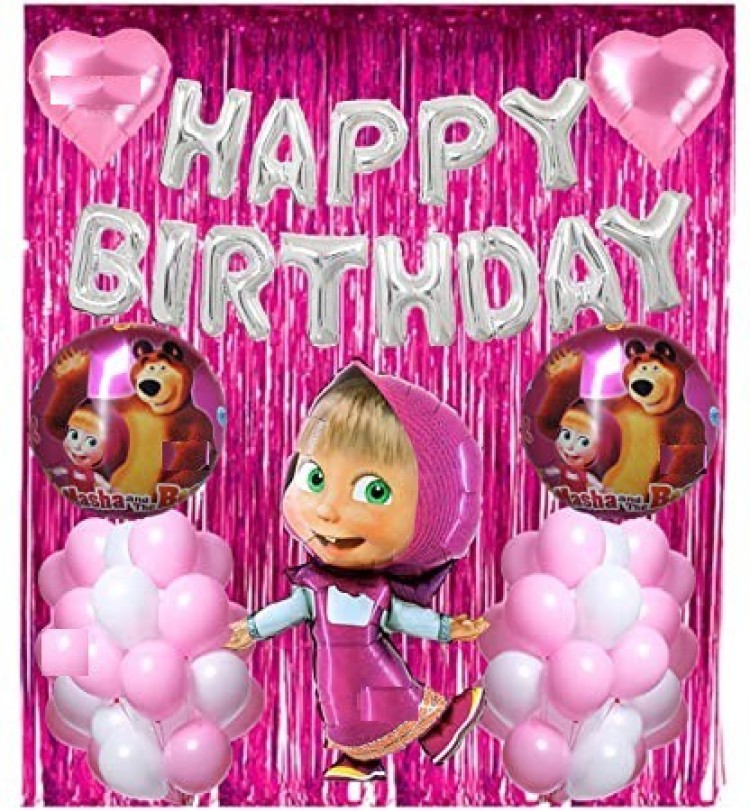
- Balloon Arrangements: Colorful balloons are a must. Consider a balloon arch for entry, filled with pink and brown balloons for an inviting touch.
- Centerpieces: Craft centerpieces using plush toys or themed objects and flowers in the color scheme.
DIY Masha and Bear Decorations
Easy DIY Crafts to Enhance Your Party
If you’re a crafty person like me, DIY decorations are a fun and cost-effective way to personalize your party. Here are some ideas to spark your creativity:
1. Masha and Bear Cutouts
Print out character images from the internet, glue them onto cardboard, and cut them out. Place them around the party area for an immersive feel.
2. Themed Tablecloths
Purchase a plain tablecloth and decorate it with fabric paint or markers to resemble Masha’s dress or Bear’s fur.
3. Forest Backdrop
Create a backdrop with green streamers and paper leaves to replicate the forest background of the show.
Incorporating Masha and Bear into Every Party Detail
Invitations and Party Favors
Your invitations set the stage for the party. Use Masha and Bear themed invitations or DIY your own by using colorful cardstock and stickers. Don’t forget the party favors! Here are some fun ideas:
- Masha and Bear stickers
- Coloring books with crayons
- Mini plush toys of Masha and Bear

Creating a Magical Atmosphere
Lighting and Music
To truly captivate your guests, consider the ambiance. Here’s how to elevate your party atmosphere:
- Lighting: Use soft fairy lights to create a whimsical effect. You can drape them around the food table or entrance.
- Music: Play Masha and Bear episodes’ soundtracks or related children’s music to keep the energy high.
Comparison of Store-Bought vs. DIY Decorations
| Type of Decoration | Store-Bought | DIY |
|---|---|---|
| Cost | Higher | Lower |
| Time | Less Time | More Time |
| Personalization | Limited | Fully Customizable |
| Quality | Consistent | Variable |
Pros and Cons of Each Option
Store-Bought Decorations
Pros: Convenient, consistent quality, comes as a complete package.
Cons: Can be expensive, less personal, limited options.
DIY Decorations
Pros: Cost-effective, fully customizable, adds a personal touch.
Cons: Time-consuming, may require crafting skills, variable quality.

Putting It All Together: A Sample Decoration Plan
Here’s a sample timeline and checklist to help you organize and execute your decorations smoothly:
1 Month Before
- Choose a date and venue.
- Select a color scheme and decoration style.
- Order any necessary supplies (balloons, tableware, etc.).
1 Week Before
- Create or buy invitations and send them out.
- Start crafting DIY decorations.
- Prepare your playlist of Masha and Bear music.
2 Days Before
- Set up decorations at the venue.
- Test your lighting and sound system.
- Prepare party favors.
Day of the Party
- Make final adjustments to decorations.
- Set up food and drink stations.
- Enjoy the celebrations with your little one!
Frequently Asked Questions about Masha and Bear Birthday Decorations
What are some budget-friendly Masha and Bear decoration ideas?
Using DIY crafts, homemade banners, and store-bought items from discount stores can keep costs down. Additionally, repurposing items from previous parties can save money.

Can I find Masha and Bear decorations locally?
Yes! Check local party supply stores or major retailers, but be sure to compare prices online to ensure you’re getting the best deal.
What activities should I include that match the Masha and Bear theme?
Consider games like a “Bear Hunt,” where kids search for hidden items, or a “Masha Says” game for fun and engagement!

How can I keep the party entertaining for kids of different ages?
Incorporate a variety of activities, such as face painting, crafts, and storytelling sessions, to cater to different age groups.