Decorating a witches broom is not just an art; it’s an expression of creativity and tradition, often embodying the spirit of Halloween or other mystical celebrations. In this comprehensive guide, we will explore the various ways to decorate a witches broom, providing you with tips, techniques, and personal anecdotes that will inspire you to craft your unique version.
Why Decorate a Witches Broom?
The witches broom has long been a symbol of magic and mystique. Traditionally, it was believed that witches used brooms to fly, but in modern times, brooms serve as a festive decoration, especially during autumn and Halloween. Decorating a witches broom can elevate your home decor, bring a sense of whimsy, and even serve as a great conversation starter!
Types of Witches Brooms to Consider
Before diving into decoration techniques, let’s discuss the types of brooms you might consider using for your project.
Traditional Broom
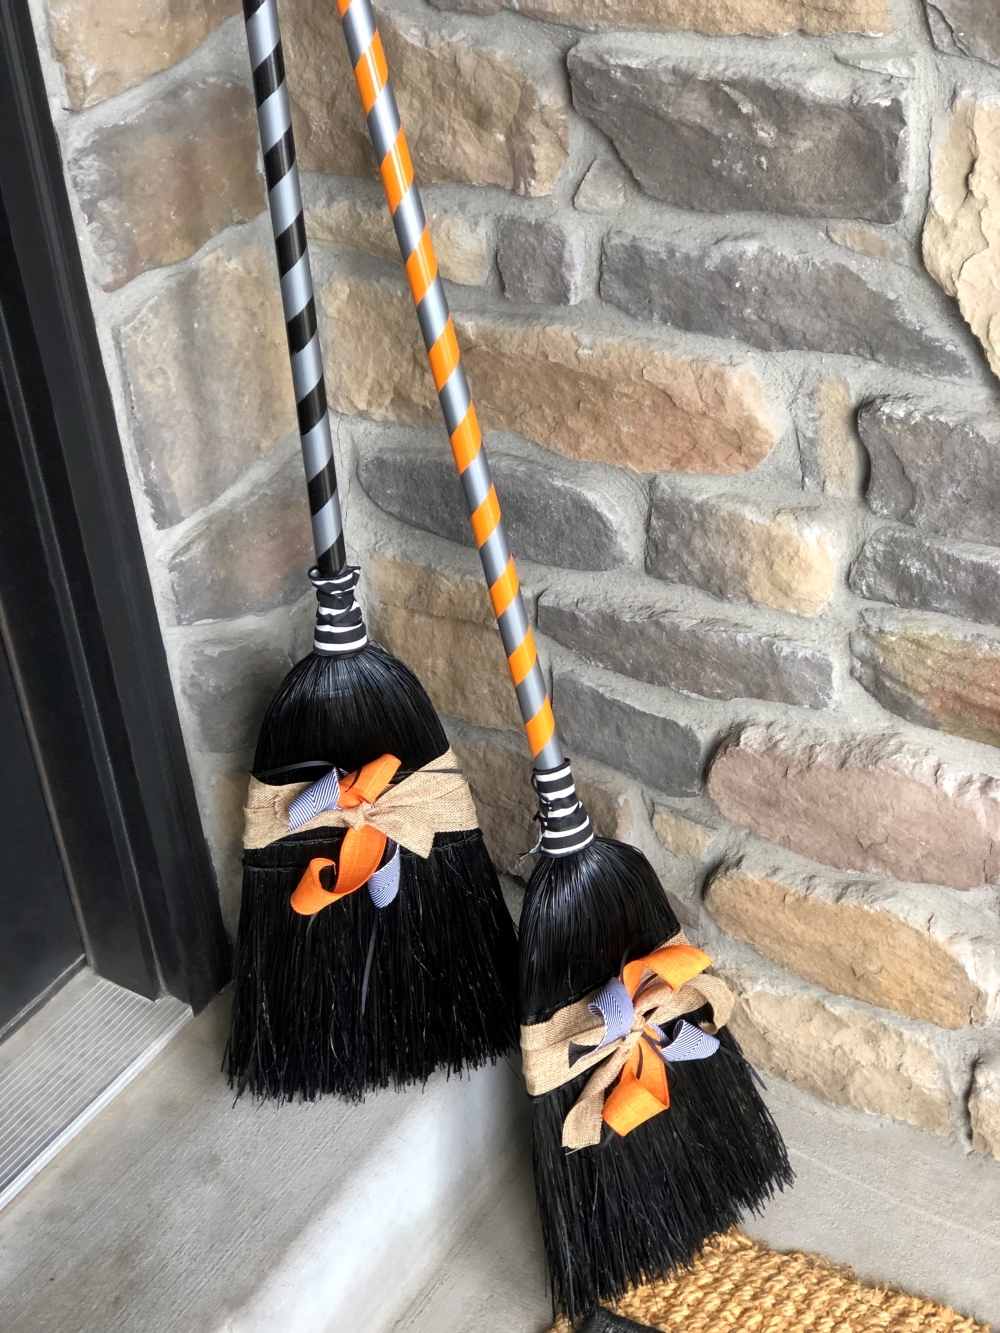
The traditional witches broom features a long wooden handle with a wide straw base. This style can easily be embellished with various decorations, giving it a classic witchy vibe.
Miniature Broom
Perfect for tabletop decorations, miniature brooms can be great for crafting smaller versions of witch decor. They are especially popular in crafts and kids’ projects.
Natural Broom
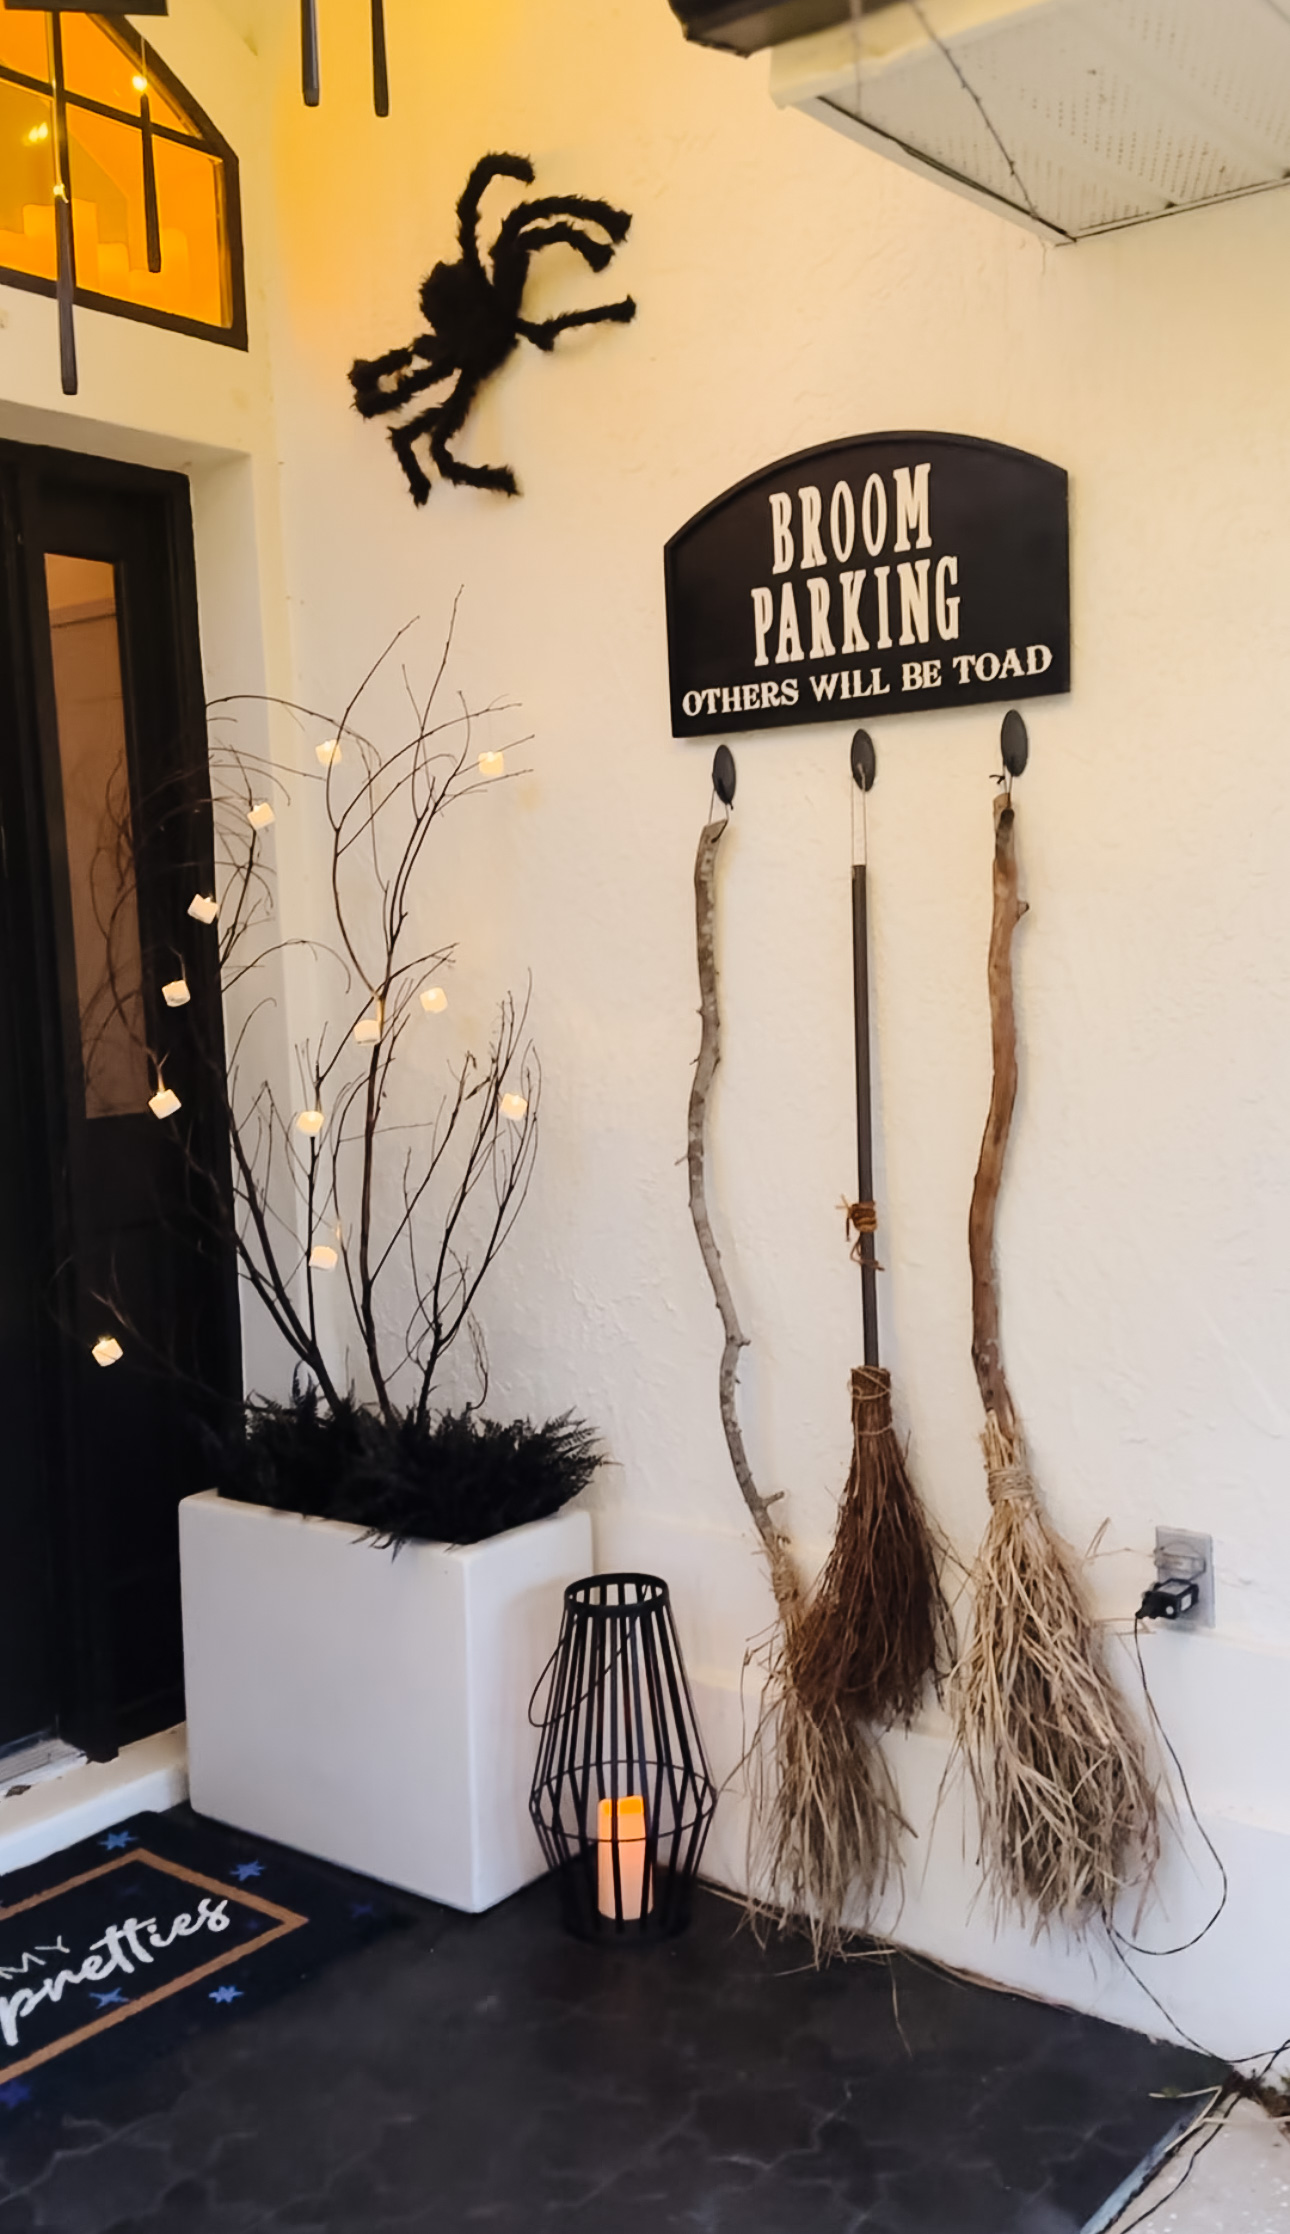
Using natural materials like twigs or reeds, a natural broom can evoke a more rustic and organic feel, aligning perfectly with nature-themed decorations.
Essential Supplies for Decorating a Witches Broom
Here’s a list of supplies you’ll need to get started on your broom decorating journey:
- Witches broom (of your choice)
- Ribbons and bows
- Faux cobwebs
- Artificial flowers and leaves
- Paint (optional)
- Hot glue gun and glue sticks
- Scissors
- Decorative charms (optional)
Steps to Decorate Your Witches Broom
Step 1: Prepare the Broom
If you’ve chosen a natural or traditional broom, consider giving it a good clean to remove any dust and debris. This also helps the decorations to adhere better.
Step 2: Plan Your Design
Before gluing anything down, plan out your design. Will you use a color palette? Are there specific themes you want to incorporate? Sketching or laying out your ideas can help visualize the final product.

Step 3: Secure the Base Decorations
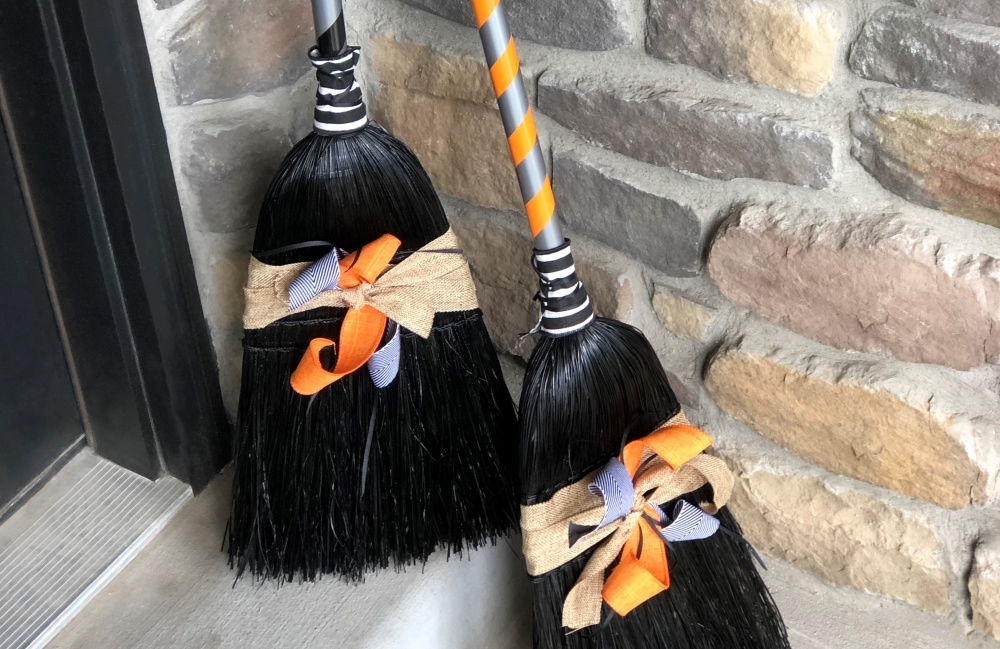
Start by attaching the base decorations using a hot glue gun. This can include wrapping the handle with ribbons or adding artificial flowers to the broom’s bristles. Make sure to secure them firmly.
Step 4: Add Whimsical Touches
Incorporate whimsical elements like faux cobwebs, glitter, or charms. These details can bring your broom to life and ensure that it stands out in your decor.
Step 5: Finishing Touches
Once all decorations are secured, consider adding a protective coat of spray sealant, especially if you’re placing the broom outdoors. This helps maintain your design through weather elements.
Creative Decorating Ideas
Spooky Themed Broom
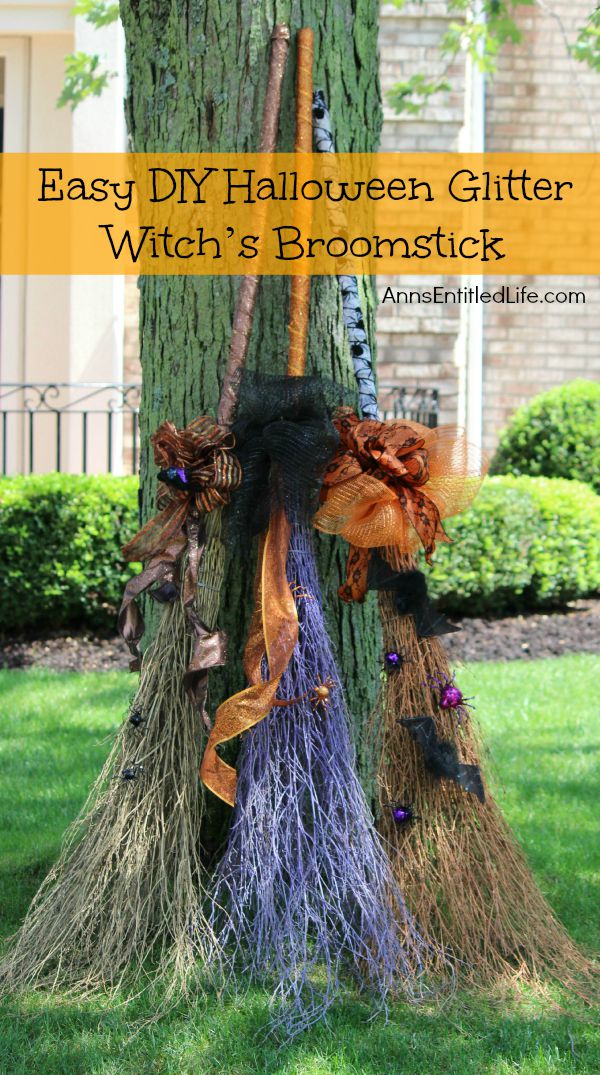
Use dark colors like black and purple, with spider web accents and small plastic spiders to create a spooky effect perfect for Halloween.

Autumn-Inspired Broom
Incorporate pumpkins, fall leaves, and warm colors like orange and gold. This style is perfect for a seasonal transition decoration.
Floral Fairy Broom
Adorn your broom with pastel colors, faux flowers, and butterflies for a light and ethereal look that’s perfect for spring or fairy-themed events.
Gothic Glamour Broom
Utilize black feathers, metallic ribbons, and dark jewels to give your broom a glamorous yet gothic style. This can be ideal for themed parties.
Comparison of Different Decorative Styles
| Decorative Style | Best For | Materials Needed | Difficulty Level |
|---|---|---|---|
| Spooky Themed | Halloween | Black ribbons, spiders, cobwebs | Medium |
| Autumn-Inspired | Fall Decor | Fake leaves, mini pumpkins | Easy |
| Floral Fairy | Spring Events | Pastel colors, faux flowers | Easy |
| Gothic Glamour | Themed Parties | Feathers, metallic ribbons | Medium |
Pros and Cons of Decorating a Witches Broom
Pros
- Creative outlet for self-expression.
- Customizable to fit any theme or occasion.
- Great way to enhance holiday decor.
- Can be a fun activity for families or groups.
Cons
- Can be time-consuming, especially for intricate designs.
- Requires materials that may need to be purchased.
- Weather can damage outdoor displays if not protected.

Personal Experience: Crafting My First Witches Broom
I still remember the first time I decided to decorate a witches broom. It was during a particularly creative Halloween season, and I wanted to bring something special to my front porch. I gathered supplies and spent an entire afternoon wrapping ribbons, gluing on faux leaves, and even painting small pumpkins to hang from the handle.
It was messy, but the satisfaction I felt seeing my decorated broom brightened my day. Friends and neighbors loved it, and I ended up making it a yearly tradition. Don’t underestimate the joy this simple craft can bring!
FAQs About Decorating a Witches Broom
What materials are best for outdoor witches brooms?
For outdoor brooms, consider using weather-resistant materials like outdoor fabric, plastic decorations, and sealants to protect against rain and wind.
Can I use real broomsticks for decoration?
Absolutely! Real broomsticks can add an authentic touch to your decorations. Just make sure they are properly treated and sealed if used outdoors.
How long does it take to decorate a witches broom?
It typically takes 1-3 hours depending on the complexity of your design and your crafting speed. Allow extra time for drying if you’re using paint or glue.
How can I store my decorated broom after the season?
Store your broom in a cool, dry place, preferably indoors. Wrap it in a protective cover to prevent dust and damage.
Conclusion
Decorating a witches broom is a delightful way to tap into your creative side while enhancing your home decor. The possibilities are endless, and whether you prefer spooky, whimsical, or elegant styles, your broom is sure to bring joy and festive spirit to your surroundings. So gather your supplies, unleash your creativity, and let the decorating begin!