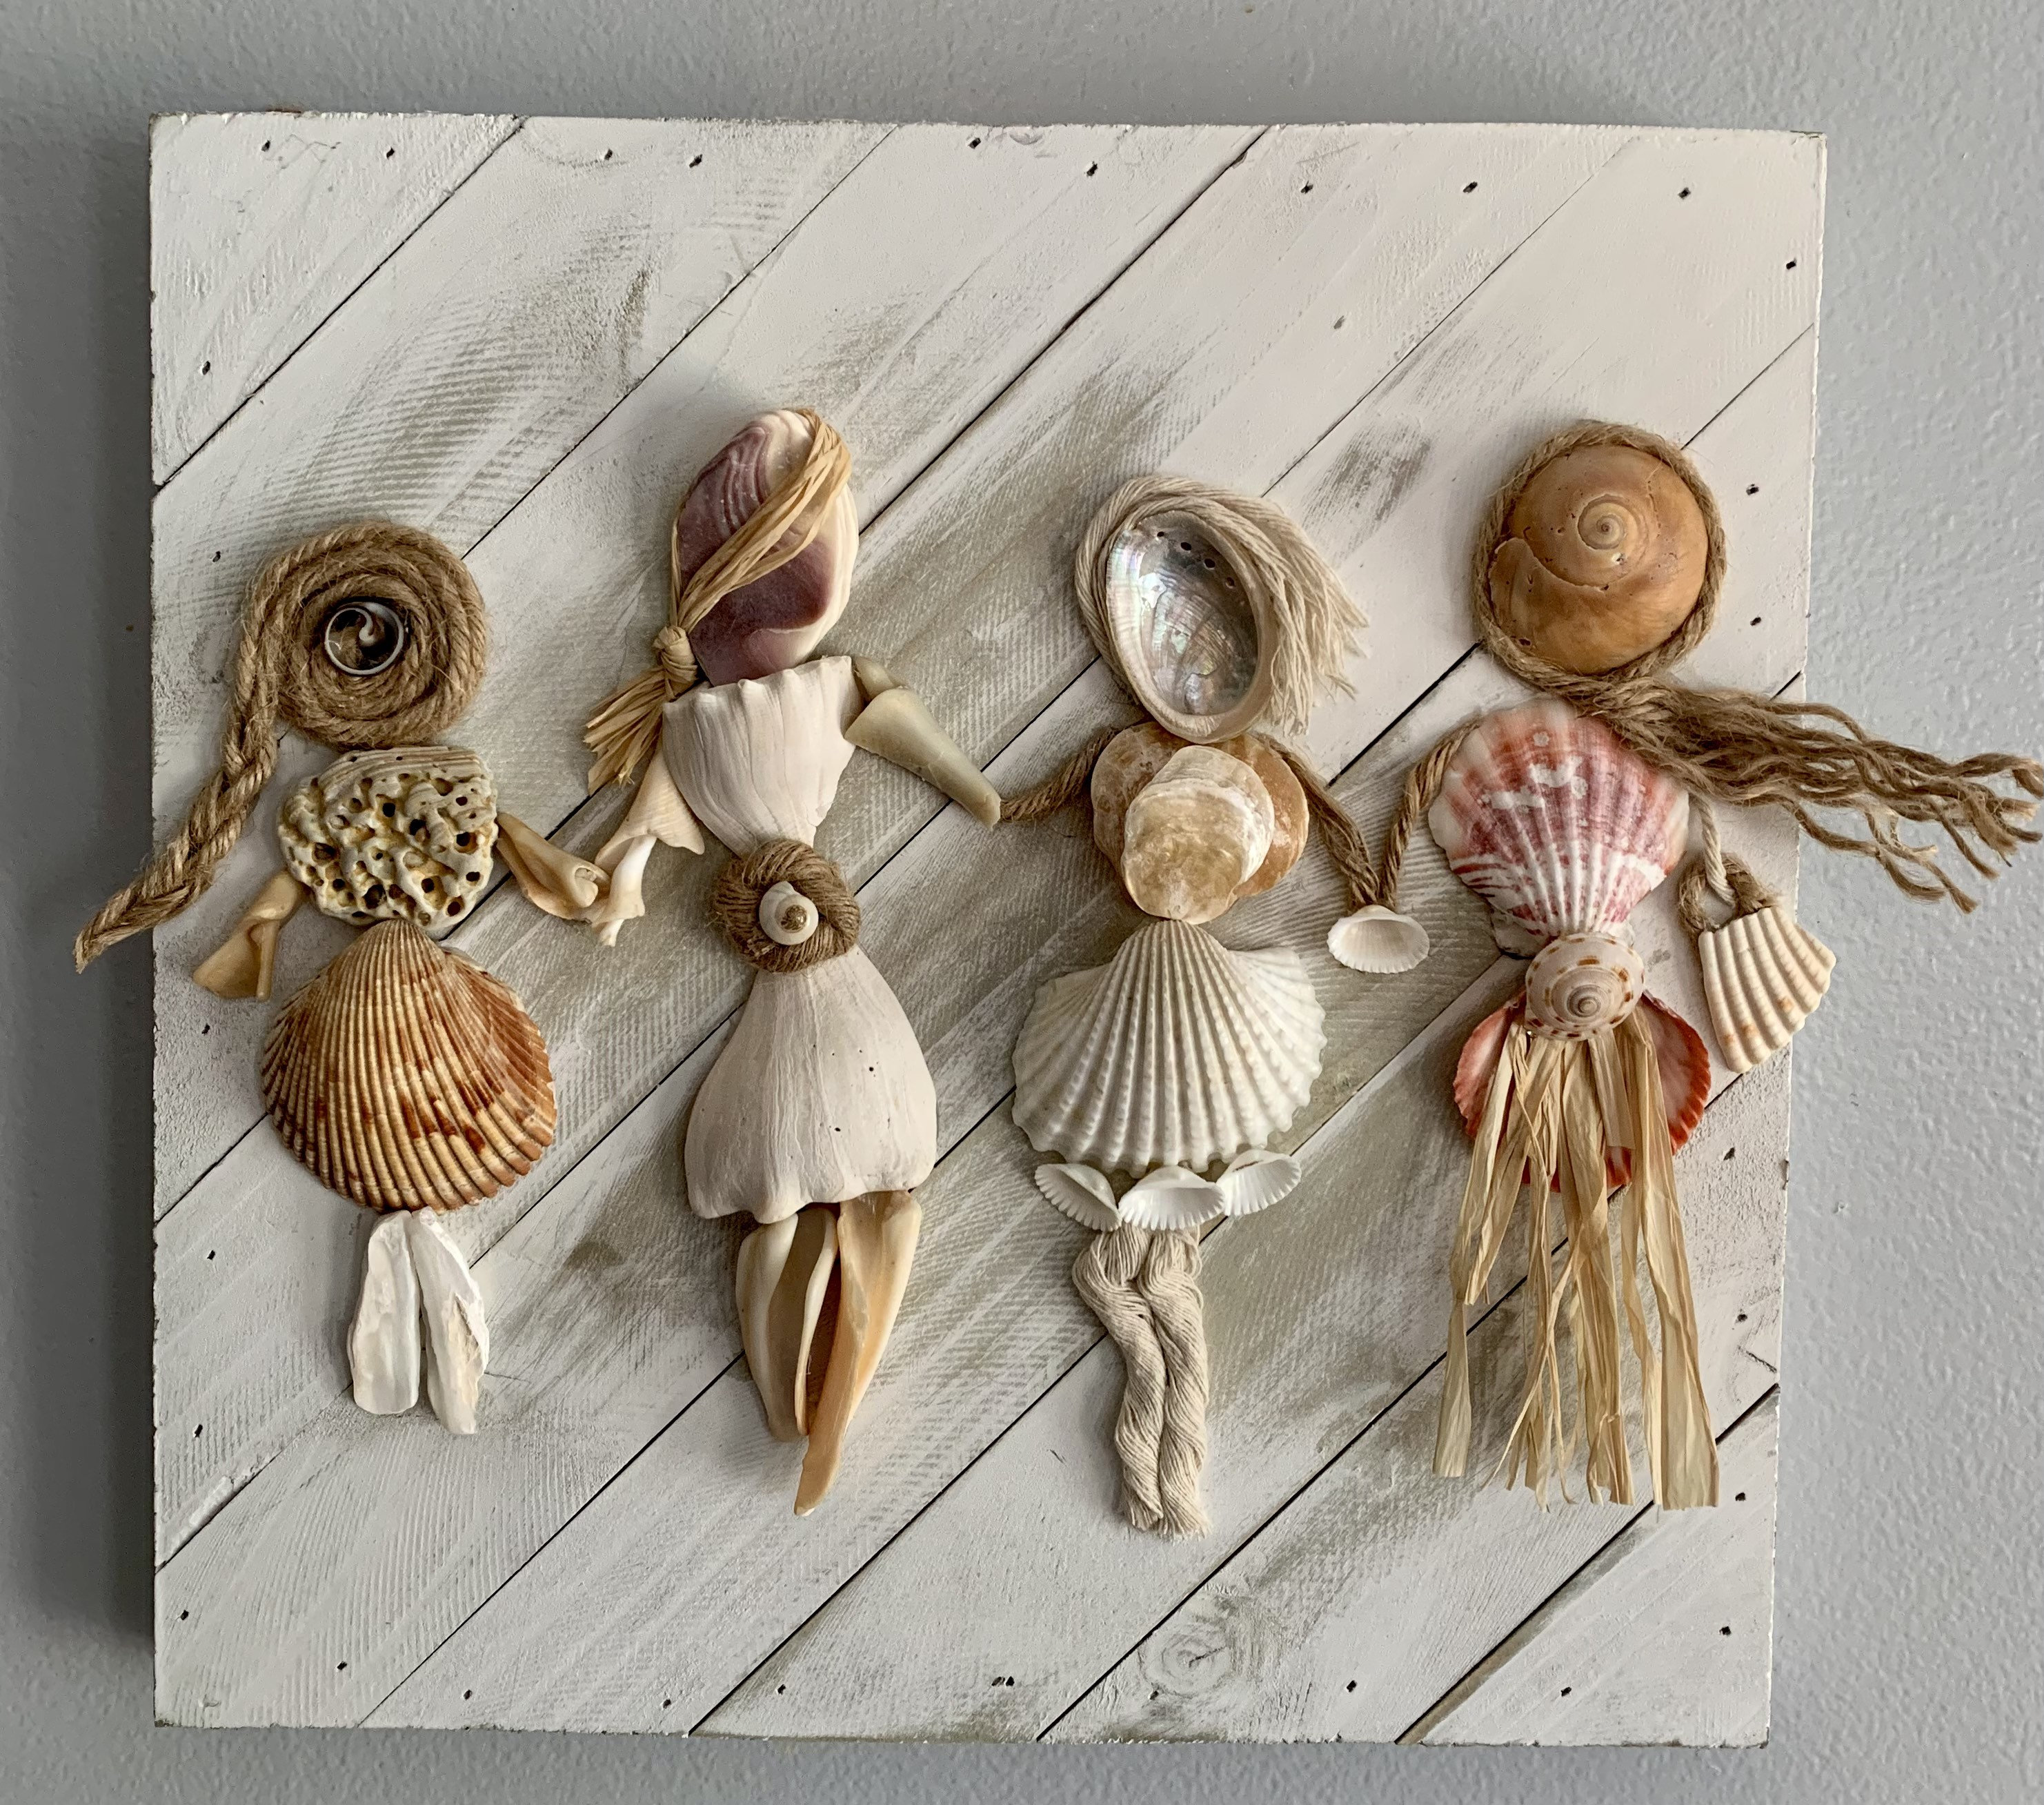
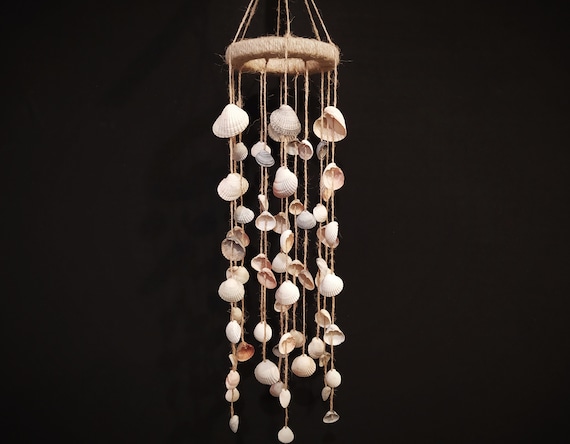
Have you ever dreamed of bringing the tranquil essence of the beach into your living space? If so, seashell decoration wall hangings could be your gateway to transforming your home into a coastal paradise. In this article, we’ll explore various ideas, DIY tips, and inspiration on how you can create these stunning decorations that not only look beautiful but also evoke peace and tranquility.
What Are Seashell Decoration Wall Hangings?
Seashell decoration wall hangings are handcrafted pieces adorned with various types of seashells, often combined with other natural materials like driftwood and twine. These wall hangings can take on multiple forms, ranging from simple garlands to complex designs featuring intricate arrangements of shells.
Why Choose Seashell Wall Hangings?
- Unique Aesthetic: Each seashell is unique, ensuring your decoration will be one-of-a-kind.
- Versatile Design: Fits a variety of interior styles, from coastal to bohemian.
- Natural Element: Brings the calming essence of nature indoors.
- DIY Potential: A fantastic project for crafters and DIY enthusiasts.
Getting Started: Materials You’ll Need
Before diving into your seashell decoration project, gather the necessary materials to create your wall hanging. Here’s a comprehensive list:
Basic Materials
- Seashells of various shapes and sizes
- Wood piece (driftwood or a sturdy wooden board)
- Strong twine or fishing line
- Hot glue gun and glue sticks
- Scissors
- Paint (optional)
- Drill (optional, for hanging purposes)
Where to Find Seashells
- Beaches
- Craft stores
- Online marketplaces
- Local artisans

How to Create a Seashell Wall Hanging: A Step-by-Step Guide
Now that you have your materials, let’s get into the fun part—creating your seashell wall hanging!
Step 1: Design Your Layout
Before you start gluing, it’s crucial to have a vision of what your final piece will look like. Lay out your seashells on your wooden piece without glue to see how they fit together. Feel free to mix and match sizes and colors.

Step 2: Secure the Shells
Once you’re satisfied with your design, start gluing the shells in place. Apply a generous amount of hot glue to the shell and press it firmly onto the wood. Allow it to dry completely before moving on.
Step 3: Add Twine for Hanging
To create a hanging mechanism, cut a length of twine and tie it around the top of the driftwood. You can also drill small holes to secure the twine if you prefer a more streamlined look.

Step 4: Final Touches
Consider adding additional elements like small starfish, beads, or even a little paint for extra flair. Let everything dry and ensure that the shells are securely attached before hanging your new decoration.
Creative Ideas for Seashell Wall Hangings
Looking for some inspiration? Here are a few creative designs to help you get started:

1. Seashell Garland
Create a simple garland by stringing seashells together with twine. Hang it across a window or along a wall for a whimsical touch.
2. Driftwood and Shells
Use a piece of driftwood as the base and glue a variety of shells along its length. This rustic look adds depth and texture.

3. Shell Frame
Use seashells to embellish a picture frame. This is perfect for displaying beach memories or family photos.
4. Shell Chandelier
If you’re feeling adventurous, consider creating a seashell chandelier using multiple tiers of seashells and twine.

Comparing Different Shell Types for Crafts
| Shell Type | Color Variations | Size Options | Best Use |
|---|---|---|---|
| Conch Shells | Pink, Orange, White | Large | Statement pieces |
| Clam Shells | White, Beige | Medium | Garlands, bases |
| Scallop Shells | Red, Orange, White | Small to Medium | Embellishments |
| Sea Glass | Green, Blue, Brown | Small | Accents in designs |
Pros and Cons of Seashell Wall Hangings
Pros
- Customizable to fit any space or style
- Eco-friendly and made from natural materials
- Encourages creativity and personal expression
- Can be a great conversation starter
- Affordable, especially if you collect your seashells
Cons
- Can be time-consuming to create
- Seashells may fade or degrade over time if not properly treated
- Requires some crafting skills
Expert Tips for Maintaining Your Seashell Decor
To keep your seashell wall hangings looking great for years to come, consider the following maintenance tips:
Cleaning
Dust your seashells regularly with a soft cloth to avoid buildup. If they get dirty, gently clean them with a damp cloth.
Protection
Keep your seashell decorations out of direct sunlight to prevent fading. Consider using a sealant to protect them from moisture and dust.
Storage
If you take your decorations down, store them in a cool, dry place to avoid damage.
Frequently Asked Questions
How can I incorporate seashell wall hangings into my decor?
You can place them in any room for a coastal feel, but they work particularly well in bathrooms, living rooms, and porches. Pair them with other nautical decor for a cohesive look.
What types of seashells are best for wall hangings?
Mixing various types of shells like conchs, clams, and scallops adds depth and interest to your design. Look for colors that complement each other.
Can I use artificial seashells instead?
Yes, artificial seashells can be a great alternative, especially if you want a specific color or design that natural shells may not provide.
How long does it take to make a seashell wall hanging?
The time required depends on the complexity of the design. A simple piece may take just an hour, while a more intricate design could take several hours to complete.
Final Thoughts
Creating seashell decoration wall hangings is not just a craft; it’s a way to bring a piece of the ocean into your home. By following this guide, you can make beautiful, lasting decorations that remind you of the serene beaches you love. So gather your seashells, unleash your creativity, and start crafting today!