As the crisp autumn air ushers in Halloween season, it’s the perfect time to transform your yard into an enchanting witch wonderland! With a sprinkle of creativity and a dash of DIY spirit, you can create captivating decorations that will thrill trick-or-treaters and neighbors alike. In this article, I’m excited to share my personal experiences and tips for crafting magical DIY witch yard decorations that will elevate your Halloween festivities!
Why Choose DIY Witch Yard Decorations?
Decorating your yard for Halloween can be a joyous activity that brings families and friends together. Here are some compelling reasons to consider DIY witch decorations:
- Cost-effective: Creating your own decorations can save a significant amount of money compared to buying pre-made items.
- Customizable: You can tailor your decorations to fit your personal style, theme, or neighborhood vibe.
- Creative Outlet: DIY projects provide an excellent opportunity for creative expression and can be a fun weekend activity.
- Memorable Moments: Working on these projects with family can foster bonding and create lasting memories.
Materials You’ll Need for DIY Witch Decorations
Before diving into specific projects, let’s gather the essentials! Here’s a list of materials commonly used for crafting witch yard decorations:
- PVC or wooden boards
- Black and purple paint
- Old clothing (for witch costumes)
- Straw or hay (for broomsticks or scarecrows)
- LED lights
- Wire (for structure)
- Hot glue gun and glue sticks
- Crafting scissors
- Batten or heavy-duty staples (for securing items)
- Decorative elements (witch hats, cauldrons, etc.)
Enchanting DIY Witch Yard Decoration Ideas
1. DIY Witch Silhouette
One of the easiest and most impactful decorations is creating a witch silhouette. Here’s how:
Materials Needed:
- Black poster board or plywood
- Craft knife or jigsaw
- Outdoor paint (optional for weatherproofing) Stakes or wire
Instructions:
- Draw a witch silhouette on the poster board or plywood. Use inspiration from online templates.
- Carefully cut out the silhouette using a craft knife or jigsaw.
- If using plywood, paint the silhouette with outdoor paint to ensure it withstands the elements.
- Secure the silhouette to a stake or wire for easy placement in your yard.

Pros and Cons:
| Pros | Cons |
|---|---|
| Simple and quick to make | May require some artistic skill |
| Inexpensive materials | Weather can impact durability |
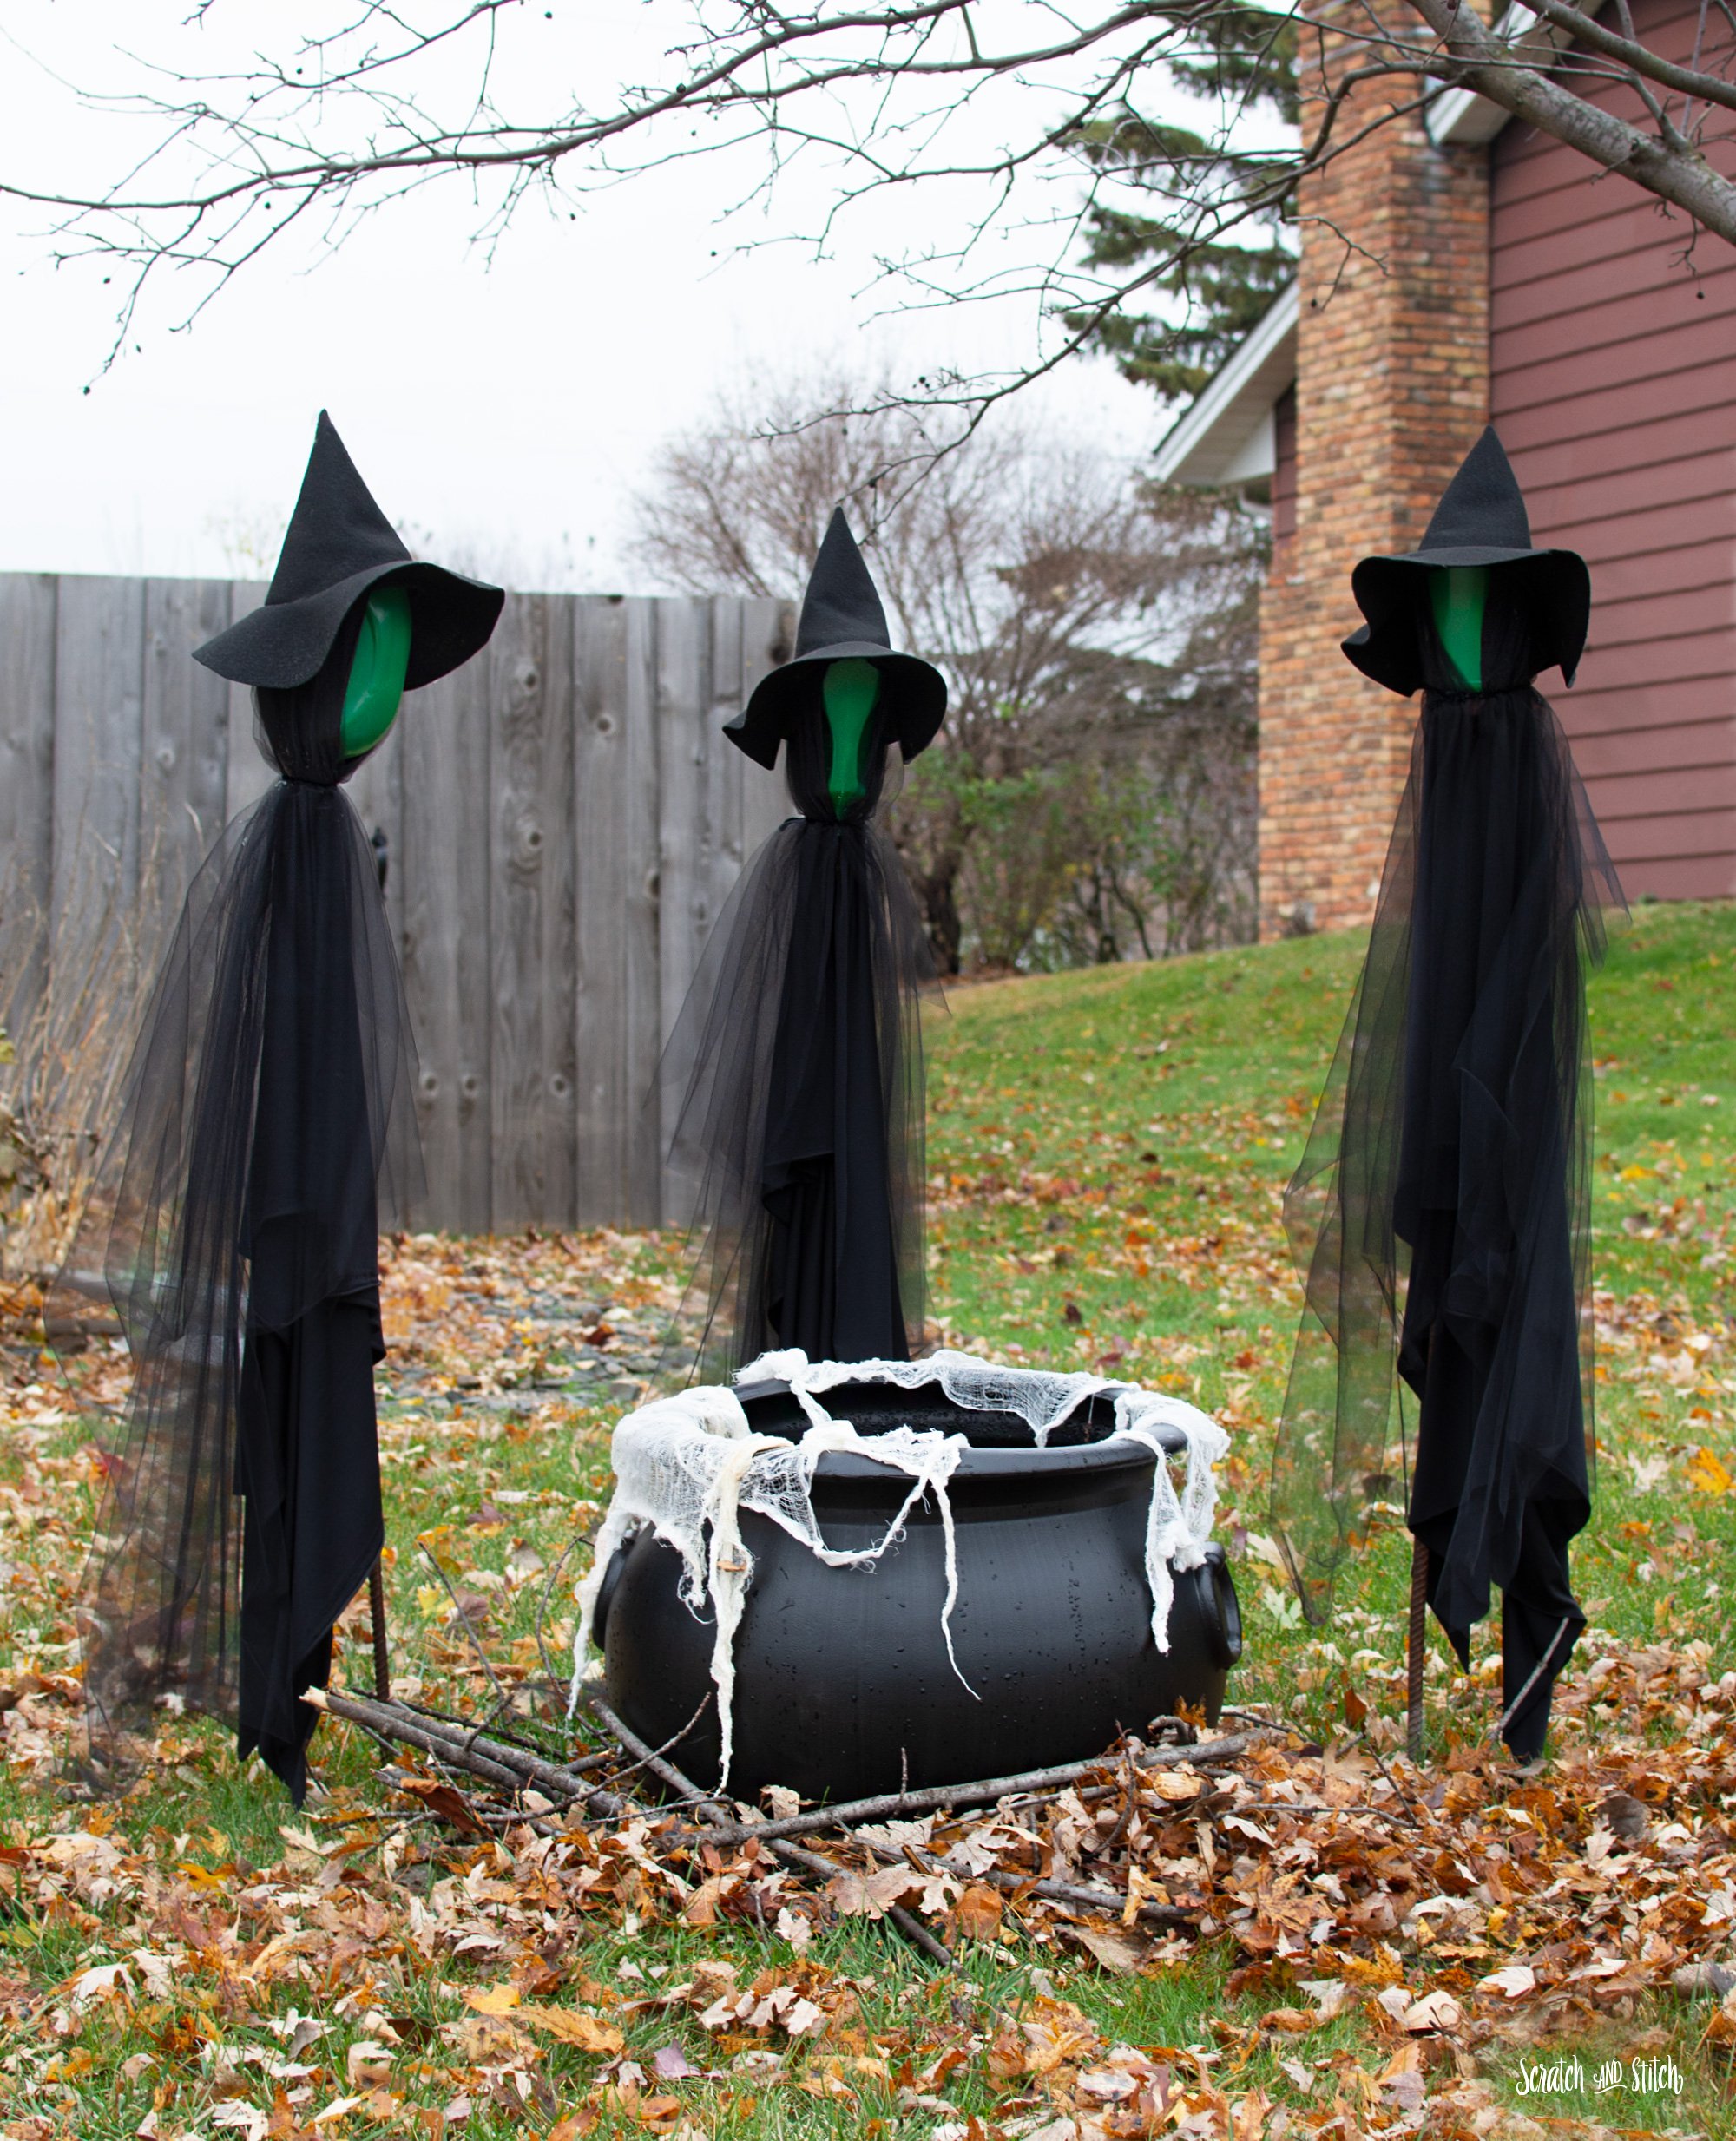
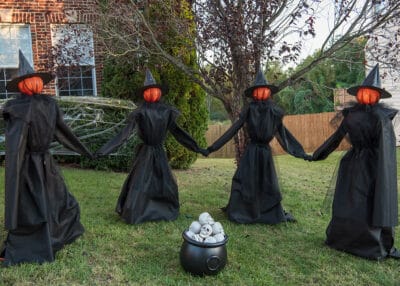
2. Witch’s Cauldron Decoration
Every witch needs a cauldron! Here’s how to create a spooky cauldron for your yard:
Materials Needed:
- Black plastic bucket or old cauldron
- Fake dry ice or fog machine (optional)
- LED tealights
- Green paint or glow-in-the-dark spray
Instructions:
- Paint the plastic bucket with black paint, adding designs or a glow-in-the-dark finish.
- Fill the bucket with green “potion” made from dry ice or colored water to resemble bubbling brew.
- Add LED tealights around the cauldron for a magical glow at night.
- Position the cauldron prominently in your yard for maximum impact.
Pros and Cons:
| Pros | Cons |
|---|---|
| Eye-catching and interactive | Safety concerns with fog machines |
| Flexible for indoor or outdoor use | Requires some maintenance to keep looking fresh |
3. Witch Broomsticks
Witch broomsticks are a quintessential Halloween decoration. Here’s how to create your own:
Materials Needed:
- Sturdy stick or pole (for the broomstick handle)
- Twigs or straw (to create the broom head)
- String or twine
Instructions:
- Gather twigs or straw and bundle them together. Secure tightly with string or twine.
- Attach the broom head to the stick or pole using additional twine, ensuring it’s stable.
- Decorate the broomstick with ribbons or paint for a personalized touch.
- Place the broomstick against trees or in planters for a whimsical look.
Pros and Cons:
| Pros | Cons |
|---|---|
| Simple to make with natural materials | May not withstand harsh weather |
| Great for yard placement or as props | Can require regular replacement |
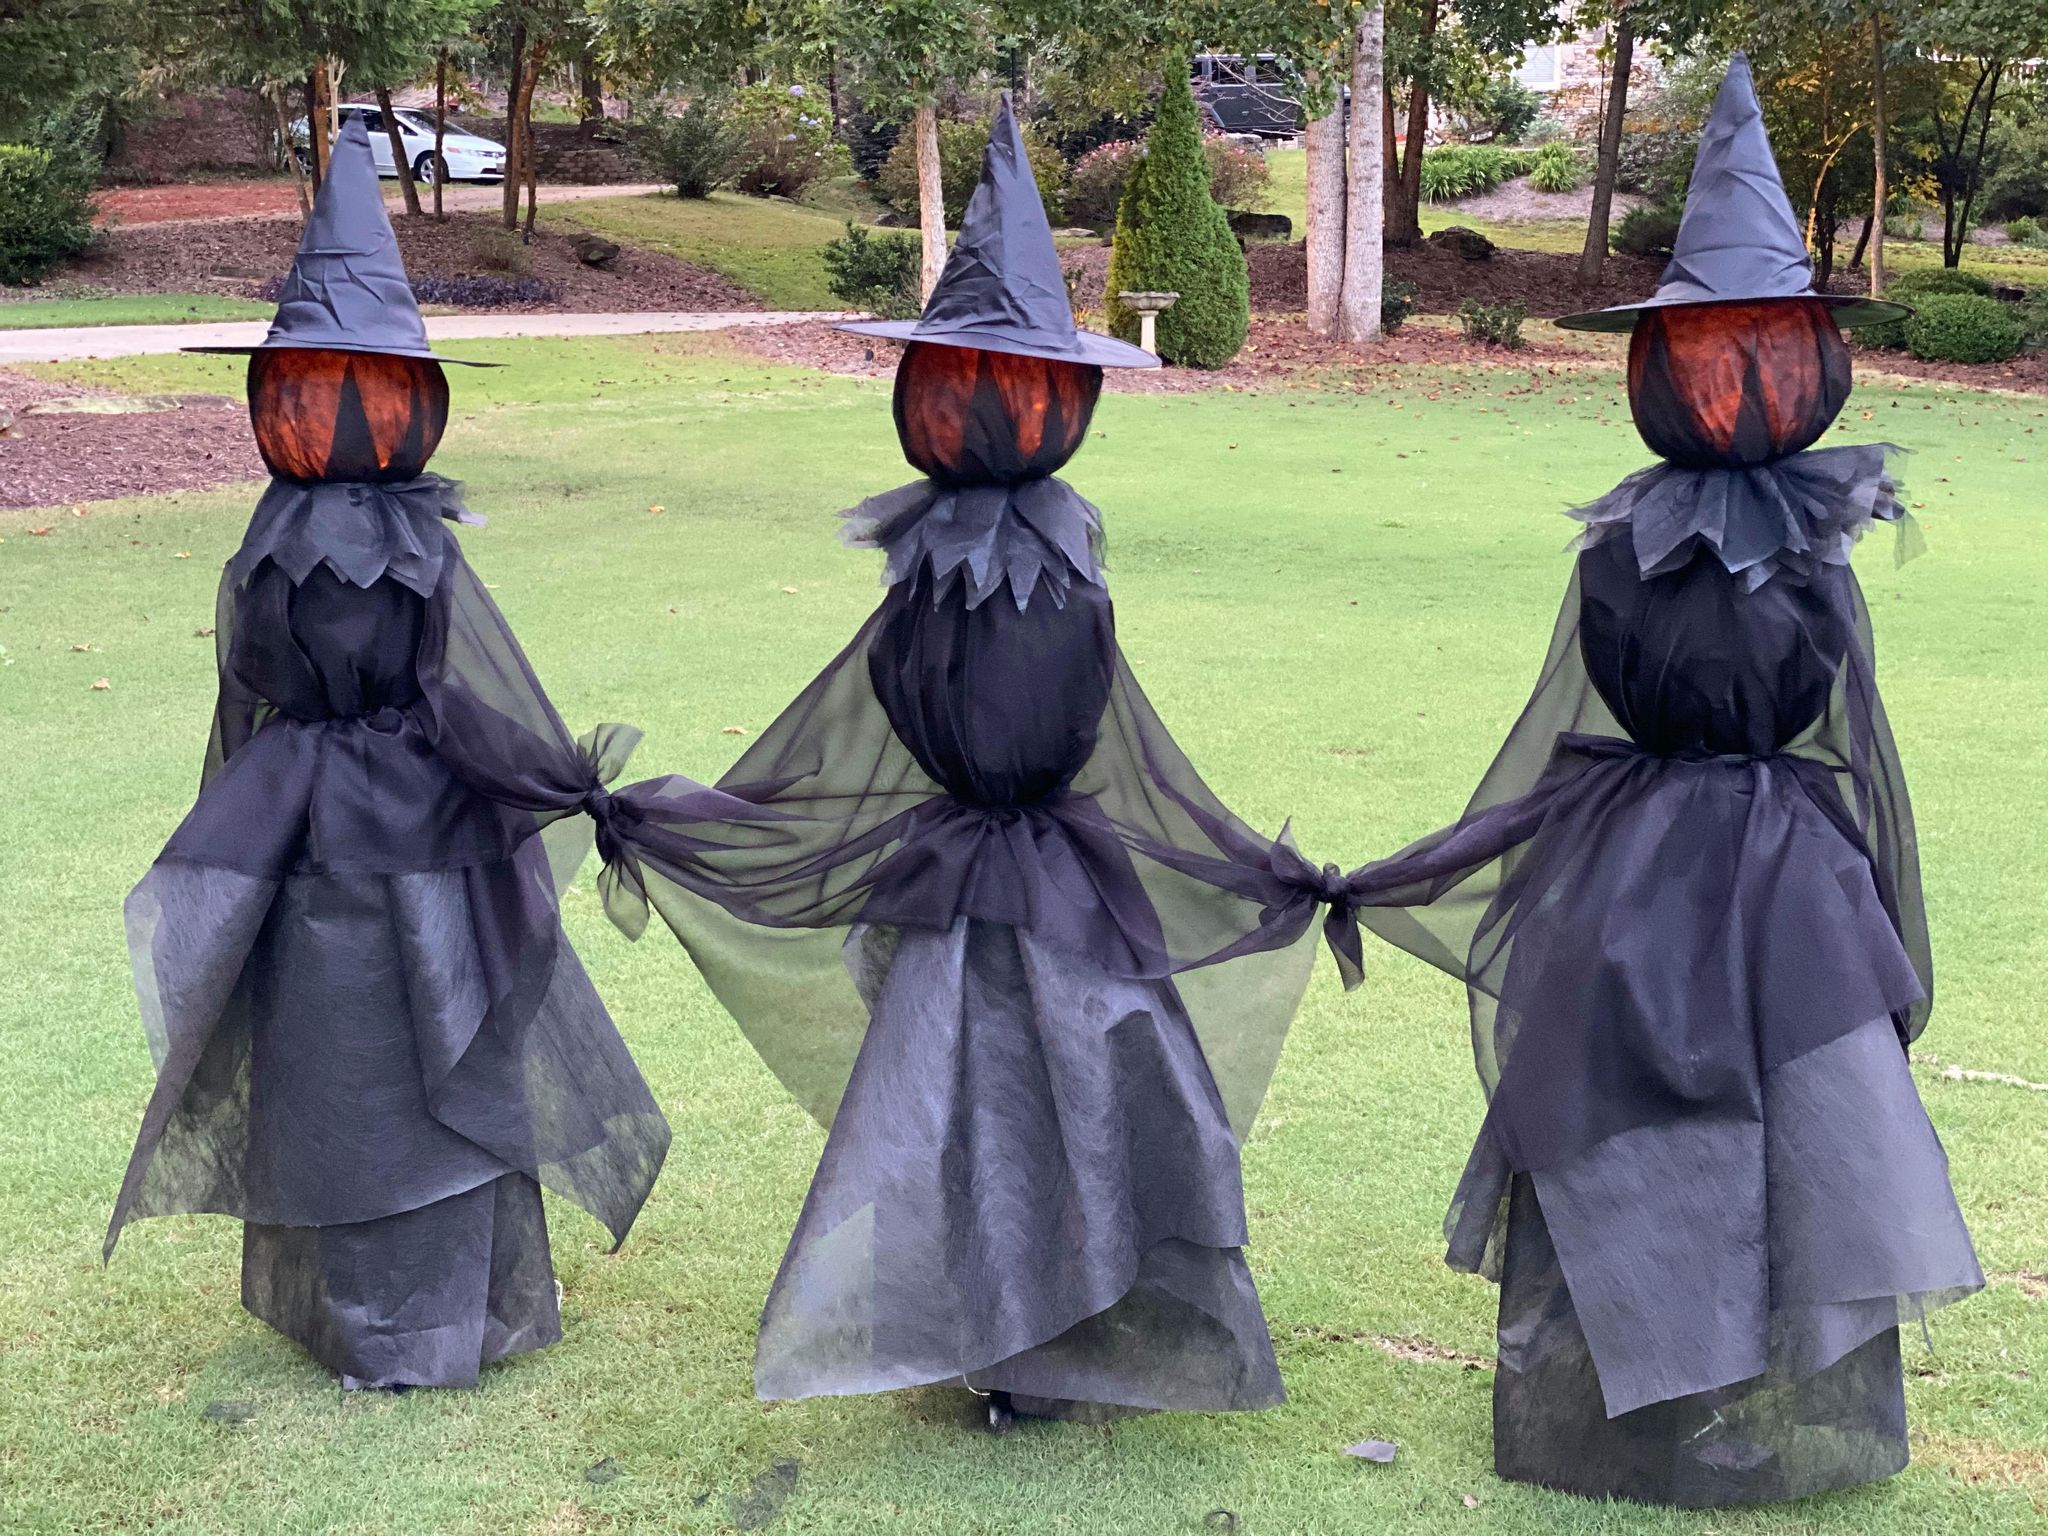
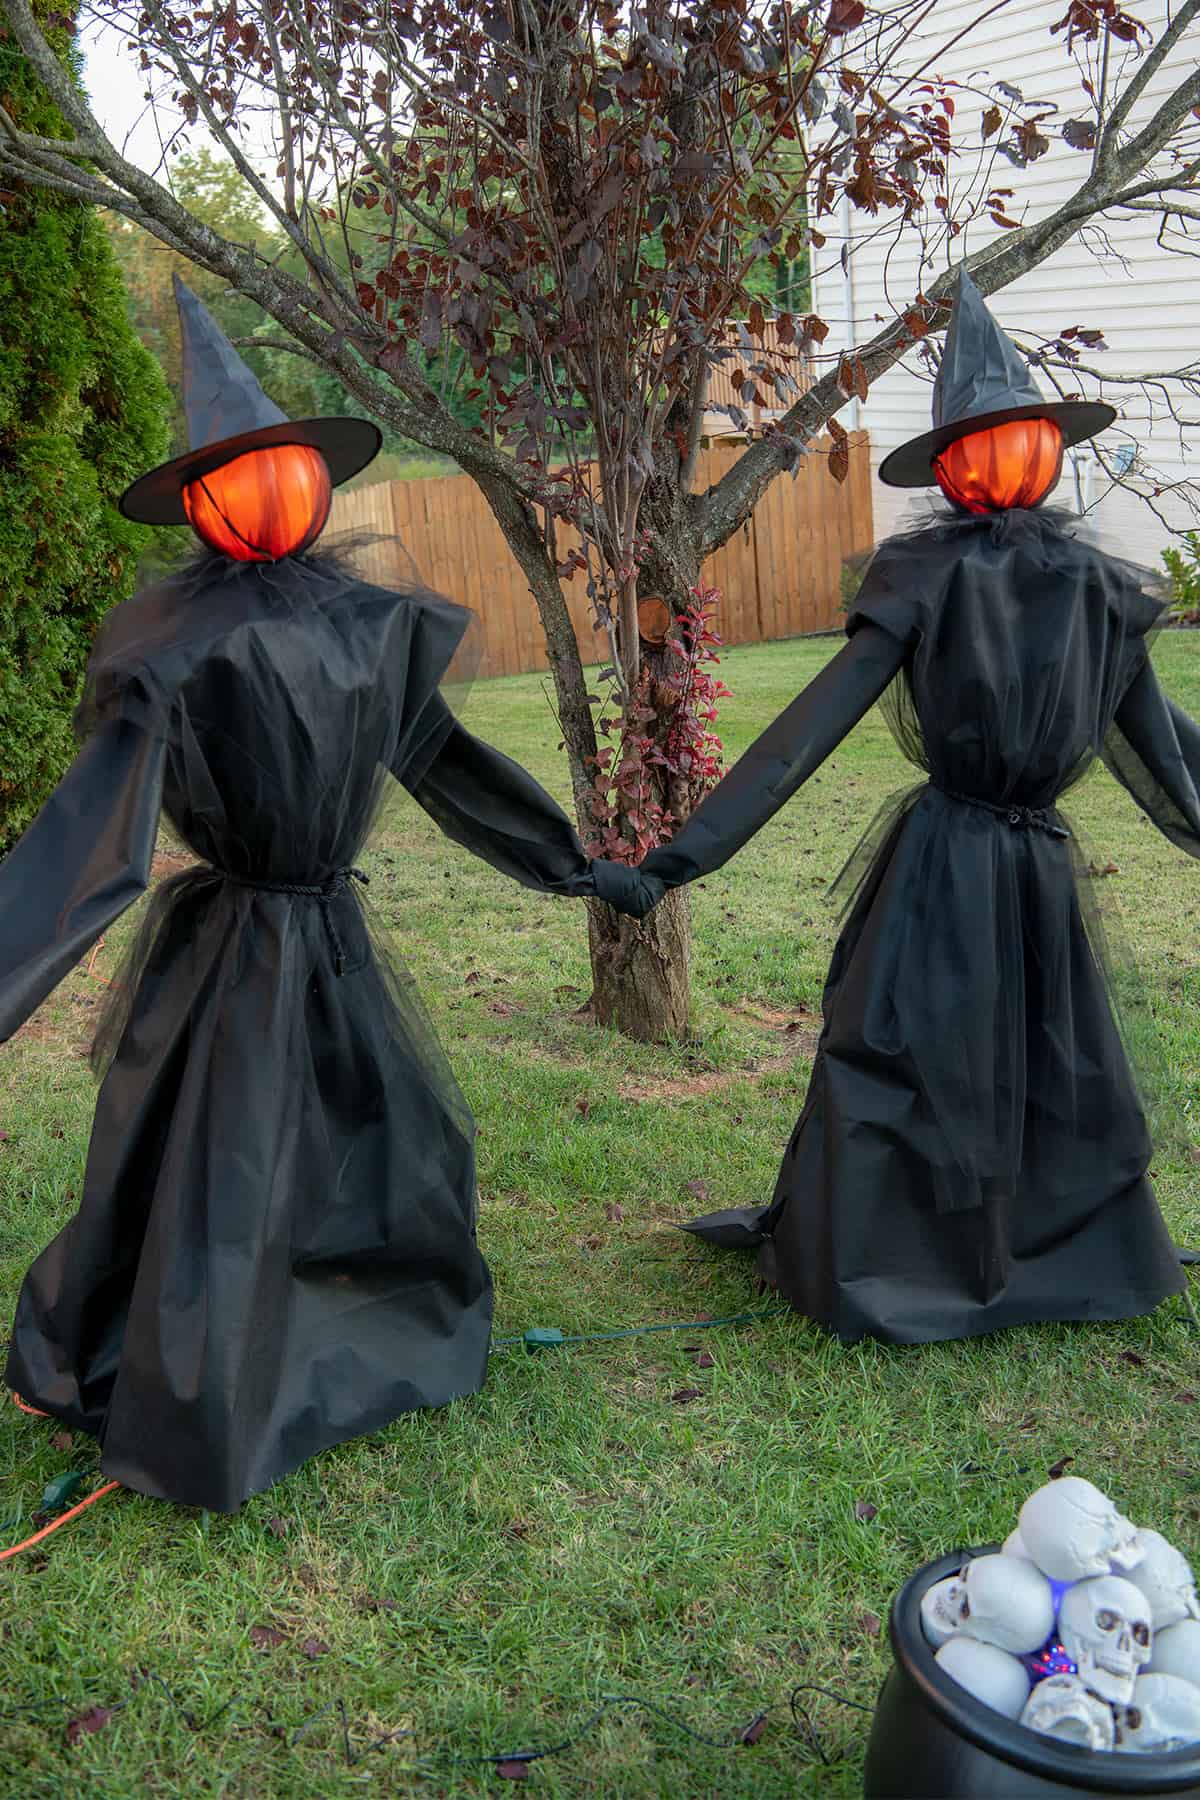
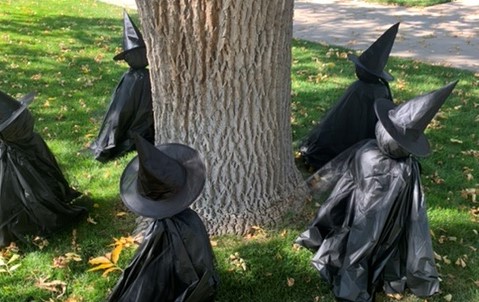
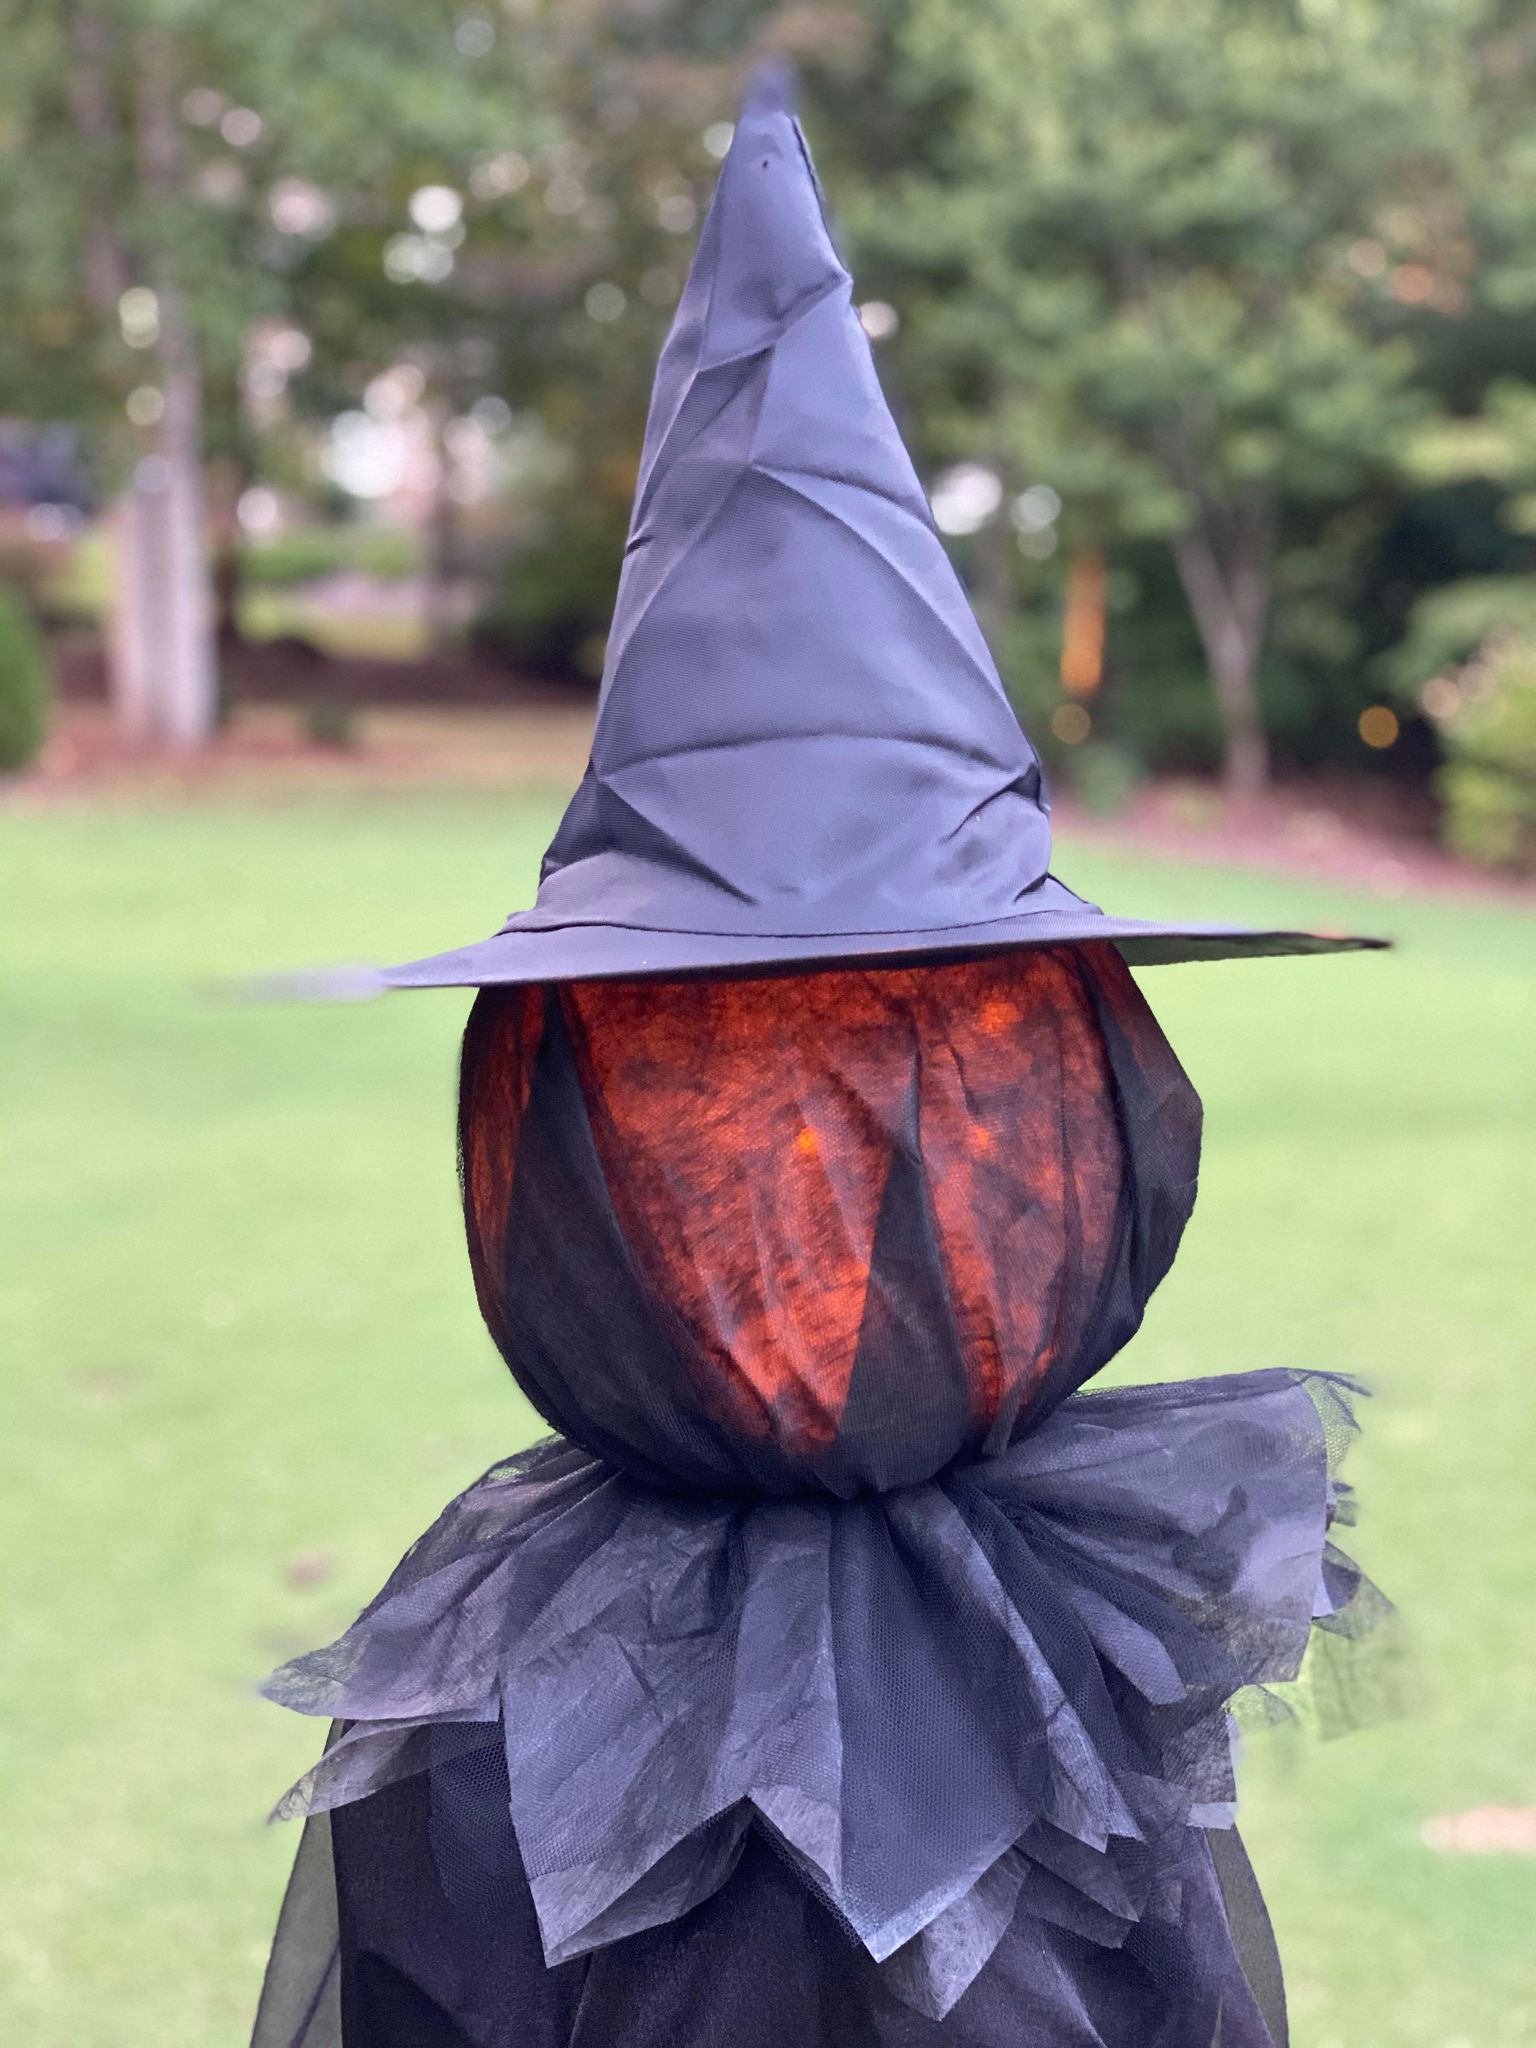
4. Spooky Witch Figures
Crafting life-sized witch figures can add a lifelike element to your yard. Here’s how to make one:
Materials Needed:
- Old clothes
- Stuffing material (straw, plastic bags, or old clothing)
- Wooden stake (for stability)
Instructions:
- Dress the stuffing material in old clothes to create the witch’s body.
- Secure the body to a wooden stake to keep it upright in your yard.
- Add a witch hat and face (you can use a mask or paint it on) for more personality.
- Position your witch figure prominently to greet visitors.
Pros and Cons:
| Pros | Cons |
|---|---|
| Highly customizable appearance | Can take time to construct |
| Creates a strong Halloween presence | Requires some maintenance to keep up |
Additional DIY Witch Decoration Ideas
5. Floating Witch Hats
Floating witch hats create a magical ambiance. Here’s how to make them:
Materials Needed:
- PVC pipes
- Witch hats
- Fishing line
Instructions:
- Secure the base of the witch hats to the tops of the PVC pipes.
- Use fishing line to hang the hats from tree branches or a porch ceiling.
- Position the floating hats at varying heights for an enchanting effect.
Pros and Cons:
| Pros | Cons |
|---|---|
| Unique and eye-catching | May require additional support on windy days |
| Great visual appeal at night | May need regular adjustment |
6. Witch Potion Jars
Transform your yard into a potion-making station with enchanting jars:
Materials Needed:
- Glass jars or bottles
- Food coloring or glow sticks
- Labels (you can create spooky labels on your computer)
Instructions:
- Fill jars with water and add food coloring to create potions of various colors.
- Seal the jars and label them with eerie potion names.
- Display the jars on tables or along pathways for an inviting potion station.
Pros and Cons:
| Pros | Cons |
|---|---|
| Easy to customize | Requires careful handling if glass is used |
| Great conversation starter | May not last if left outside in harsh weather |
7. Haunted Graveyard Scene
Create a chilling atmosphere with homemade tombstones:
Materials Needed:
- Foam boards or cardboard
- Gray paint
- Black marker or paint (for inscriptions)
Instructions:
- Cut foam boards or cardboard into tombstone shapes.
- Paint the tombstones gray and allow them to dry.
- Use a black marker or paint to add funny or spooky inscriptions.
- Place the tombstones around your yard for a haunting effect.
Pros and Cons:
| Pros | Cons |
|---|---|
| Sets a spooky tone for Halloween | Can be time-consuming to create several pieces |
| Great for kids and adults alike | Requires storage space for off-season |
Tips for Displaying Your Witch Decorations
Once you’ve created your witch decorations, displaying them effectively can enhance their magical appeal:
- Lighting: Use string lights or LED lanterns to illuminate your creations at night.
- Layering: Mix decorations of varying heights to create depth and interest.
- Scene Creation: Arrange your decorations to tell a story — consider setting the witch silhouette near the cauldron!
- Seasonal Touch-ups: Refresh your decor periodically to keep things looking festive.
Frequently Asked Questions (FAQs)
What are some easy DIY witch yard decorations for beginners?
Some easy options include witch silhouettes, potion jars, and broomsticks. These projects require minimal materials and can be completed quickly, making them perfect for beginners.
How can I make my witch decorations last longer?
To extend the life of your decorations, consider using weatherproof materials, sealing paint, and storing them indoors after Halloween. Additionally, you can bring more delicate items inside during storms.
Are there any eco-friendly DIY alternatives?
Absolutely! Use recycled materials such as old clothes for figures or cardboard for tombstones. Natural decorations, like pumpkins or gourds, can also enhance your witchy theme while being eco-friendly.
Can I involve my kids in these projects?
Many of the DIY projects mentioned are kid-friendly! Be sure to supervise when using sharp tools or paint, but let your kids get creative with colors and designs.
Where can I find inspiration for more witch decorations?
Online platforms like Pinterest or Instagram offer a plethora of creative ideas. Seasonal craft blogs and YouTube tutorials are also fantastic resources for inspiration.
Conclusion
With a bit of creativity and some simple materials, you can craft a magical display of DIY witch yard decorations that will enchant everyone this Halloween. From spooky silhouettes to bubbling cauldrons, the possibilities are endless. I hope my personal experiences and tips inspire you to unleash your inner witch and transform your yard into a charming Halloween wonderland. Happy crafting!