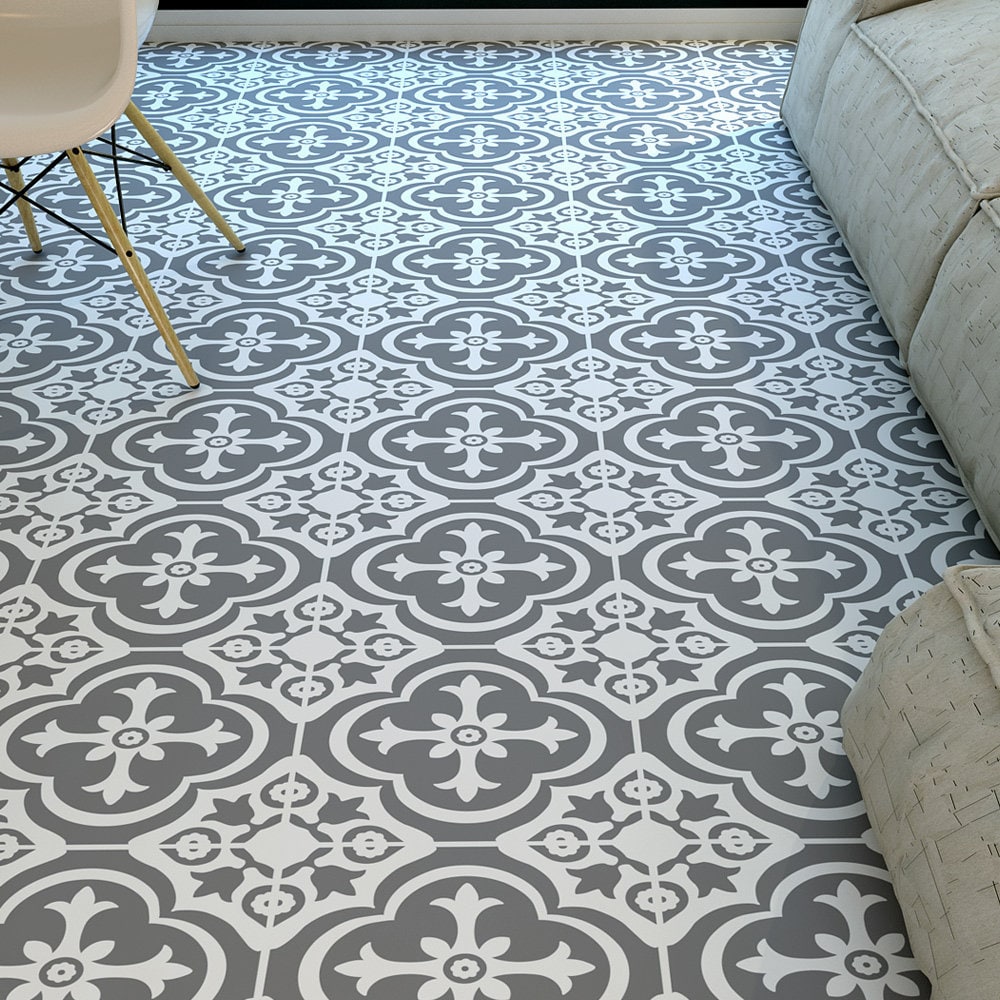
Decorative vinyl tiles have become a popular choice for homeowners and interior designers alike, thanks to their aesthetic appeal and practical benefits. In this comprehensive guide, I’ll share my insights and personal experiences with vinyl tiles, helping you understand why they could be the perfect flooring solution for your next project.
What Are Decorative Vinyl Tiles?
Decorative vinyl tiles are versatile flooring solutions that come in a variety of designs, colors, and textures. Unlike traditional vinyl flooring that typically features a solid color or simple pattern, decorative vinyl tiles mimic the appearance of natural materials like stone, wood, and ceramic while offering greater durability and ease of maintenance.
Types of Decorative Vinyl Tiles
- Luxury Vinyl Tiles (LVT): High-quality tiles that provide a realistic look of natural materials.
- Vinyl Composite Tiles (VCT): More budget-friendly options, ideal for high-traffic areas.
- Self-adhesive Vinyl Tiles: Easy to install with a peel-and-stick backing—perfect for DIY enthusiasts.
Benefits of Decorative Vinyl Tiles
When I first considered vinyl tiles for my own home, I was drawn to several key advantages:
1. Aesthetic Versatility
With countless designs available, decorative vinyl tiles can effortlessly match any decor, whether you prefer modern minimalism, rustic charm, or classic elegance.
2. Durability and Longevity
Vinyl tiles are highly resistant to scratches, dents, and stains, making them ideal for families with kids or pets. They can last 10-20 years with proper care, a factor that played a significant role in my flooring decision.

3. Ease of Installation
Many vinyl tiles feature a click-lock design, allowing for straightforward installation without the need for professional help. I tackled this project myself, and I was pleasantly surprised by how simple it was!
4. Comfort Underfoot
Vinyl flooring provides a soft, warm surface that feels comfortable to walk on, making it a great choice for kitchens and living areas.

5. Low Maintenance
Cleansing decorative vinyl tiles requires minimal effort—usually, just a damp mop and gentle cleaner are enough to keep them looking fresh.
Installation of Decorative Vinyl Tiles
Thinking about installing decorative vinyl tiles? Here’s a step-by-step guide based on my experience:

1. Preparation
Ensure the subfloor is clean, dry, and level. Any imperfections can lead to issues down the line.
2. Measure and Plan
Accurate measurements are crucial. Plan your layout to minimize cuts and wastage.

3. Acclimatization
Let your tiles sit in the room for at least 48 hours prior to installation to adjust to the temperature and humidity.
Installation Methods
| Method | Description | Best For |
|---|---|---|
| Glue-down | Adhesive is applied to the subfloor for a secure fit. | High-traffic areas |
| Click-lock | Tiles snap together, making installation fast and easy. | DIY projects |
| Self-adhesive | Tiles come with a sticky back for quick application. | Temporary or rental spaces |

4. Installation
Follow your layout plan, starting from the center of the room or a straight line. I found it helpful to use spacers to maintain even gaps.
5. Finishing Touches
Once installed, allow the tiles to settle and apply baseboards for a polished look.

Maintaining Decorative Vinyl Tiles
Keeping my vinyl tiles in great shape is easier than I anticipated. Here are my top maintenance tips:
Regular Cleaning
Use a soft broom or vacuum to remove dust and debris. For deeper cleaning, a damp mop with a gentle cleaner does wonders.
Dealing with Stains
Address spills immediately to prevent stains. A mixture of vinegar and water can effectively tackle most stains.
Protecting Your Investment
Place mats at entry points to trap dirt and prevent scratching. Consider using furniture pads to avoid indentations.
Comparison: Decorative Vinyl Tiles vs. Other Flooring Options
Understanding Your Choices
It’s crucial to weigh the pros and cons of vinyl tiles against other popular flooring materials. Here’s a comparison table based on my findings:
| Feature | Decorative Vinyl Tiles | Hardwood Flooring | Ceramic Tiles |
|---|---|---|---|
| Cost | Affordable | Expensive | Moderate |
| Durability | Highly Durable | Very Durable | Durable |
| Maintenance | Low | Moderate | High |
| Installation | Easy | Complex | Moderate |
| Comfort | Soft & Warm | Hard | Hard |
Pros and Cons of Decorative Vinyl Tiles
Pros
- Variety of designs and colors
- Water and stain-resistant
- Comfortable underfoot
- Cost-effective
- Easy to install
Cons
- May fade in direct sunlight
- Not as eco-friendly as other materials
- Can be damaged by sharp objects
Frequently Asked Questions (FAQs)
1. How long do decorative vinyl tiles last?
With proper care, decorative vinyl tiles can last anywhere from 10 to 20 years, making them a worthwhile investment for any home.
2. Are decorative vinyl tiles waterproof?
Most vinyl tiles are water-resistant, but it’s essential to check the manufacturer’s specifications. They are suitable for areas like kitchens and bathrooms!
3. Can vinyl tiles be used over existing flooring?
Yes! As long as the existing floor is level and in good condition, you can lay vinyl tiles over it without issues.
4. How do I remove scratches from vinyl tiles?
Minor scratches can be buffed out with a soft cloth; for deeper scratches, consider using a repair kit specific to vinyl flooring.
5. Is professional installation necessary?
Not at all! If you’re comfortable with DIY projects, installing vinyl tiles can be a straightforward process, as I personally discovered.
Conclusion
Decorative vinyl tiles have transformed the flooring market, combining beauty and functionality. From their vast design options to ease of maintenance and installation, they can suit a variety of tastes and lifestyles. Whether you’re renovating your home or starting from scratch, I wholeheartedly recommend considering decorative vinyl tiles as your next flooring choice.
Thank you for joining me on this journey into the world of decorative vinyl tiles! I hope this guide has provided you with valuable insights and inspiration. Happy decorating!