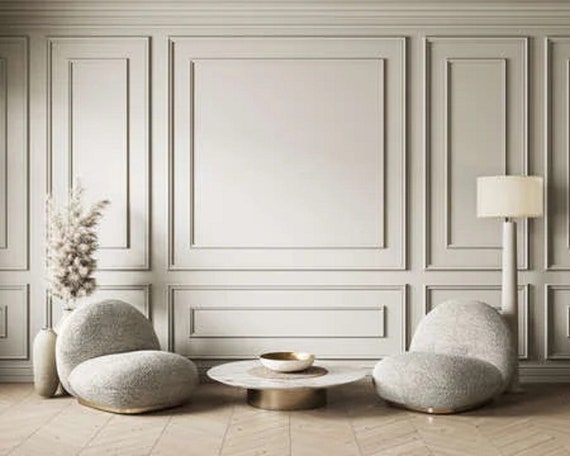
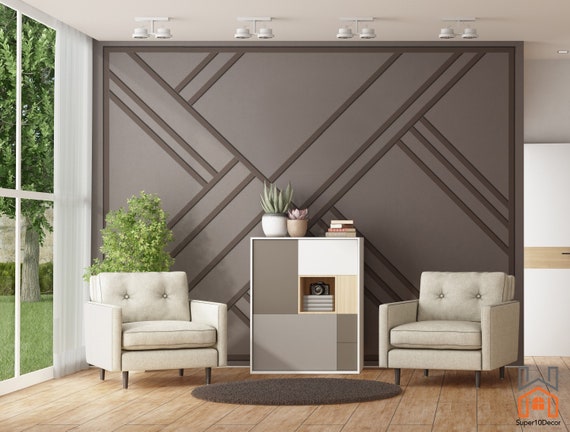
Decorative wall trim molding can transform your living spaces, adding depth, character, and architectural interest. As someone who has dabbled in home renovation, I can attest to the significant impact that trim molding has made in my own homes. In this comprehensive guide, we will explore different types of decorative wall trim molding, installation tips, pros and cons, as well as common questions that arise during your home improvement journey.
What is Decorative Wall Trim Molding?
Decorative wall trim molding, often referred to simply as trim, is an aesthetic element used to enhance the interior or exterior of a home. It serves both functional and decorative purposes, covering joints between various construction elements, such as walls and ceilings, while also adding a visual appeal to a room.
Types of Decorative Wall Trim Molding
There are several types of decorative wall trim molding, each offering a unique style and appeal. Below we will explore the most common types:
Crown Molding
Crown molding is a type of trim that connects the walls to the ceiling, creating a seamless transition and an elegant, polished look. It varies in width and complexity, from simple profiles to intricate designs.
Baseboards
Baseboards run along the bottom of the walls and typically cover the joint between the wall and the floor. They can vary in height and design, ranging from simple to ornate styles.

Chair Rails
Chair rails are installed at a height of about 30 inches from the floor, serving both aesthetic and functional purposes. They can prevent chairs from damaging the wall and enhance the visual appeal of the room.
Picture Rails
Picture rails are similar to chair rails but are positioned higher on the wall, typically used to hang artwork and pictures without damaging the wall surface. This style is particularly popular in traditional homes.

Quarter Round and Shoe Molding
Quarter round and shoe molding are used at the junction of the wall and floor, adding a finishing touch to baseboards while hiding gaps.
Panel Molding
Panel molding is often used to create decorative wall panels and can add a three-dimensional effect to your walls. It is commonly utilized in more formal spaces.

Materials Used for Trim Molding
Understanding the materials available for decorative wall trim molding can help you choose the right type for your project. Here are the most common options:
- Wood: Durable and versatile, wooden moldings offer a classic look and can be stained or painted to fit your decor.
- MDF (Medium Density Fiberboard): A cost-effective alternative to wood, MDF can be painted and is resistant to warping.
- Polyurethane: Lightweight and resistant to moisture, polyurethane moldings are ideal for areas like bathrooms.
- Plaster: Traditionally used in older homes, plaster moldings offer an elegant and unique look but can be more fragile.
How to Install Decorative Wall Trim Molding
Installing trim molding may seem like a daunting task, but with the right tools and a bit of patience, you can achieve professional results. Here’s a step-by-step guide based on my personal experience:

Tools You Will Need
- Miter saw
- Nail gun or hammer
- Measuring tape
- Level
- Caulk and caulking gun
- Wood filler (optional)
- Paint or stain (optional)
Step-by-Step Installation Process
1. Measure Your Space
Start by measuring the length of each wall where the trim will be installed. This will help you determine how much molding you need to purchase.

2. Cut the Molding
Using a miter saw, cut the molding at 45-degree angles for corners to ensure a seamless fit. If you’re installing baseboards, make straight cuts at the ends.
3. Position the Molding
Hold the cut pieces in place against the wall. Use a level to ensure they are straight before nailing or gluing them into place.

4. Secure the Molding
Using a nail gun or hammer, attach the molding to the wall. Ensure you secure it adequately, especially at joints.
5. Fill Gaps and Paint
Use caulk to fill in the gaps between the trim and the wall. If desired, apply wood filler to nail holes and sand smooth once dry. Finally, paint or stain the trim as needed.
Comparison Table: Pros and Cons of Different Trim Molding Materials
| Material | Pros | Cons |
|---|---|---|
| Wood | Durable, classic look, can be stained/painted | Can warp, more expensive |
| MDF | Cost-effective, easy to paint, resistant to warping | Can chip easily, not as durable as wood |
| Polyurethane | Lightweight, moisture-resistant, affordable | Less classic feel than wood |
| Plaster | Elegant look, historically significant | Fragile, difficult to install |
Decorative Wall Trim Molding Design Ideas
The aesthetic potential for decorative wall trim molding is practically limitless. Here are some design ideas to inspire your next home project:
Traditional Elegance
Consider crown molding and chair rails in a rich wood finish paired with neutral wall colors for a timeless and elegant look.
Modern Minimalism
For a more contemporary vibe, opt for sleek, simple baseboards and panel molding painted in the same color as your walls for a seamless effect.
Eclectic Style
Mix and match different trims and styles to create a unique look. Pair ornate crown molding with minimalist baseboards for an eye-catching contrast.
FAQs About Decorative Wall Trim Molding
What is the best type of trim molding for a DIY project?
MDF is often the best choice for DIY projects due to its ease of handling, affordability, and ability to achieve a smooth finish when painted.
How can I determine the right height for my baseboards?
A popular rule of thumb is to choose baseboards that are 1 inch high for every foot of wall height, but personal preference and style should ultimately guide your choice.
Can I install decorative wall trim molding myself?
Yes, with the right tools and patience, many homeowners successfully install trim molding themselves. Following a step-by-step guide can simplify the process.
How do I clean and maintain decorative wall trim molding?
Regular dusting and occasional cleaning with a damp cloth can keep your trim looking fresh. For painted or stained wood, ensure to use appropriate cleaning products to avoid damage.
Conclusion
Decorative wall trim molding offers a fantastic opportunity to enhance the beauty of your home. Whether you’re drawn to the classic lines of crown molding or the sleek finish of modern baseboards, there is something for every style and budget. I hope this guide has inspired you to consider trim molding for your next home improvement project. Dive in, get creative, and enjoy the transformation!
Additional Resources
For more inspiration and tips on decorative wall trim molding, consider the following resources: